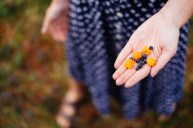
Making your own maple syrup is a good late winter/early spring activity for the whole family!
Looking for a new outdoor activity to do with the whole family this spring? Have you ever considered producing your own homemade maple syrup?
Don't worry, we know the process of tapping maple trees seems complicated at first, but the process to collect sap and turn it into syrup is surprisingly simple. It's also a rather cheap spring activity.
Remember that food items that you've made or collected yourself from nature are always more satisfying than the store-bought stuff. With that in mind, here's how you can get started tapping and processing your own syrup this year.
Materials you'll need

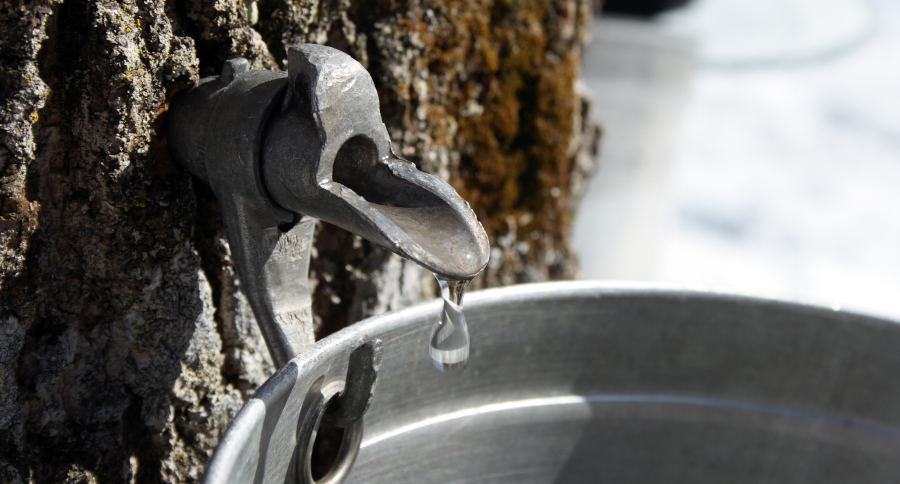
You likely already have some of the key items you'll need to start tapping the trees on your property, but we'll run through it quick and direct you to the other things you'll need. For one, you're going to need a drill and drill bits of some kind to tap the trees. Second, you'll need the taps (or spiles as they are sometimes referred). These are either metal or plastic and are readily available on Amazon. It really doesn't matter what material it is. The spiles are usually quite cheap too, you can often get 10 or more for under $30.
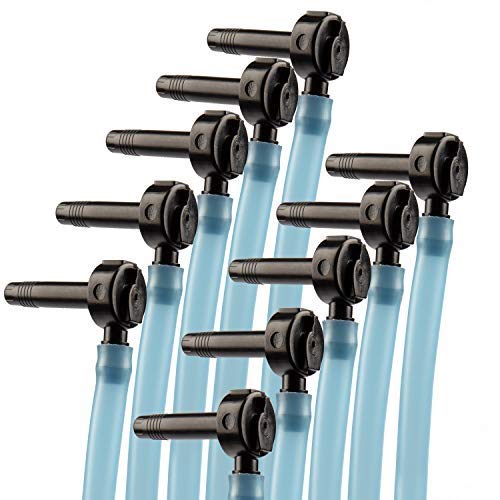

Once you have the taps, you'll need a container for the tree sap to feed into. It's important to use a food-grade container for this and not just any old thing you have laying around. Remember we are making something edible here. You can buy specialty sap containers designed specifically for that purpose, but you can also get creative. I saw one YouTube video where a guy cleaned and re-purposed two-liter soda bottles and milk jugs.
One thing to keep in mind is that the larger containers will get heavy when full, especially if the trees you're tapping are a long way from where you'll be boiling it. Also, once the sap gets flowing it can fill a container quickly, so it's important to ask yourself how often you'll be able to check them. Also make sure your chosen container has a cover to protect the sap from the elements.
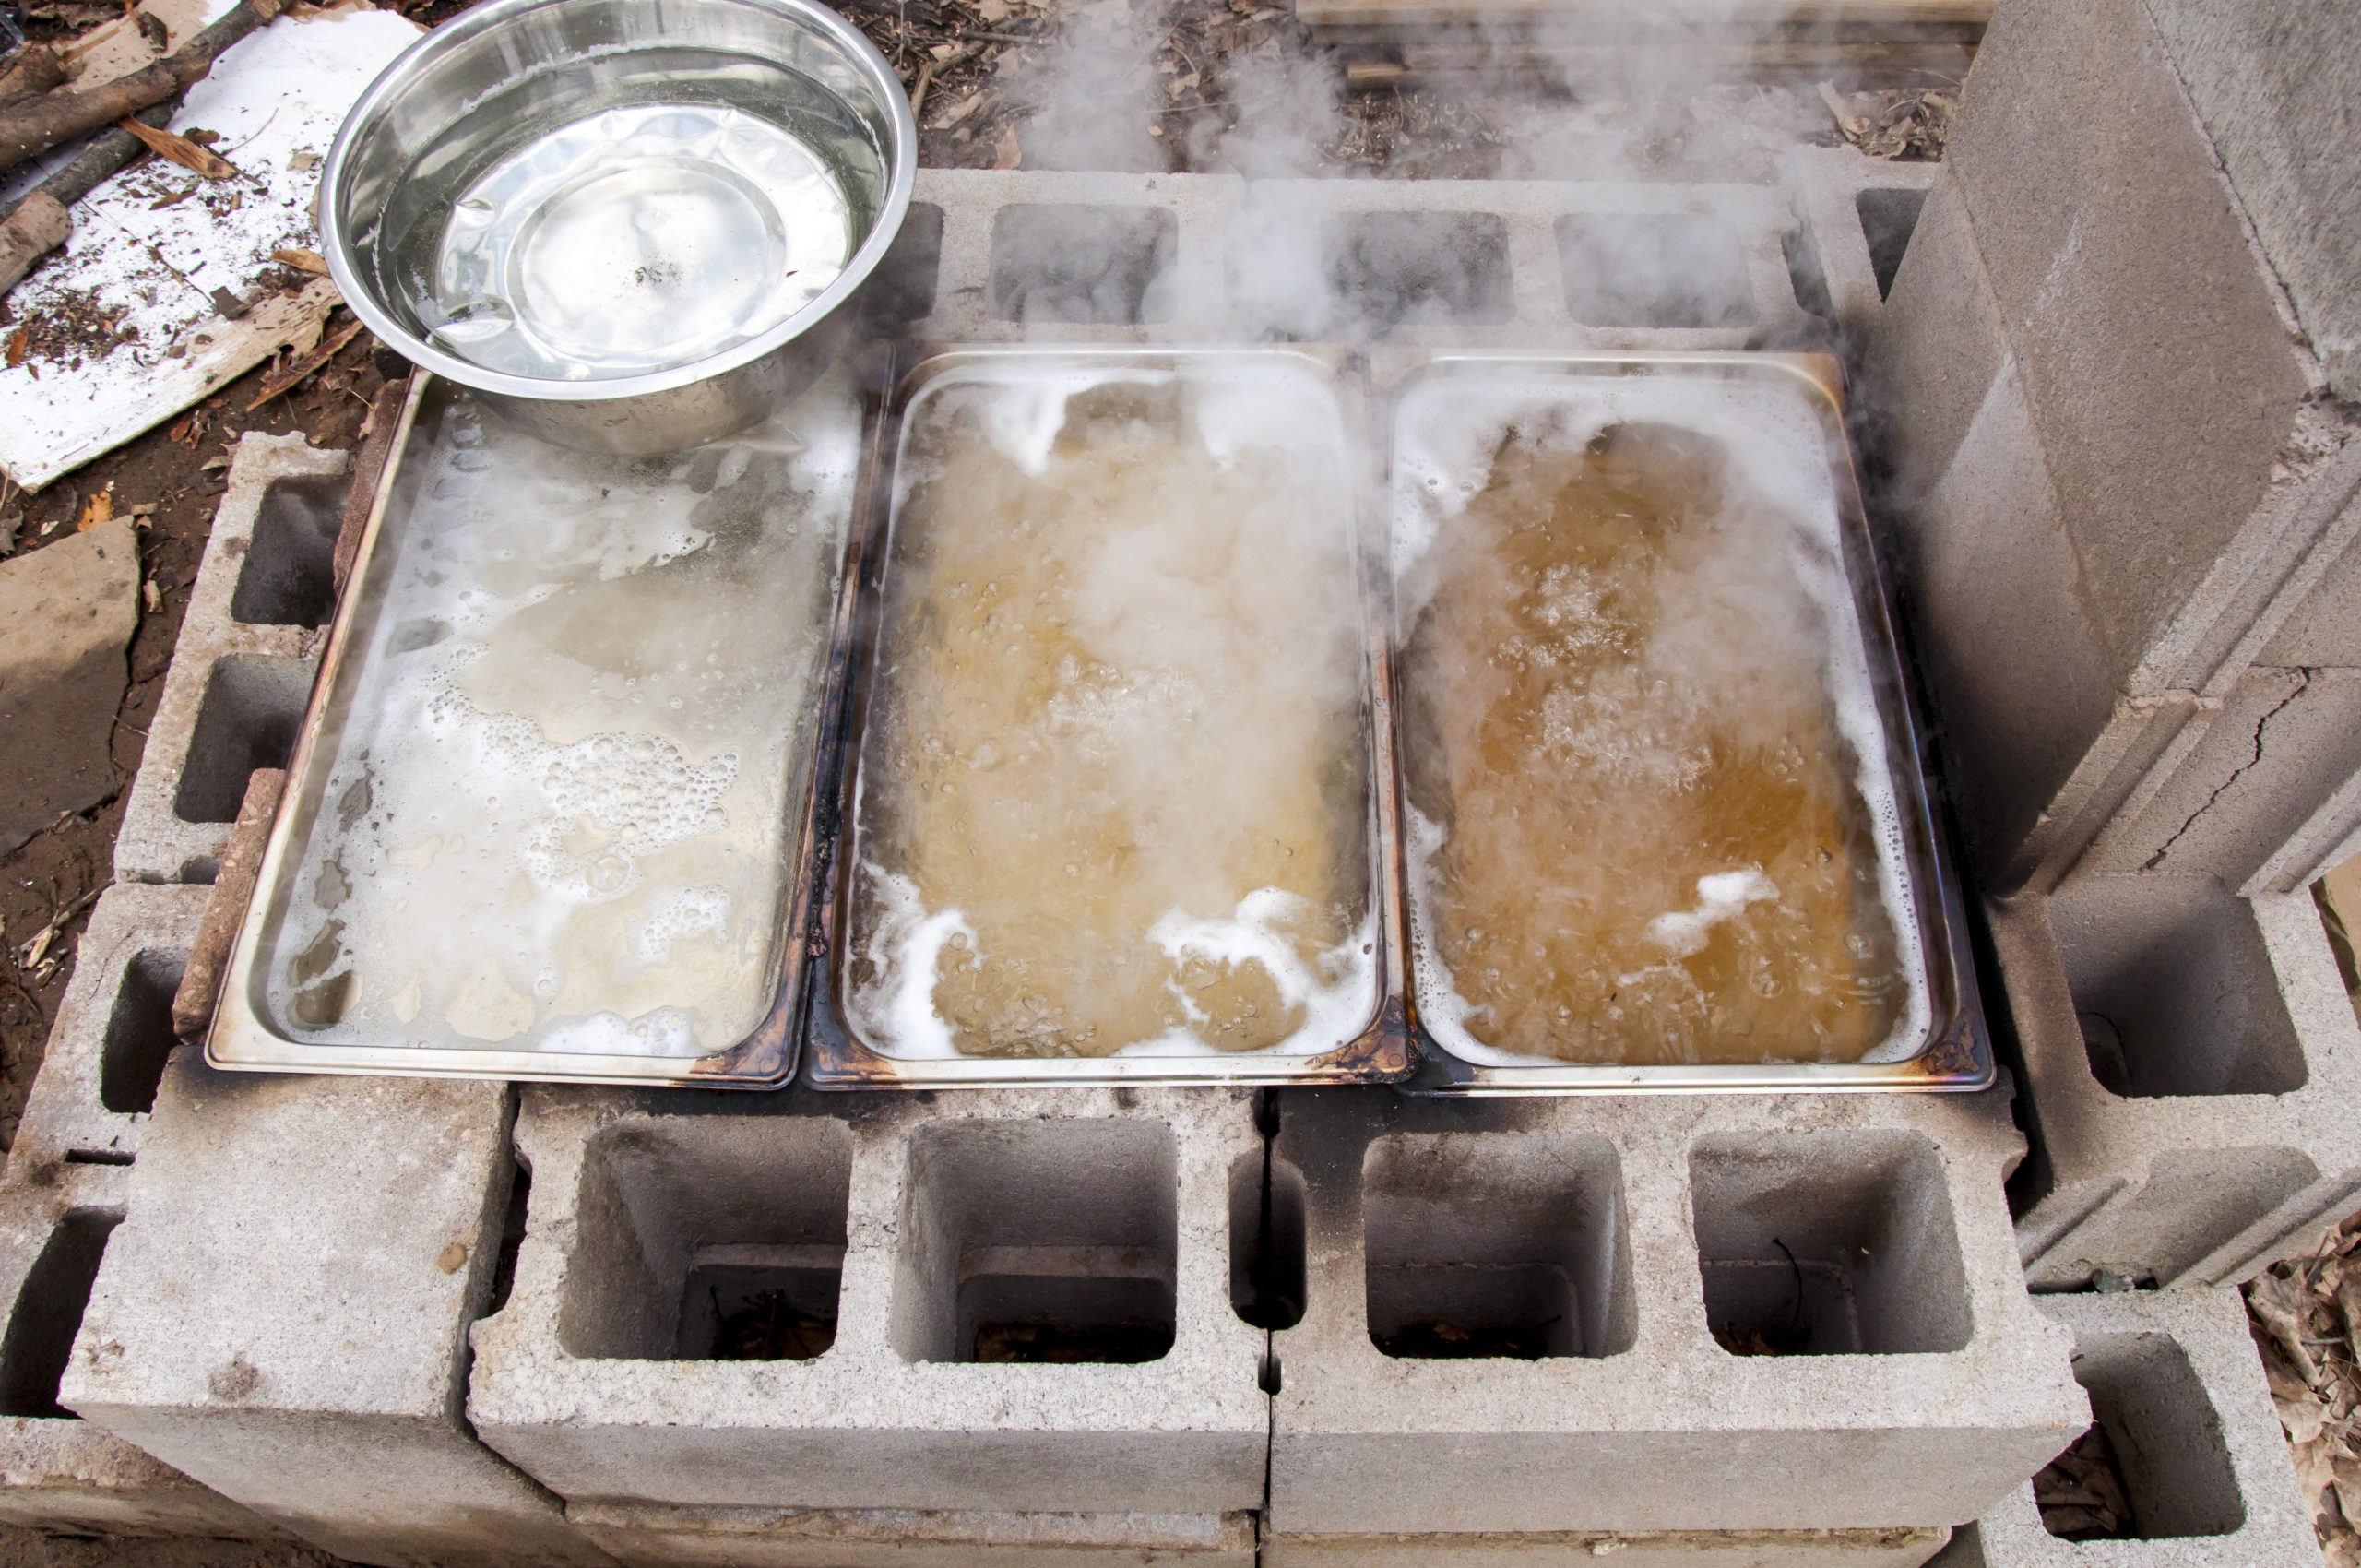
For boiling down the sap, you'll need a large pot and a heat source of some kind. You can buy evaporating machines specially made for this part of the process, but most people use a turkey fryer or propane stove of some kind. The type of heat source doesn't really matter, but it's worth noting that the boiling is a time-consuming process. You'll want something that can burn for a long time. It's not recommended to do the initial boil indoors on the kitchen stove because it produces a ton of steam and sticky condensation that will get all over everything. There's a reason most pros build outdoor "sugarhouses" with huge evaporators for that part of the process.
You will also need a thermometer of some kind to monitor the temperature of the boiling sap. Some people use meat thermometers, but you can also use a candy thermometer. A hydrometer is also recommended to help make sure the syrup doesn't get too thick. For the last step of processing you will need filters of some kind to help remove any impurities. Again, these can be found cheap online. We've also heard of people using coffee filters, cheesecloth or even a clean T-shirt for this part of the process.
Finally, you will need sealable containers to store the syrup. Mason jars work great. You can also purchase empty glass syrup bottles online.
When and how to tap maple trees
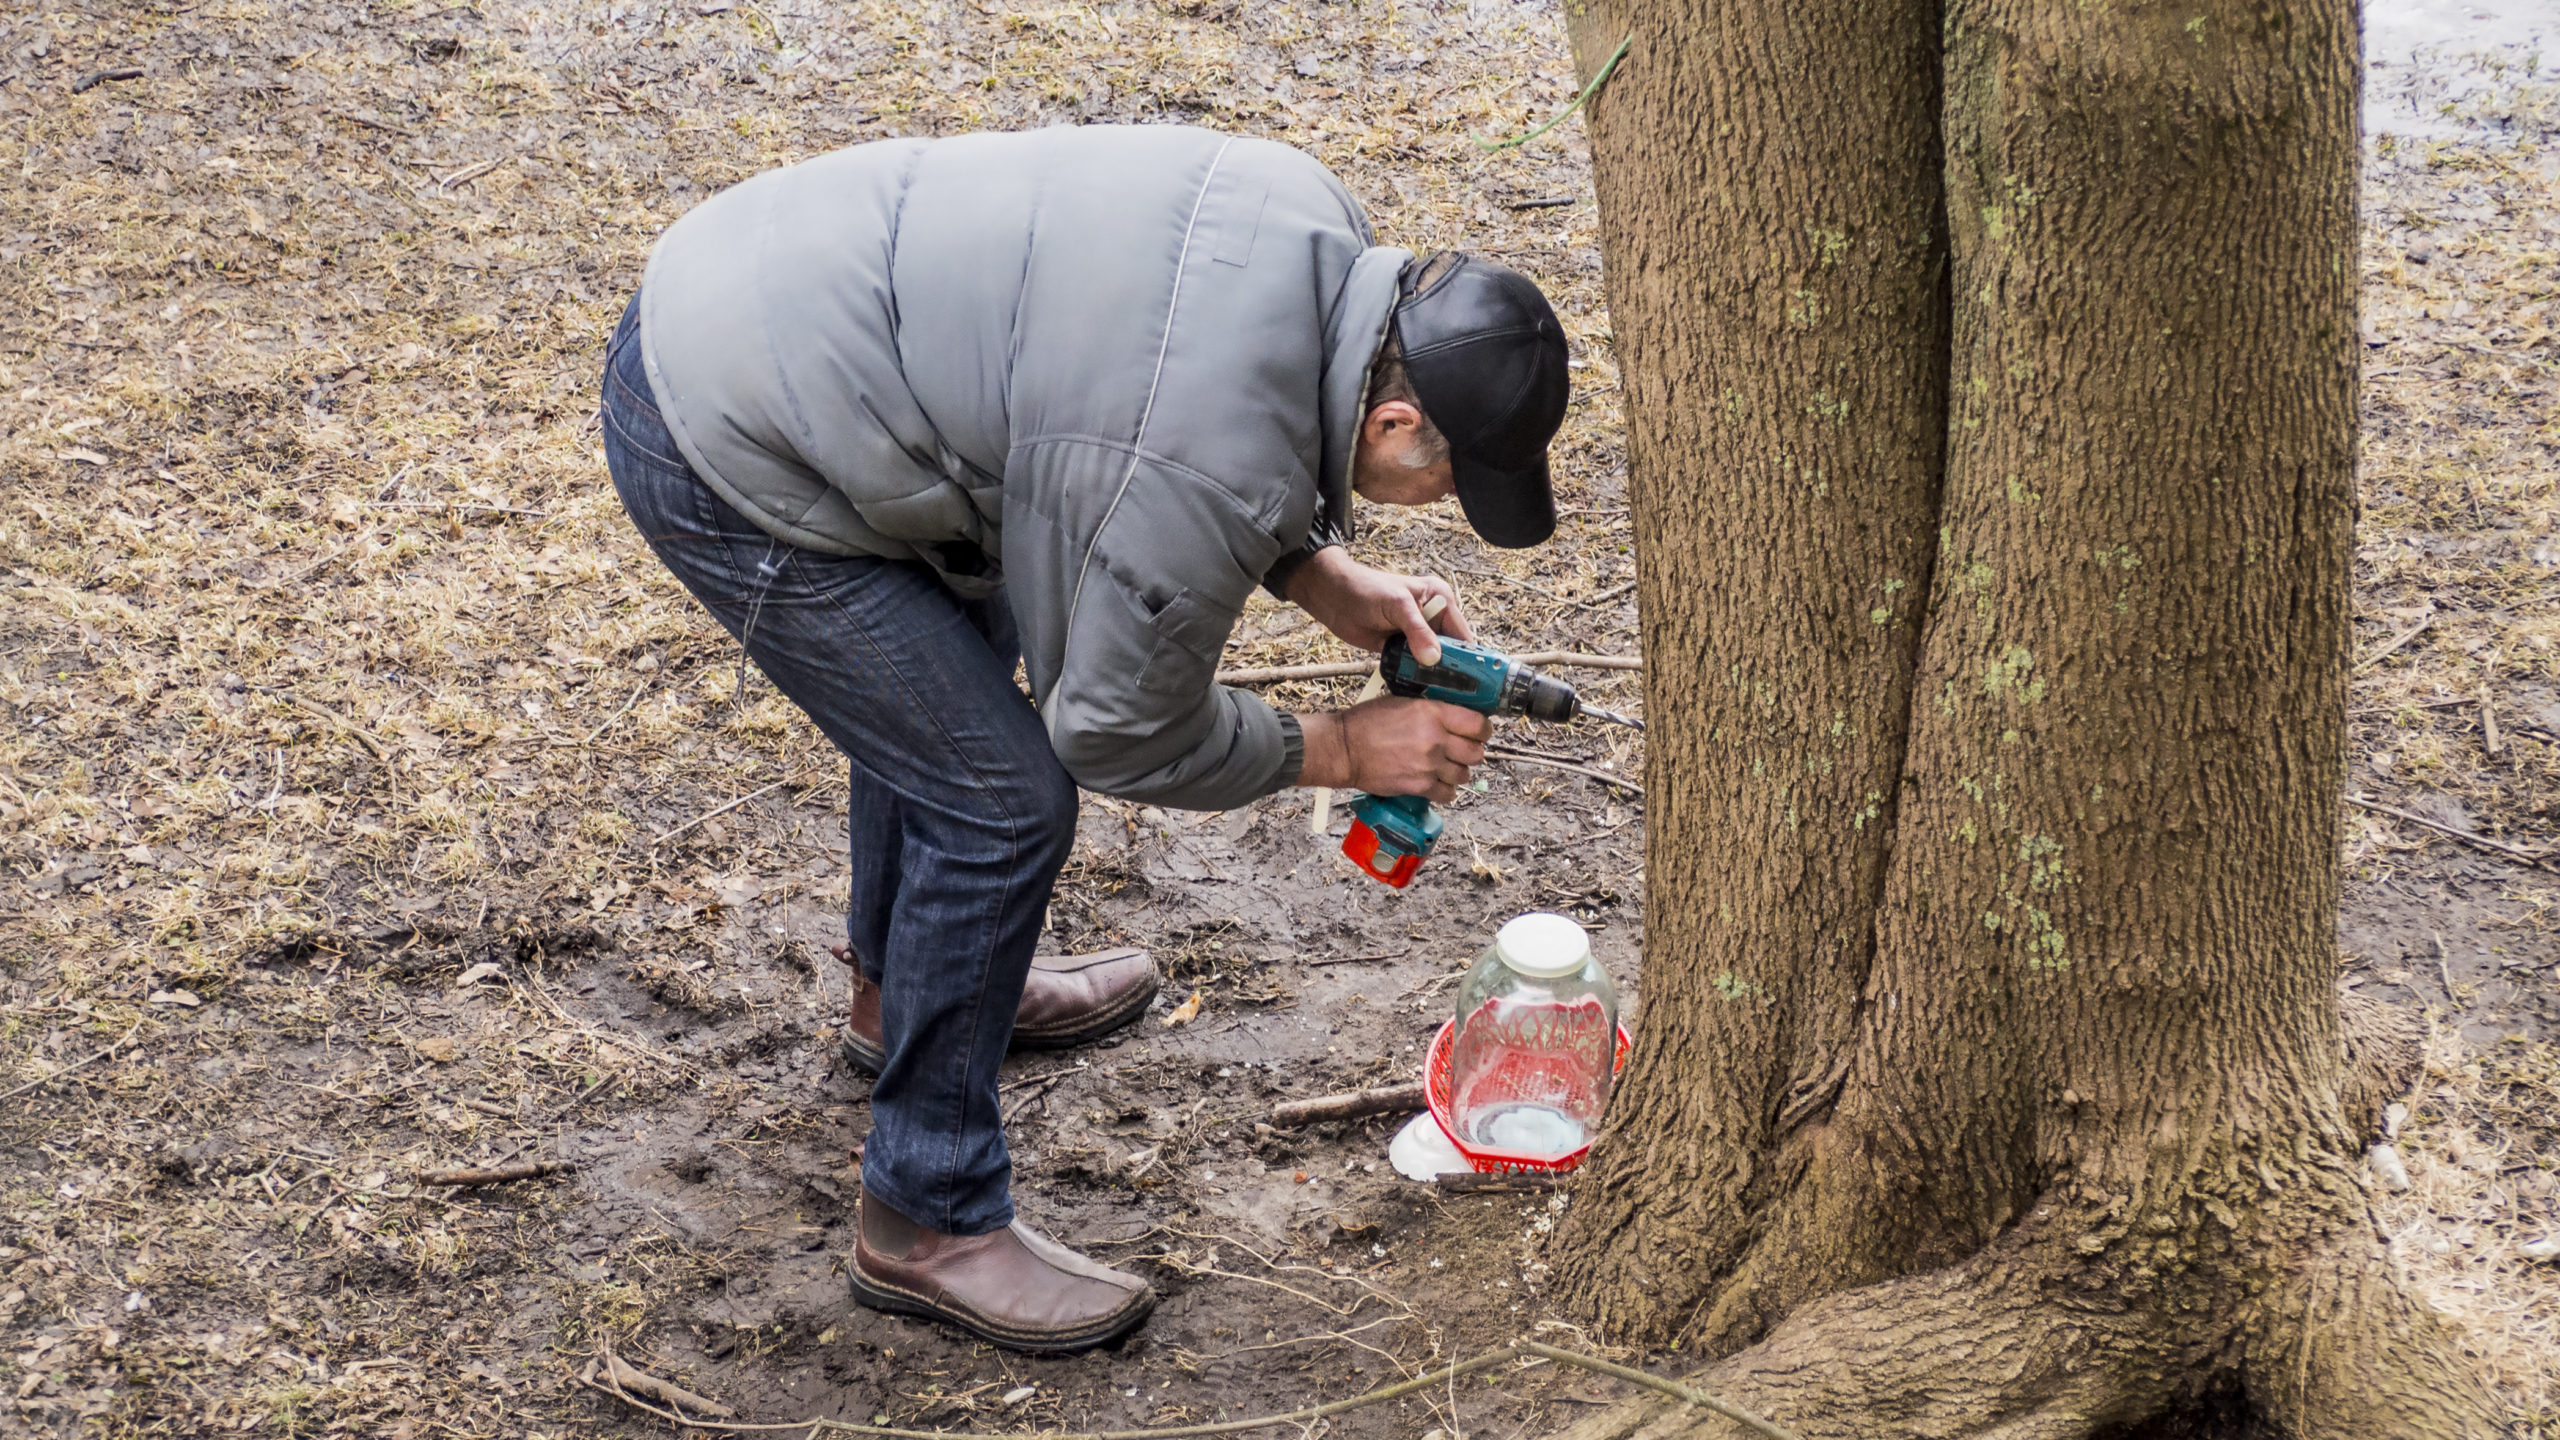
The window for collecting sap is quite narrow. There's a lot of science behind how and why trees produce this sap each year. We won't get into all the details of it. All you really need to know is that weather conditions play a vital role in the process. Most syrup fanatics agree, when temperatures are at least 40 degrees during the day and below freezing at night is the best time. This just helps to facilitate the sap flow better. Drill the hole for your tap at an upwards angle to help the sap flow out. From there, attach your bucket and hoses and you're set.
Sugar Maples are generally considered the best tree you can tap because of their sugar content. However, black maples and red maples are also popular. When selecting where to drill your taphole, try to find space on the south side of the tree where the tree gets the most sunlight. The extra warmth just helps the sap flow more quickly. Drill your hole about two to four feet high, depending on the type of spile you're using. If you have a short hose, you'll obviously want it closer to the ground.
Keep in mind the trees you tap should be around a foot in diameter at a minimum. Some people like to put multiple taps in larger trees. Just make sure they're spaced apart a good distance. Also, don't tap the tree in the same spot every year. That just helps the tree stay healthier. It is a living thing after all. Once you've got your tap and container in place, you wait. Many people are surprised by how quickly the containers fill up the first time they do this.
How to boil down the sap
Now that your buckets and other containers are overflowing with sap, it's time to start the process to turn that into syrup for tomorrow's pancake breakfast! One of the first questions most people ask is: "how much sap does it take to make maple syrup?" Unfortunately, the answer is a lot. It's really going to depend upon the type of tree you're tapping and the weather. The general thinking is that you will need between 30-40 gallons of sap to produce just one gallon of maple syrup!
That's why a large pot is essential, so you can keep adding fresh sap as you go. Remember when we said the pros use "evaporators?" That's because this part of the process literally evaporates the water out of the sap. You'll know it's working when you start seeing that golden brown color start to appear in the previously clear sap.
One thing to pay attention to here is the boiling point of water. It's going to vary from place to place depending on elevation. This is where your thermometer comes in. Here in Michigan, water boils around 205-210 degrees Fahrenheit. Experts agree the boiling point of maple sap is about seven degrees above that. That means here in Michigan, the sweet spot is around 212-217 degrees.
As you boil the sap, you'll notice a foam on the surface. Make sure to scrape that off once and a while (not with your hand obviously!). As you get towards the finishing steps and the syrup is looking nice and brown, most people like to take it indoors and finish the process on their kitchen stove.

This is also a good time to consider using the hydrometer to measure the sugar content. This just helps to ensure a good consistency to the sap that isn't too thick or thin. You may hear the term "brix" when talking about maple syrup. This term is a unit of measurement for sugar content. Most syrup enthusiasts agree that 66 brix or Bx is the ideal reading you want to look for. This is the density that you'll get with those famous and delicious Canadian pure maple syrups. Once your hot syrup has hit that 66 brix sweet spot, it's time for the last steps, filtering and storing!
Filtering and bottling
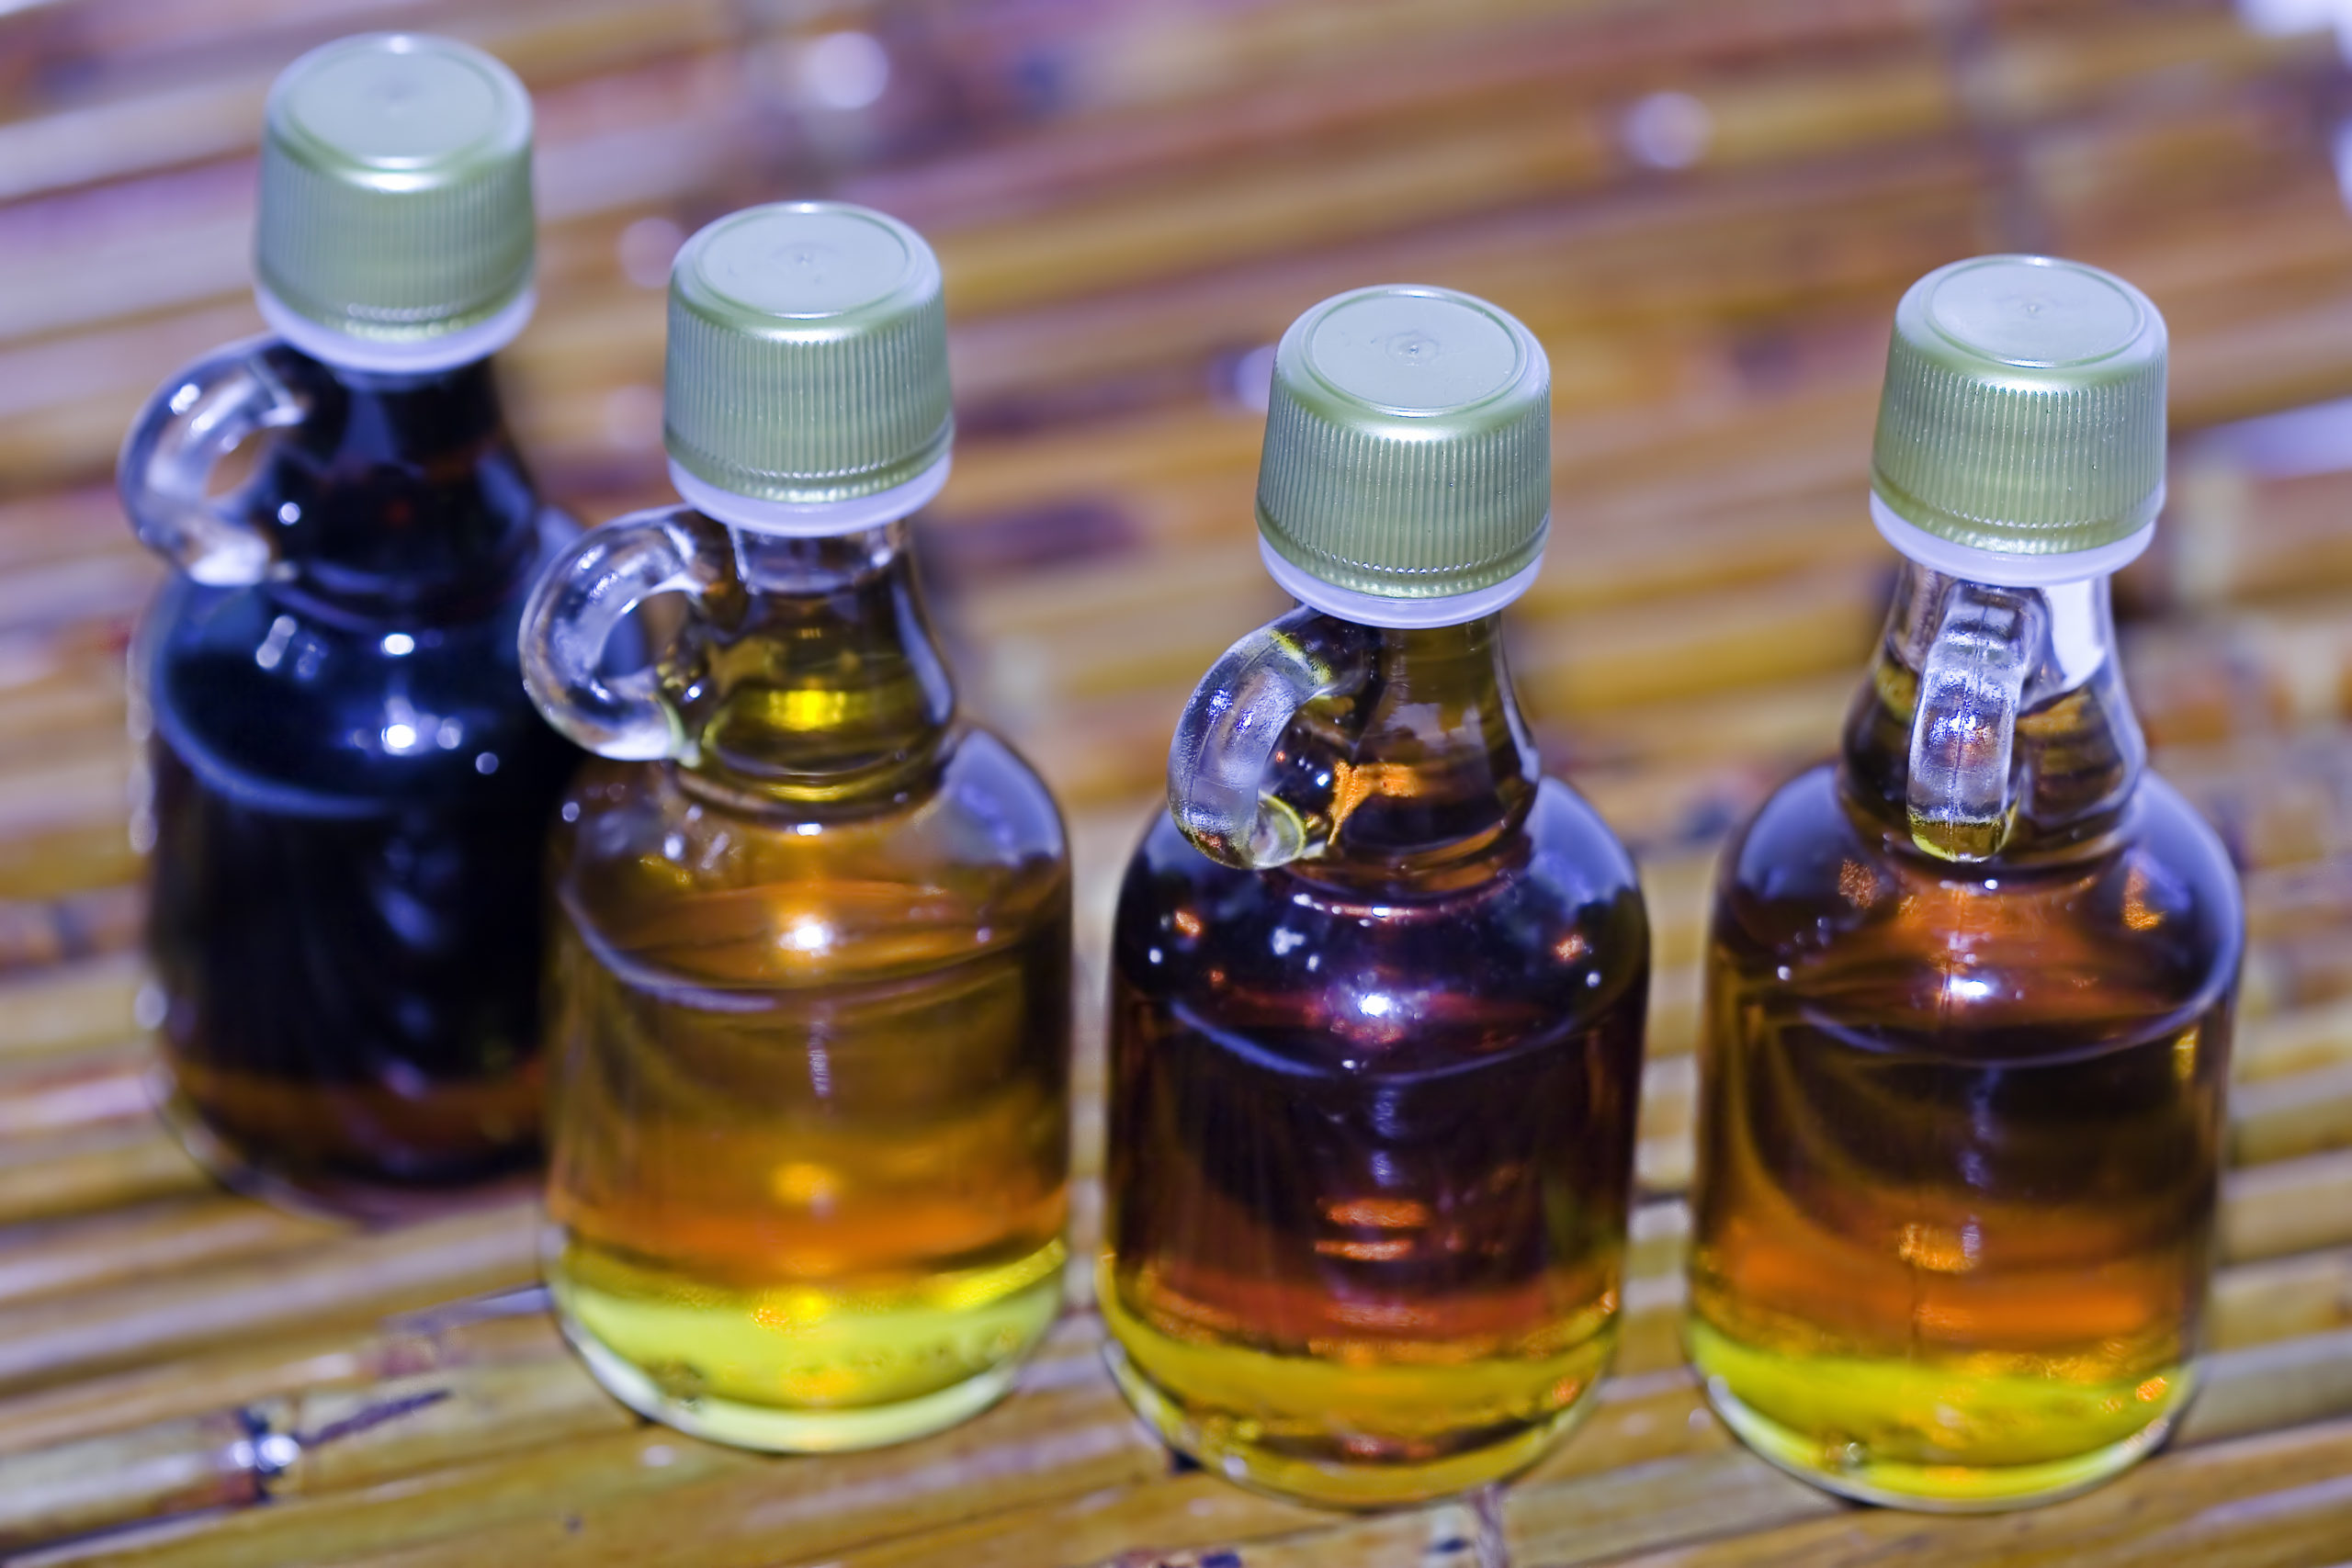
This last part is easy enough, but you do want to remember to filter the syrup while it is still warm. Be very careful to not get any on your hands. For safety reasons, this and the other parts dealing with hot syrup should be done by an adult. Simply place your filter, cheesecloth or whatever you're using over the jar and then pour the syrup though. If you've done everything else correctly, it should filter right through with minimal resistance. Don't worry if the syrup seems to have a watery consistency at first, it will be thicker after cooling.
From there you can refrigerate it and it will be ready for your breakfast waffles or pancakes. Or you could label it and give away as a gift come the holidays. Either way, your friends and family will enjoy it and will be impressed by your pancake syrup-making skills!
For more outdoor content from Travis Smola, be sure to follow him on Twitter and check out his YouTube channel.
NEXT: 10 THINGS TO KNOW ABOUT PURE MAPLE SYRUP AND SYRUP SEASON
WATCH
https://rumble.com/embed/u7gve.v3v79b/