Once the temperatures drop, it's time to break out the winter clothes—and the snowshoes and ice augers—and get out to enjoy your favorite cold-weather activities. But that means you have to figure out how to stay warm.
Whether you're going out for a winter hike, ice fishing for trout, or squeezing in a late-season deer hunt, being outside in chilly temperatures isn't as effortless as stepping out the door in the summer. Nothing is as miserable as shivering your way through what was supposed to be a fun day because you're not dressed appropriately.
Staying warm in the winter is all about how you layer up for your chosen activity—after all, sweating your way up a mountain requires a different dressing strategy than sitting in a bob-house all day. And with cold temperatures and heavy snowfall, getting caught out unprepared can also easily turn into a winter survival situation.
As a mountaineering guide working in Alaska, I spend most of the year in below-freezing temperatures, not only keeping myself warm but teaching my clients how to dress for winter, too. Needless to say, I've perfected my layering techniques. Here's how I stay warm when it's cold outside.
How to Stay Warm in Winter: Layering 101
Getty Images, StefaNikolic
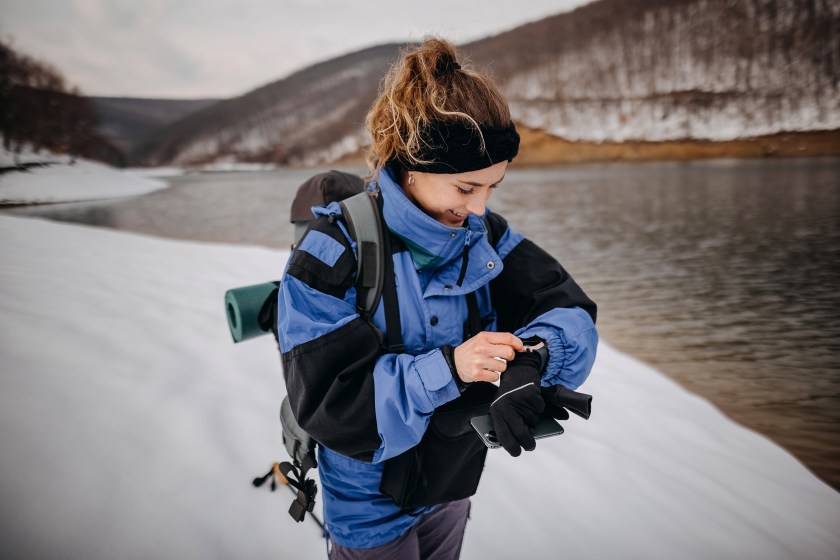
Choosing what layers of clothing to wear to stay warm is an art form, one that may take some trial and error to find the right items of clothing. Luckily, there's a method to the madness. If you plan your layering from the categories below, you'll be warm and comfortable no matter the conditions.
First, it's important to understand the different types of layers we're going to be talking about:
- Base layers sit against your skin, underneath all other layers. They typically consist of a long-sleeve shirt and long underwear (aka long johns). They should be snug enough not to bunch up but not so tight that they constrict blood flow. The goal of a good base layer is to provide a barrier for your skin that's sweat-wicking and quick-drying while also offering a first layer of protection from the cold. That's also why selecting your base layer fabric—merino wool, silk, synthetics—is crucial (more on that in a minute).
- Midweight layers, which sit over your base layer, are your primary insulating layers. These middle layers can be fleece, wool, or down or synthetic filled; and they can be pullovers, zip-ups, or vests, depending on the weather and your preference. In some cases, you may only use one midweight layer; but if the temperature and your activity warrants, you may wear multiple midweight layers stacked over each other—for example, a fleece pullover with a down vest over it.
- Outer layers go, well, on the outside. They're your defense against the elements—snow, rain, or wind (or a combination). Outer layers typically have wind- and/or waterproof synthetic materials such as Gore-Tex. Outer layers can range from simple hard-shells to insulating down winter coats and pants encased with weatherproof fabrics. Outer layers are typically sized up to fit over the other layers of your winter wardrobe, and they have large hoods and collars that cover the lower part of your face for maximum protection.
- Don't forget layers for your extremities. Fingers and toes are almost always the first thing to get cold; and because they're so far from your heart, they're most susceptible to frostbite. For hands, you'll want thin liner gloves and then either gloves or mittens, depending on the temperature and your activity's need for dexterity. For your feet, you'll want socks made of wool—this natural fiber is insulating and also wicks sweat—and either insulated hiking boots or winter boots, depending again on your activity. Lastly, you'll want to keep heat from escaping from your head by wearing a hat or beanie. And, if it's windy, you may want to cover your face and neck with a neck warmer, balaclava, or Buff.
There are also a few tips I'd encourage you to consider:
- Make sure each of your layers can fit over the previous layer comfortably. Creating a good warm-clothing layering system is like building a Russian nesting doll from the inside out.
- Avoid cotton for your base layer or midweight layer. If cotton gets wet from moisture in the air or sweat from your body, the fabric takes forever to dry and will make you colder in the process.
- Layer based on the activity you'll be doing. The number and type of layers you wear is highly dependent on what you'll be doing outside. The main strategy for approaching how you dress for the cold is based on whether you'll be doing high-intensity activities or low-intensity activities.
How to Stay Warm for High-Intensity Activities
Getty Images, Jag_cz
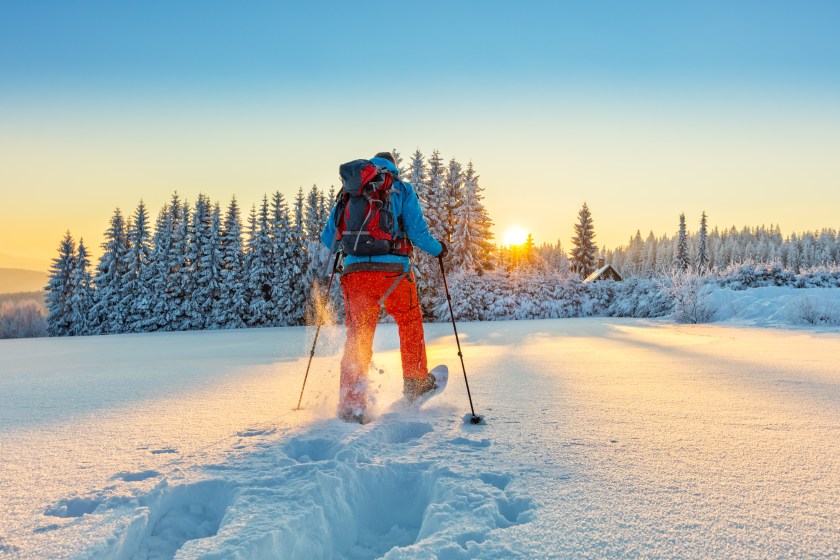
Sweating is perhaps the most dangerous thing you can do in cold temperatures; as soon as you stop moving, all that sweat and your damp clothing can make you feel extremely cold, particularly if you've chosen your layers poorly.
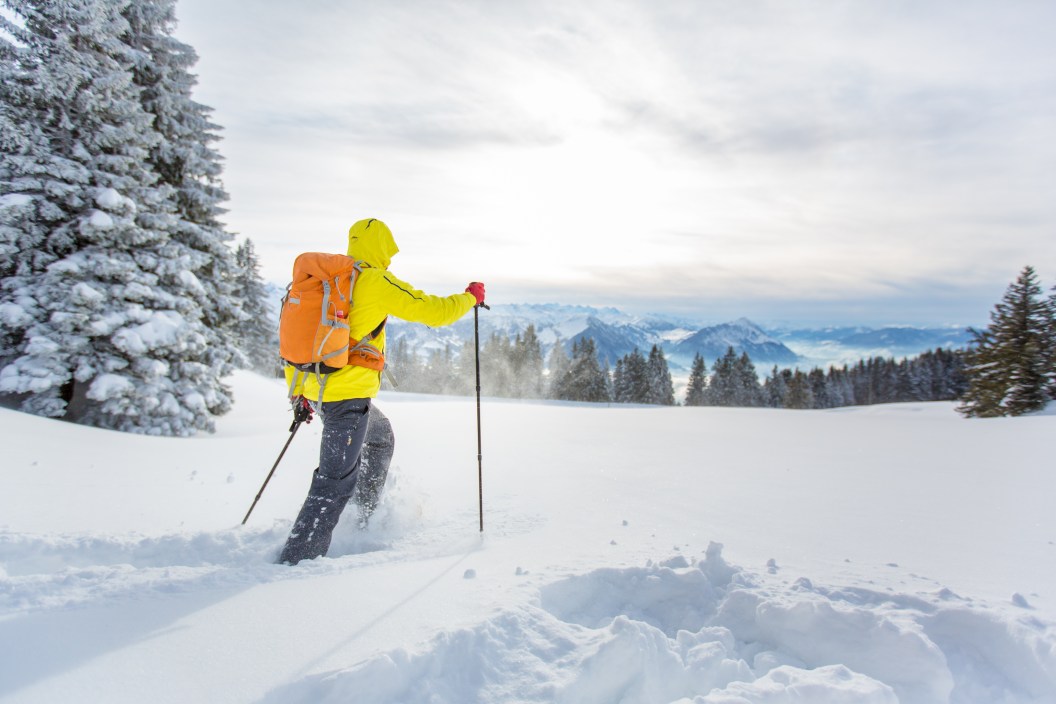
Therefore, your layering needs for high-intensity activities—hiking, snowshoeing, winter spot-and-stalk hunting—are complicated: You need to stay warm, but not so warm that you sweat. It's easier said than done, so make sure you experiment with different layers, and don't be afraid to put on or take off clothing as needed.
When I'm carrying a heavy backpack in the mountains, I change my layers frequently. I'll sometimes go from wearing just a base layer while moving to a midweight and huge puffy jacket when taking a break. While this may seem like a pain, if you keep your layers handy at the top of your pack and are efficient at taking them on and off, you won't lose a lot of time—and you'll be far more comfortable.
Base Layers
When I'm working hard, I wear lightweight synthetic sun hoodies for my base-layer shirt. My go-to winter-weather base layer is the same as my summer base layer: a Black Diamond Alpenglow Sun Hoody ($95). This polyester shirt is featherlight and breathable, with a large hood that keeps the sun off my neck and my ears—yes, UV rays can still harm your skin in the winter. I rarely sweat in it; and if I do, it dries with the lightest breeze.
I usually skip a base layer for my lower half unless it is below freezing or I'll be out all day; my legs don't get as cold as my upper body and core, and I enjoy the freedom of movement that comes with wearing less fabric. When I choose to wear a bottom base layer, I pick a synthetic legging such as the Patagonia Capilene Midweight Bottoms ($79). They're made of recycled polyester that's moisture-wicking and feels smooth on my skin.
Midweight Layers
On top, my primary midweight layer when I'm working hard is the Patagonia R1 Fleece Hoody ($169). I've owned the same hoody for six years, and it's seen me through everything from Denali summit expeditions to multi-day winter fishing trips. It's made of lightweight synthetic grid fleece with a deep, three-quarter zipper that allows for ample venting if you start sweating. It also has a snug hood and a zippered chest pocket that fits my phone.
I also bring a packable soft-shell jacket, such as the Outdoor Research Ferrosi Jacket ($149), made of stretchy, breathable nylon. Soft-shell jackets are windproof and water-resistant, but not waterproof. They're a lot more breathable than a true hard-shell jacket, which will turn you into a sweaty mess in no time if you're moving around a lot.
Last, I'll bring a Patagonia Nano Puff ($289) and, if it's really cold, a down vest such as the Kuiu Super Down LT Vest ($229). Worn over your base and midweight layers, a vest keeps your core warm while still providing airflow and agility to your arms.
For bottoms, I always wear synthetic soft-shell pants for my midweight layer, regardless of whether I'm wearing long johns. Again, this provides wind protection while still allowing my legs to breathe. Kuiu Attack Pants ($149) are one of my faves and also look good enough to wear around town or out to dinner after your winter adventure.
Outer Layers
As mentioned, outer layers are your first defense against the elements. As such, there are two types of outer layers for winter: one to protect you against rain, wet snow, and wind, and one to protect you against extreme cold.
If I'm in a wet or extremely windy environment, such as the Pacific Northwest or the East Coast, my outer layers are the best high-quality waterproof hard-shell jacket and pants I can afford. Notice I didn't say rain jacket and pants. Rain gear is typically only made with two or 2½ layers of fabric, which means there is a print on one piece of fabric to protect the membrane, rather than another layer (with some exceptions, as you'll see below). Hard-shells are made with three layers, making them more durable and more weatherproof.
My go-to hardshell jacket is the Arcteryx Alpha Jacket ($700). Yes, it's expensive. But if you're going to be out in some seriously windy or wet conditions, it's well worth it. I spent several miserable years with lesser-quality hard-shells, working in the worst conditions imaginable: 60 mph winds, three days straight of rain, and subzero temperatures. When I finally bucked up and bought the Alpha Jacket, the difference was unbelievable and worth every cent. Not only does it keep any moisture from you, it also protects you from any wind chill. I have several friends who also swear by Kuiu's Yukon TR Rain Jacket ($399), which has three-layer fabric despite its classification, but it's only sold in men's sizes.
For bottoms, I also use hard-shell pants in wet or snowy conditions, such as the Arc'teryx Beta Pant ($275) or the Kuiu Yukon TR Rain Pant ($349), but any pants made of Gore-Tex or a similar material will do. I always buy hard-shell pants with a full or half zip along the sides or cuffs so I can put them on over my soft-shell pants without having to take my boots off.
If the weather forecast calls for temperatures below 20 degrees, I'll also bring an oversized down or synthetic fill puffer coat that fits over all my layers, including my hard-shell, for extra warmth—think of it like a blanket with sleeves. This is also the first thing I put on when I stop for a break to help conserve my heat. My favorite is the Patagonia DAS Parka ($449), a tried-and-true favorite among mountain guides in Alaska. If I have room in my pack, I'll also bring a short down layer for my legs, such as Skhoop's Short Down Skirt ($159), which fits much like a sleeping bag with the bottom cut off.
Protection for Head, Hands, and Feet
Lore says you lose a ton of body heat from your head, but scientists have proved it's little more than 10 percent. Believe it or not, I typically wear a baseball cap when working hard in the winter to protect my head from wind and snow but keep it from sweating. If things get really cold, I'll switch it out for a thin synthetic skullcap, such as the Skida Nordic Hat ($34).
I also like to have my face mostly bare if I'm breathing heavily, but I wear a thin layer around my neck, such as the Buff Original EcoStretch Neckwear ($22). I can easily pull this up over my face if temperatures drop or I'm exposed to wind. If things are really cold, or I'm at high altitude where I'm concerned about UV rays, I use OuterU's FaceGlove ($30) as well. It's a Polartec fleece face shield that just covers your nose and cheekbones, protecting them from the sun and wind while keeping your mouth uncovered so you can breathe. It looks weird, but it works great.
I almost always wear a pair of liner gloves such as the Black Diamond Lightweight Screentap Gloves ($35) as a first layer on my hands. These are thin and designed to be worn under a thicker glove or mitten. They not only boost my hands' warmth, but they let me ditch my heavier gloves or mittens while doing dextrous work without exposing my bare skin to the cold. Working with metal or camping fuel with bare hands in the winter can be very dangerous, as these items may be colder than air temperature.
Over my liner gloves, I generally wear a pair of insulated work gloves, such as the Kinco Premium Ski Gloves ($37). I also always keep a heavier pair of mittens at the top of my pack, such as the Black Diamond Mercury Mitts ($120), so I can easily switch them out if I need something warmer.
As far as footwear goes, so much depends on your specific activity. For most adventures, a solid pair of winter boots will get you far. Make sure you're using wool socks and that your boots fit comfortably over your socks. This may mean going up a half size from your usual; too-tight boots reduce your circulation, increasing your chances of frostbite. You might want to add a pair of gaiters over your boots, too, if you'll be walking in deep snow.
How to Stay Warm for Low-Intensity Activities
Getty Images, PamelaJoeMcFarlane
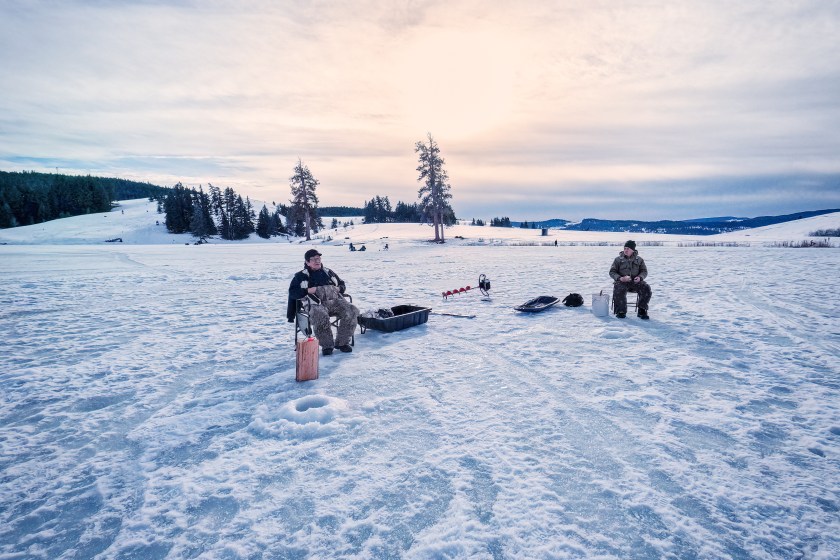
While it's nice to get moving in the winter, low-intensity activities such as ice fishing, hunting in a deer stand or a duck blind, or watching the northern lights can be just as fun. They're also a lot easier to dress for: Because you'll mostly be sitting or standing still, you don't have to worry about sweating. On the other hand, you may get colder more quickly because you aren't moving much.
That means you'll need more—and warmer—layers for low-intensity activities.
Base Layers
If I'm going to be mostly sedentary while outside, I go for thicker, woolen base layers. One of my favorites is Smartwool's Classic Thermal Merino Base Layer ($115). The wool is not only soft, it's also surprisingly warm for its thin weight. It also doesn't hold odor as synthetic material can, so you can get several days worth of wear out of the top if you need to.
I always wear thermal bottoms if I'm going to be sedentary. Luckily, Smartwool also makes Merino wool long johns ($115) that are just as soft and warm as the tops.
Gobi Heat also makes heated base layers ($199 each) that I reach for on the coldest days. These tops and bottoms contain conductive threads that are heated by a small battery for up to eight hours of external warmth.
Midweight Layers
My midweight layers for low-intensity activities are nearly the same as for high-intensity activities, but I simply wear more of them. I still keep a fleece layer over my base layers; but I ditch the soft-shell jacket, as it's better suited to more animated endeavors. Instead, I'll double up on puffer jackets, putting a lighter one on first before adding a heavier down or synthetic jacket over it. You could also try a heated jacket or vest; the long battery life keep you toasty for hours of ice fishing.
If I'm not going to be moving around a lot, I may skip the soft-shell pants and go straight to hard-shell for better wind protection. If it's really cold, I'll wear soft-shells and hard-shells, and also double up on my thermal bottoms.
Outer Layers
The Patagonia DAS Parka ($449) is a great outer layer for low-intensity activities as well. If you don't need your full range of motion, a longer down jacket will keep your thighs warm, such as Patagonia's Down With It Parka ($349).
Even if you don't plan to move around much, it's a good idea to bring a hard-shell jacket to help you avoid heat loss. If you're bringing a massively puffy jacket, such as the DAS Parka, your hard-shell likely won't fit over it, but that's OK. Put it over as many layers as is comfortable.
Legs also get a toasty outer layer during sedentary activities. Down pants, such as Kuiu's Super Down Pro Pant ($329), are a great option on their own or under your hard-shell pants; or you can get a full-length down skirt such as Skhoop's Alaska Long Down Skirt ($199) to wear like a belted blanket.
Protection for Head, Hands, and Feet
In sedentary situations, I wear as thick a winter hat as possible. All of my down jackets also have hoods, and I keep them up over my head for added warmth. I'll also use a heavier neck warmer, such as the Turtle Fur Classic Neck Warmer ($18), or even the brand's balaclava ($28), which is a hat and neck warmer combined.
For my hands, I still wear liner gloves but generally opt for mittens over them. If I need to do some fiddly work with my hands, I'll wear a heavy pair of gloves, such as the Black Diamond Guide Glove ($180). This is the glove we Denali guides use on summit day when we're working with carabiners and ropes at 20,000 feet. You can also find plenty of heated mittens with reasonably good battery lives, such as the Ororo Duluth Heated Chopper Mittens ($160).
For footwear, I wear the warmest snow boots I can find, such as the Baffin Impact Winter Boot ($230). I also bring plenty of toe warmers and have no shame in using them. I swear by HotHands' full-length footwarmers ($48), and Weston makes worthwhile rechargeable heated insoles ($80). If you use a heating product in your boots, make sure to bring an extra pair of socks. The external heat can make your feet sweat and, when the heating element runs out, your feet can get very cold.
Final Tips and Tricks for How to Stay Warm
Getty Images, Solovyova
I used to hate being out in the cold, which may seem like an odd confession for someone who grew up skiing and now spends much of the year working on glaciers in Alaska. But, as a smaller woman with poor circulation, I get cold easily. Learning how to keep myself warm took a lot of practice—and a lot of miserably cold days out—before I got it right. I picked up a few additional tips and tricks along the way that may help you out as you venture out into the cold this winter.
1. Eat Plenty of Food and Drink Lots of Water
When enjoying the great outdoors in the winter, your caloric needs are astronomically higher than in the summer, and much of that energy is spent keeping your body warm. In other words, you'll have to eat a lot more food to maintain the same core temperature as in summer, so make sure you bring plenty of snacks and that you chow down regularly.
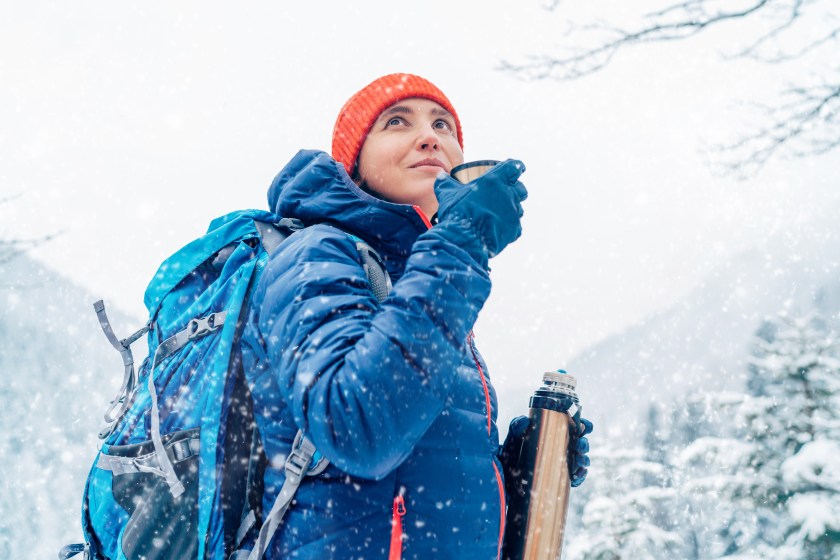
The same is true for water. While it can be really hard to drink cold water when you're already chilled, being dehydrated reduces your body's ability to circulate blood. This not only makes you colder, but it also greatly increases your risk of frostbite. Most of the severe frostbite cases I've seen have happened to people who were also dehydrated.
2. Make Yourself a Hot-Water Bottle
I learned this trick while on a two-week-long ski touring trip in Wyoming, where temperatures were regularly minus 20. Take a 16-Ounce Wide Mouth Nalgene Water Bottle ($15) and fill it with hot water. Tuck it into a pocket or zip it up right into your jacket—just be careful not to burn yourself. Your makeshift hot-water bottle warms you right up; and if you add a tea bag or hot chocolate powder, it also offers you a way to stay hydrated after it cools down enough to drink.
3. Have a Good Attitude
It may seem easier said than done when you're cold and miserable. But having a good attitude while recreating in the winter will take you very far. I learned the hard way that being cold is a choice, and there are always things you can do to warm up, from taking a jog around the lake to knocking out some push-ups. Take initiative and keep yourself moving, even if you're engaging in a low-intensity activity. There's no sense in being outside if you're not having fun while doing it!
READ MORE: How to Plan the Dream Remote Alaska Fly Fishing Trip
