Take my word for it: making sure your shotgun is throwing a great pattern right where you point it is one of the few things you can control in the turkey woods. That's why understanding how to pattern a shotgun for turkey is critically important to your success.
Once upon a time, a 14-year-old version of myself was hunting on a family friend's property on a beautiful, misty, late-April morning. The wooded hills were still in that early spring, near-leafless state that lets the sound of turkey calls ring thunder through the mountains. The birds were gobbling and it was perfect—a totally classic spring morning in the eastern turkey woods.
I was also toting my first real turkey gun, a 12 gauge Mossberg Tactical Turkey I'd begged my parents for as a birthday gift. To be honest, it was a terrible gun, but it looked really cool and was reasonably priced enough that my parents gave in and got the thing for me.
To get to the point: After working a tom into thirty yards, my 14-year-old heart broke when I missed him, three times. I can still see him flying over my head as I sat there with an empty gun. Later that day, my dad and I shot the gun at a paper target—something we'd previously never bothered to do with shotguns—and it turned out, the gun was shooting about a foot and a half high.
It was at that point I swore it would never happen again. That bird, long dead now, still bothers me, and it's the reason I've meticulously patterned every shotgun/load/choke combo I've shot since that day. I've still missed a handful of birds over the years, but never because I didn't pattern a shotgun. Want to learn from my mistakes? Here's a quick and dirty guide on how to pattern a shotgun ahead of this turkey season.
Hayden Sammak
Before you get started, gather what you'll need:
- 10 rounds of the turkey load of your choice (be sure this is compatible with your gun)
- Shotgun choke of your choice (be sure this is compatible with your gun and your load)
- 1 box cheap trap shotgun loads of the same or roughly the same shot size as your turkey loads
- Target holder
- 5-10 large pieces of cardboard (pizza box lids work great)
- 1 roll of butcher paper
- 1 roll duct tape
- 1 black marker
- 1 approximately 10" paper plate with a 1" hole cut out of the center for a stencil
Step 1: Make a backing for your target.
I use the lids and bottoms of pizza boxes because they're free and about the right size; it's important that you have an area big enough that you can see how the initial shots pattern, even if the first shots are off-center. Anyway, I take the pizza box lid and jam it into a target holder, specifically this one.
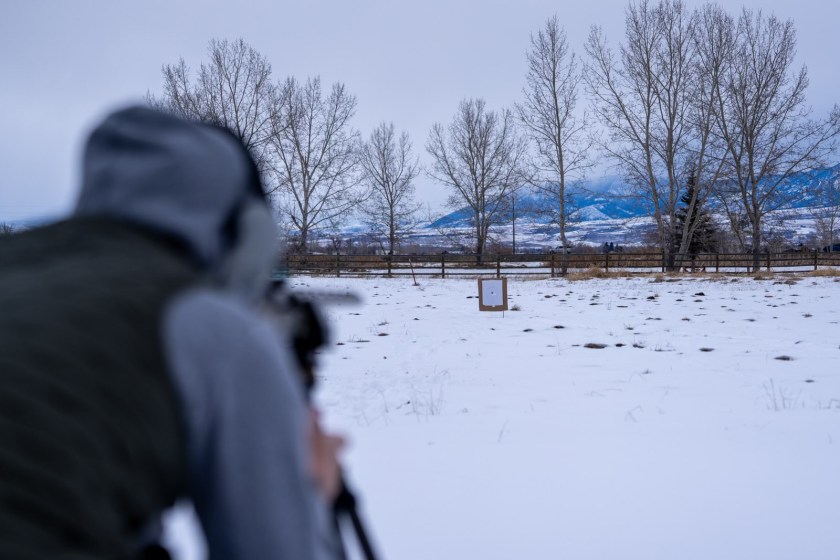
Step 2: Draw a paper target.
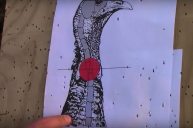
Because we need to count the pellets of each shot, these targets will be single use, so I make my own with squares of butcher paper instead of buying them. Place the paper plate stencil in the middle of the butcher paper square, trace its outline, then use the hole in the middle to draw your black dot. This will leave you with a perfect target. Do not just draw a dot and shoot at it. The 10" circle is critically important: once we're sighted in, counting the number of pellets within that 10" circle will help us determine our technically effective range (remember: effective range is always determined by both the capability of the gun and the capability of the shooter).
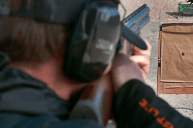
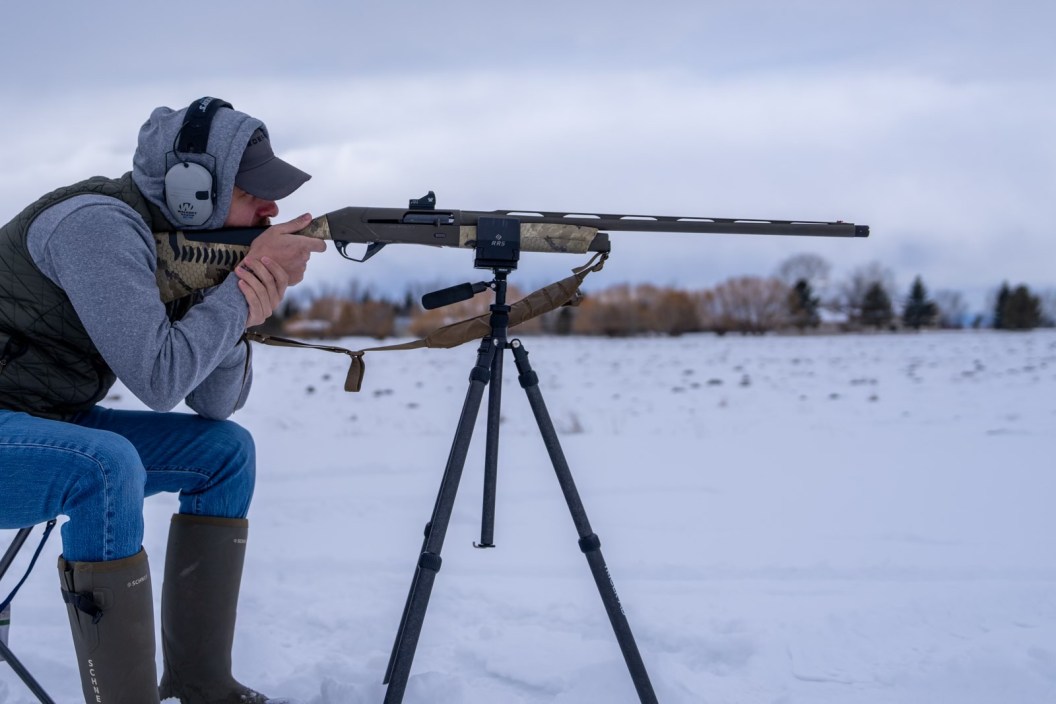
Step 3: Get a steady rest.
It is crucial you set your gun up on a very solid rest, like a tripod with a clamp. This is important. We're not practicing our shooting, we're trying to create the most stable platform possible in order to assess the performance of our setup and our setup alone. As much as possible, we're trying to take ourselves out of the equation.
Step 4: Take a cheap shot.
Take a crack at it from about 15 yards away with a cheap trap load. The trap load is good for a couple reasons. For one, shooting trap loads (instead of expensive turkey loads) when we're just trying to establish our general Point Of Impact, or POI, can save potentially 20 bucks a shot if your gun is way off. Additionally, it's gonna save your shoulder some, too—you're probably about to do a lot of shooting. Anyway, take your shot and note your point of impact, then take another shot on the same target to confirm (note: we're not counting pellets at this point, we're just trying to determine our point of impact).
If you're dead center, great. Move on to step six. If you're consistently off, move on to step five. If you have two very different looking shots, check to be sure that everything on your gun is tight and that your rest is good, then continue shooting until you have a consistent POI. Once you've established a consistent POI, move on to step five.
Step 5: Dial your sight in.
Make some initial adjustments. If you're shooting a scope or red dot, you'll be making your adjustments on windage/elevation turrets or dials. Simply adjust your shot in the direction you need to go as indicated on your turret/dial. For example, if you're shooting low, adjust the turret/dial in the direction it indicates is "up," which is normally counterclockwise. Adjust your windage turret or dial in a similar manner. For iron sights, the rule of thumb is to move your sight in the direction you want your shot to go. You can watch a video on iron sight adjustment here. Adjust incrementally until your POI is dead center.
Step 6: Extend your range and shoot the real deal.
Extend your range to 30 yards and check your POI with a fresh target and one of your intended turkey loads. You will probably notice a significantly denser pattern. Take a second shot to confirm your POI with the turkey loads and make necessary adjustments if needed.
Step 7: Go long and start counting.
We're going to assume most every turkey load is going to perform at 30 yards, so extend your range to 40 yards and get counting pellets. This is where that 10" circle comes into play; I determine the effective range of a shotgun, load, and choke combination by how many pellets land within that 10" circle at a given distance. I want there to be at least 75 pellets within that circle. If I count over 75 pellets, I'll know that yardage falls within what you could consider the shotgun's "technical" range, or the range in which the setup itself, taking the shooter and conditions out of the equation, is effective.
Continue this procedure until you determine the shotgun's maximum technical range (the point at which less than 75 pellets are present in the circle), or you decide you've shot enough turkey shells for the day. Remember: technical effective range and practical effective range, i.e. your maximum shot distance in a hunting scenario, can be very different, and extending your practical effective range will be the product of practice. A little positional plinking— think of how you'd be likely set up on a turkey—with a .22 and some soda cans is a fun, cheap way to practice.
Step 8: Analyze and accept, or experiment.
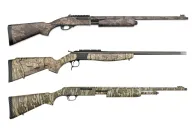
Depending on the load/choke/shotgun combination you're shooting, you may notice your shotgun's technical effective range is only 40 yards. If you opted for cheaper traditional turkey loads, like a 3" 12 gauge shell full of #4 shot for example, that's not a completely unlikely scenario. At that point, you can either accept the limitations of your current gear and keep your shots within 40 yards, or experiment with different chokes, loads, or even guns. My order of operations when it comes to experimenting with a setup is load, choke, gun. To that end, my advice is to check out some tungsten loads if you're looking to extend your range. While the investment up front can be significant—15 shells of top-of-the-line TSS can set you back nearly $300 dollars—your technical effective range will improve immediately. If at that point you're satisfied with the performance of your setup, you'll hopefully only have to shoot one or two shots ahead of the opener to verify everything is working right, and can save the rest for turkeys.
Like I said, I'm still annoyed about missing that bird, 18 years later. Don't be like me then, be like me now: go out a month ahead of the season, pattern your gun, and approach this opener with the cool, calm collectedness of a turkey hunter who knows exactly how his gun is shooting. Hit the range, dial in, and go get 'em.
A Note on Safety
One final note on safety: Always make sure your loads are compatible with your gun and your choke is compatible with your loads. Shooting steel shot, for example, through some extra full chokes can be dangerous and cause damage to your barrel; and a 3 ½" turkey load does not belong in your grandpa's shotgun chambered in 2 ¾". Remember: safety first.
READ MORE: What Is Turkey Drumming?