To be able to use your rope, you have to know how to tie the knots.
Rope knots are something that can be extremely useful when hunting. Understanding how to use the right knots can make carrying your gear a little easier at a minimum, and could even save your life.
As we all know, the rope is only as good as the weakest knot. Now is the time to learn and practice your knot-tying skills, to make sure you can execute when you need them the most.
Check out these 10 rope knots every hunter should know, and see how many you can already tie, and how many you need to learn.
1. The Square Knot (Reef Knot)
Why use this knot?
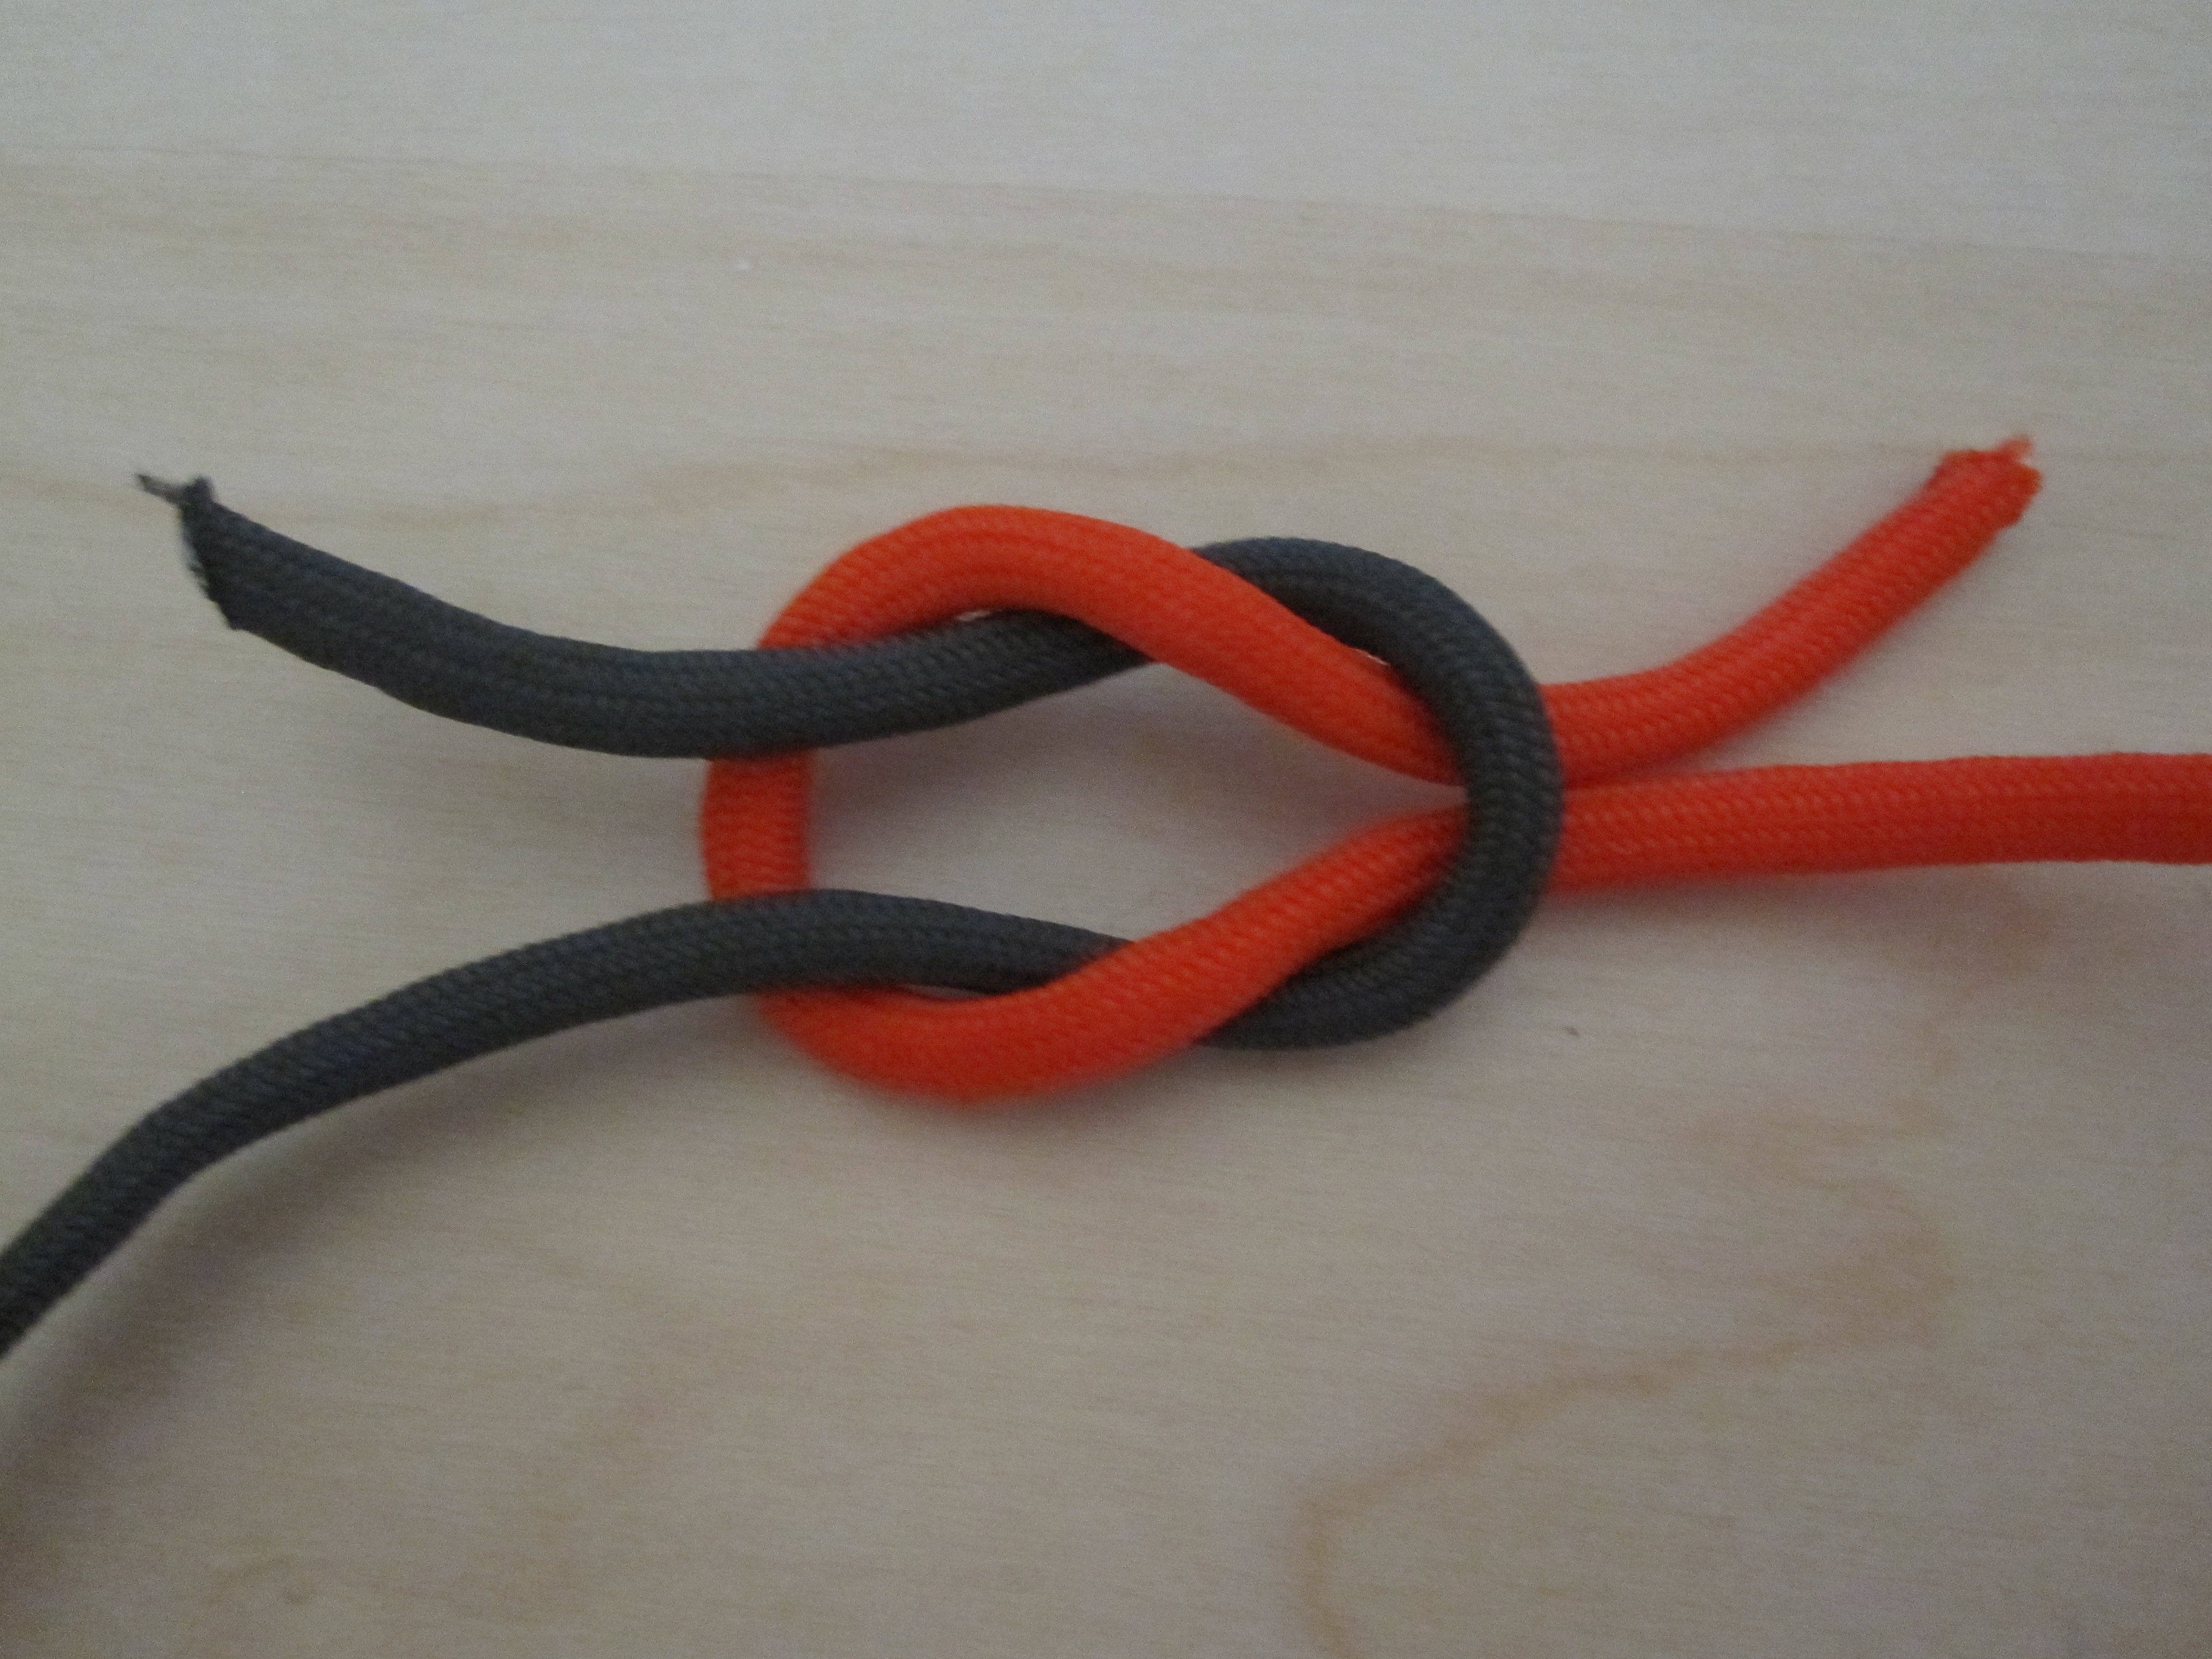
The square knot is quite possibly the most commonly used knot. If you only learn one type of knot, make it this one. The square knot or reef knot can be used to combine two similar ropes together or just to tie off a knot on a rope.
How to tie it:
The easiest way to remember is a right-over-left overhand knot, and then a left-over-right overhand knot. Just two simple ties, but make sure you do them in the right order so you can untie the knot when ready.
2. Sheet Bend
Why use this knot?
Similar to the square knot, the sheet bend is used to connect two different types of rope. The ropes can be various types of material and different thicknesses. This rope knot can come in handy if you run out of rope and have to improvise, even though there are plenty of different knots that do the same thing.
How to tie it:
Make a "J" shape out of the larger of the two ropes. Pass the smaller rope through the middle from behind, go all the way around both sides of the "J," and then pass the smaller line back underneath itself.
3. The Clove Hitch
Why use this knot?
The clove hitch knot is fast, easy and effective. A clove hitch can be used to quickly secure a rope to a solid structure.
How to tie it:
Make a loop around your structure with your rope. Then make another loop. This time, pass the end of the rope under the loop before you tighten. This knot can come undone if the tension is released, but you can add a square knot for more security if you like.
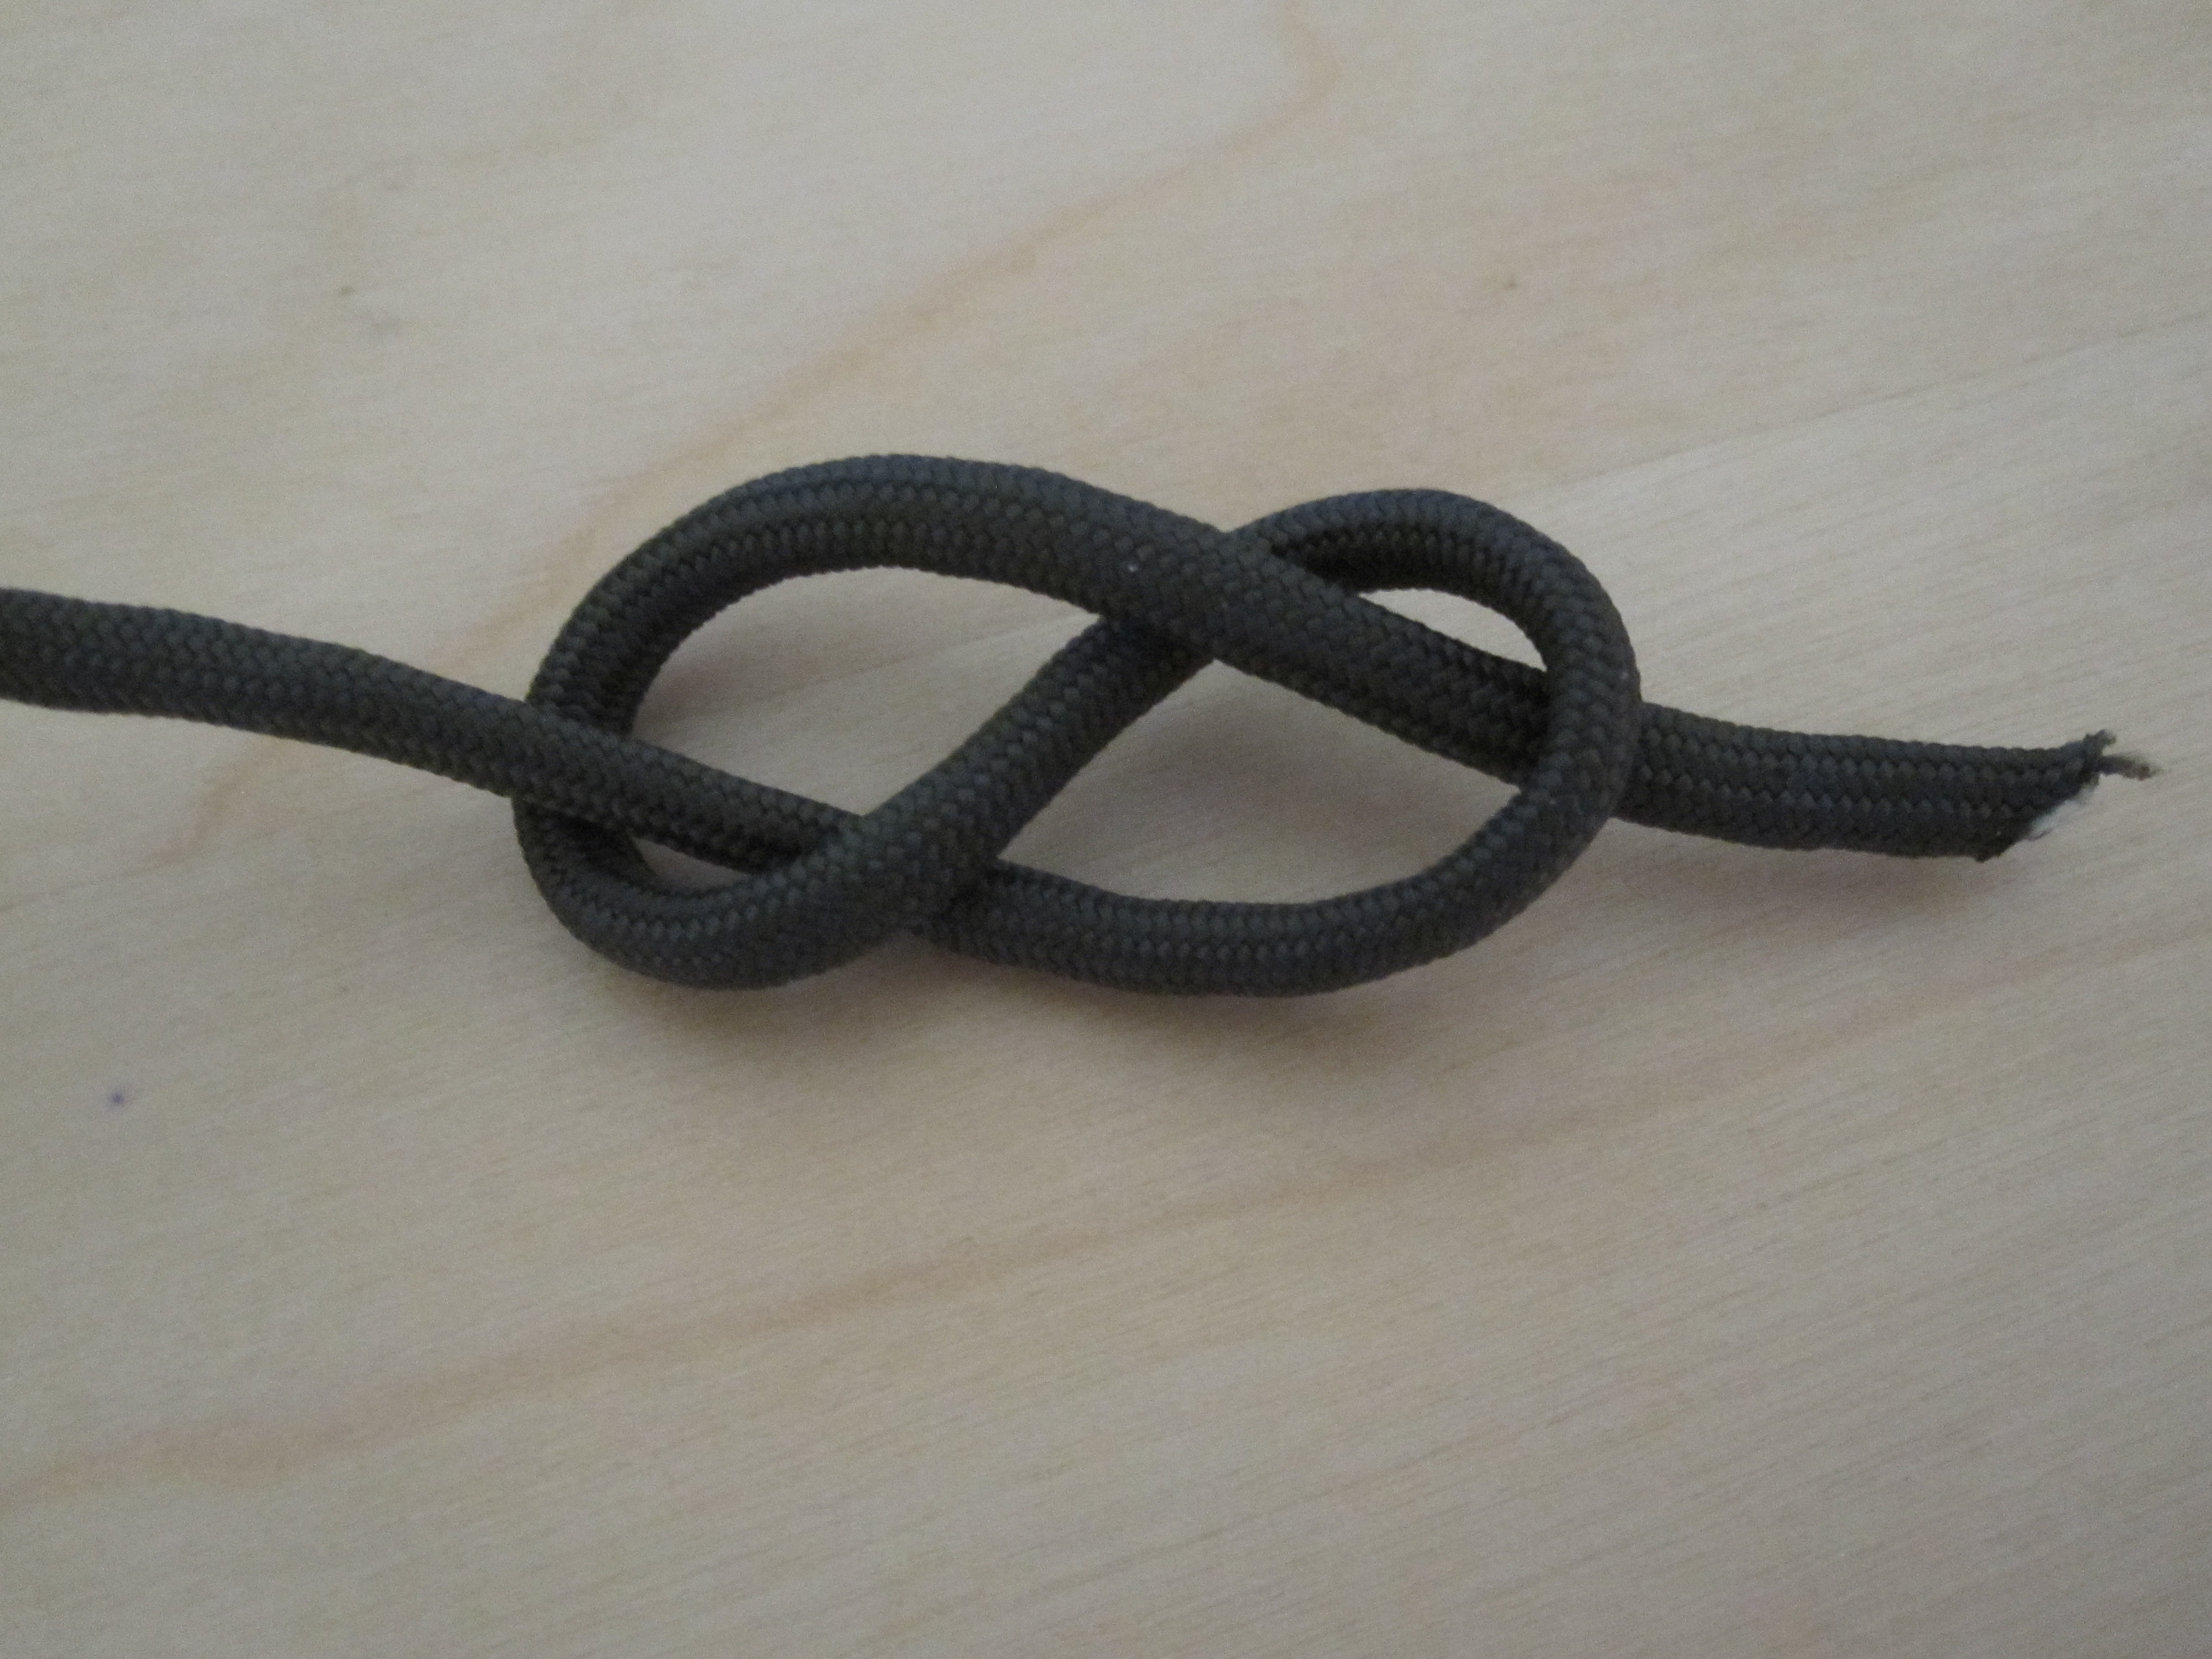
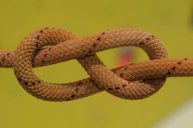
4. The Figure 8
Why use this knot?
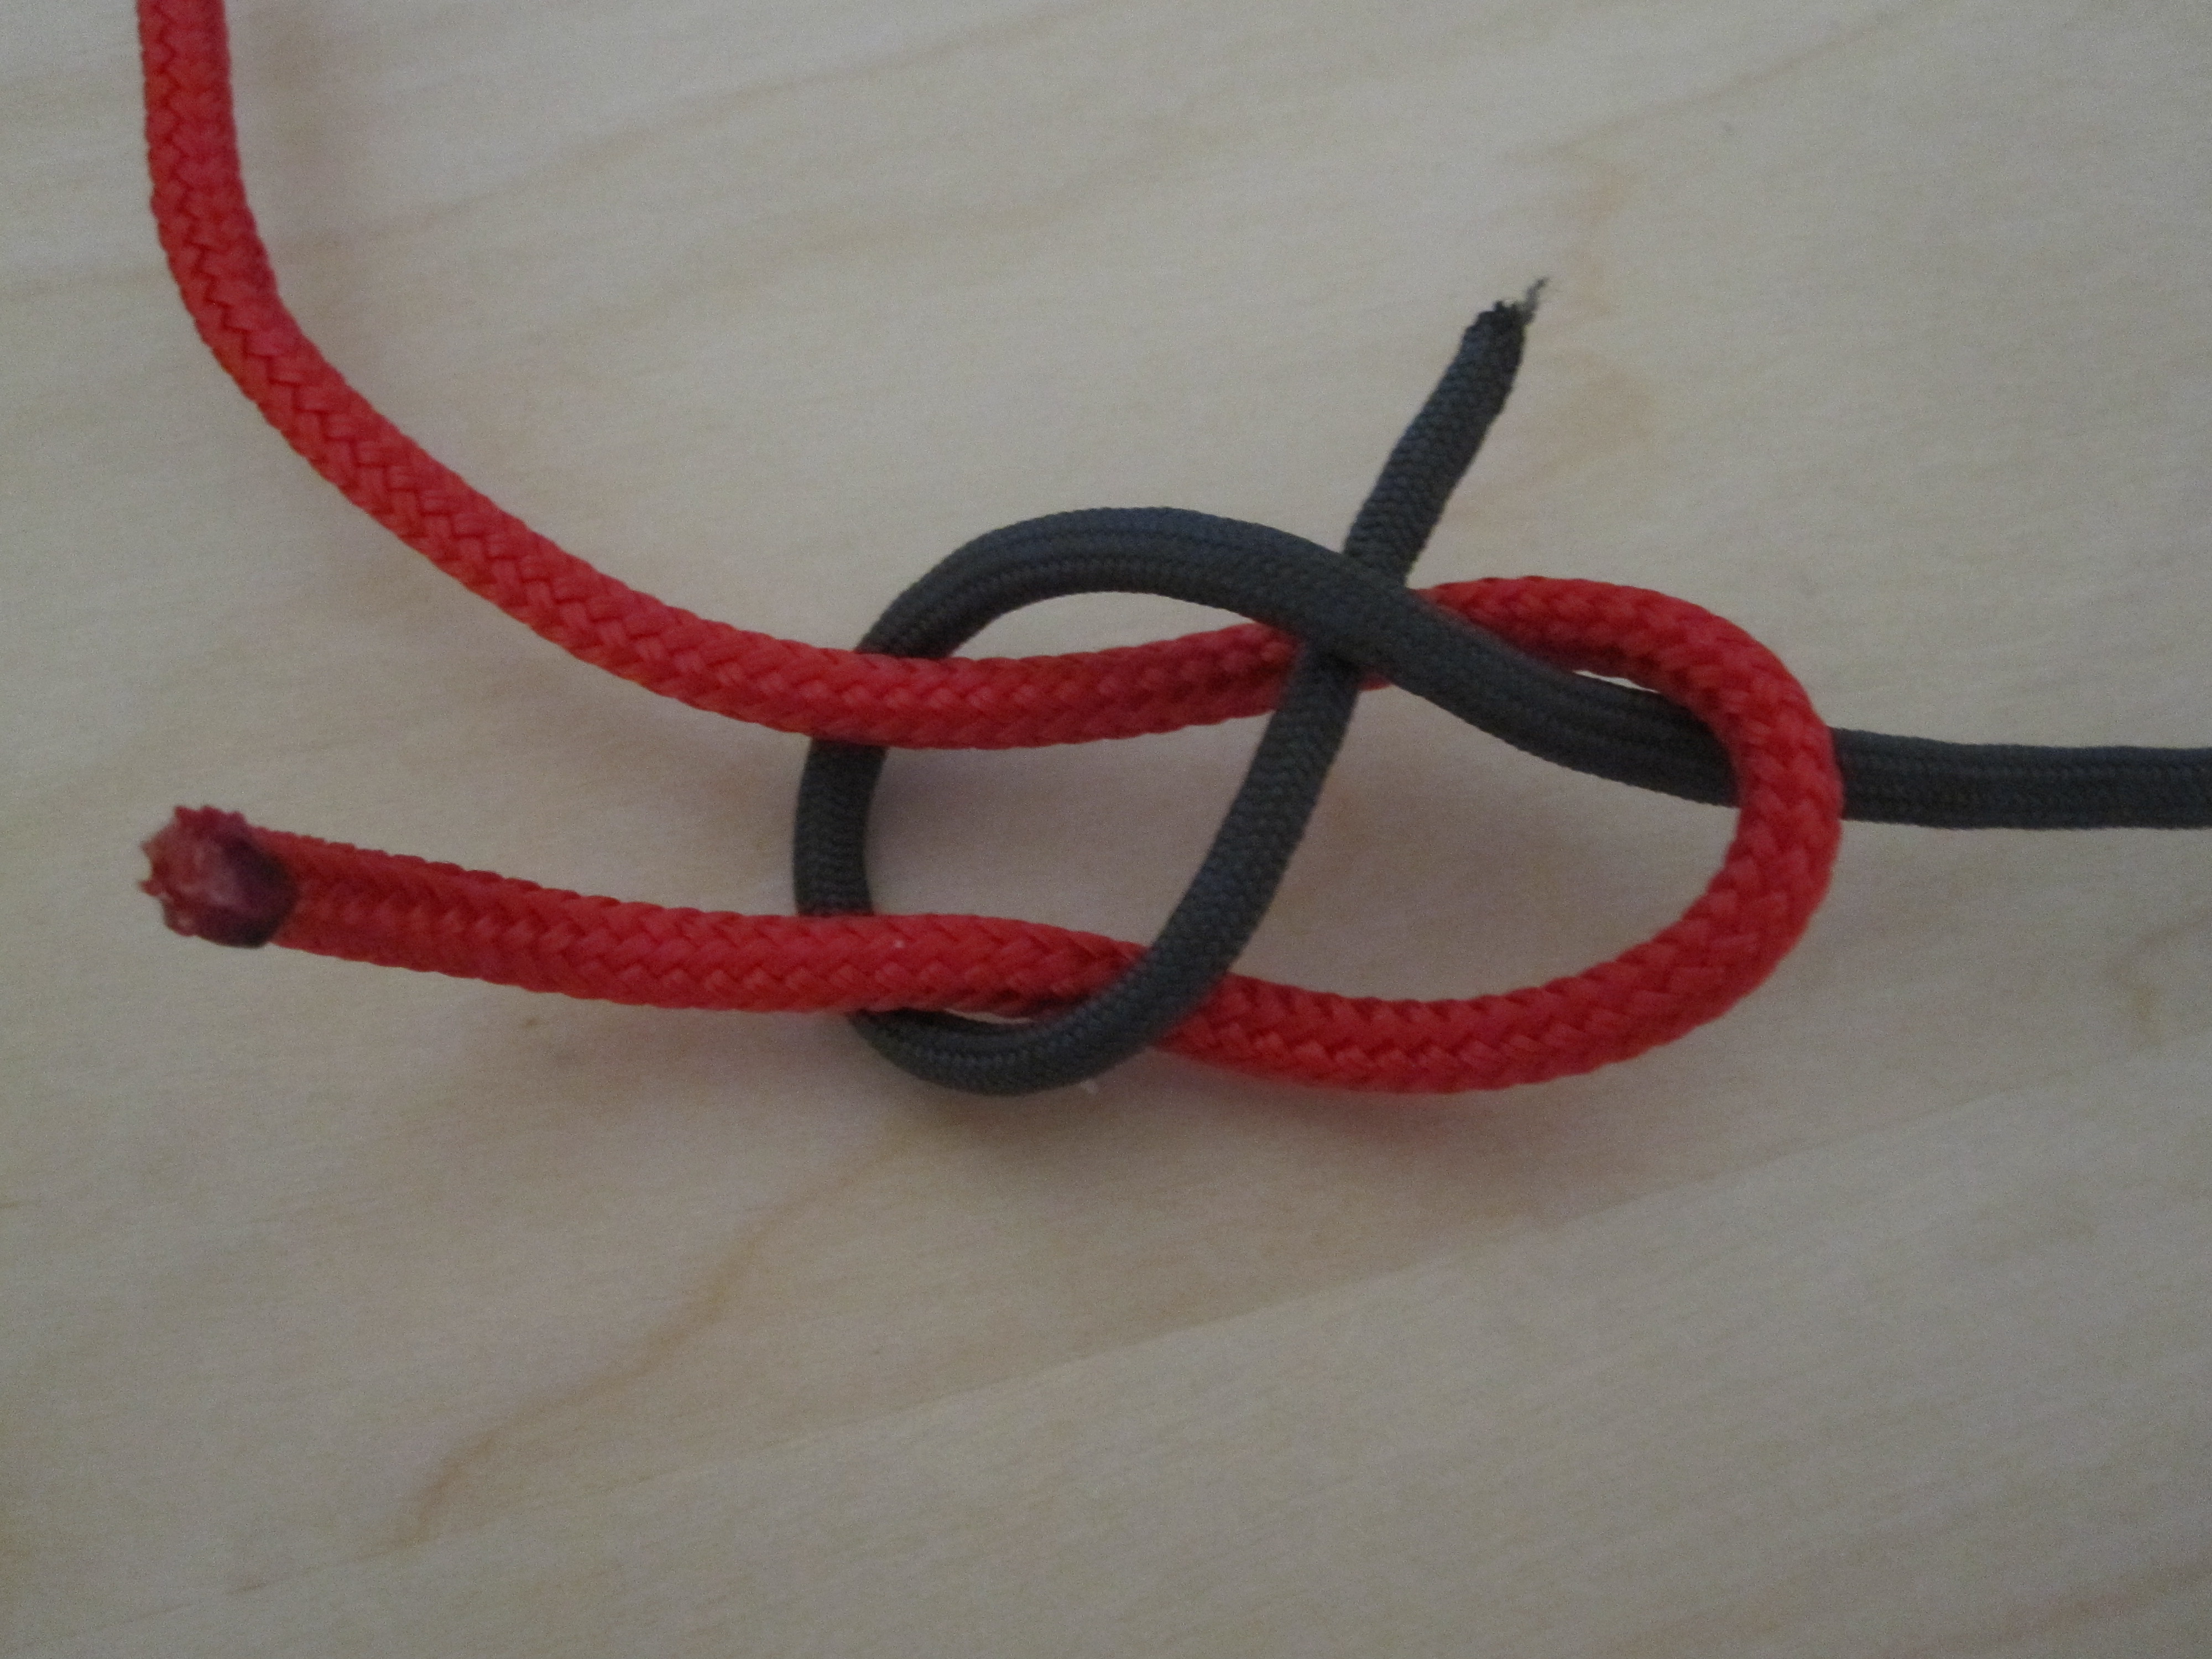
The Figure 8 is a stopper knot. Tied at the end of your rope, the Figure 8 will keep your rope from passing any farther than you wish. It's also used in more complex knots, so it is good to learn early.
How to tie it:
Take the end of your rope and pass it over itself, forming a loop. Then go back under the main line and through the first loop. See the figure eight? Then you've done it correctly.
5. Two Half Hitches
Why use this knot?
The two half hitches knot is a step up from the clove hitch knot. The two half hitches knot can be used to attach your rope to a solid structure.
How to tie it:
This knot is an easy one, just wrap the end around your structure and make a half hitch, and then wrap the line in the same direction to make the second half hitch. Pull it tight to secure, and you're done.
6. The Taut Line Hitch
Why use this knot?
The taut line hitch is a good knot if you want to grip an object and then pull it tight to another object.
How to tie it:
Create a loop in your rope by wrapping around the object you wish to tie to. With the end of the rope, wrap around the rope twice, back over the loop, around the line, and back through. Then just pull tight onto your object. This knot can come loose over time, so top it off with a square knot for more strength if necessary.
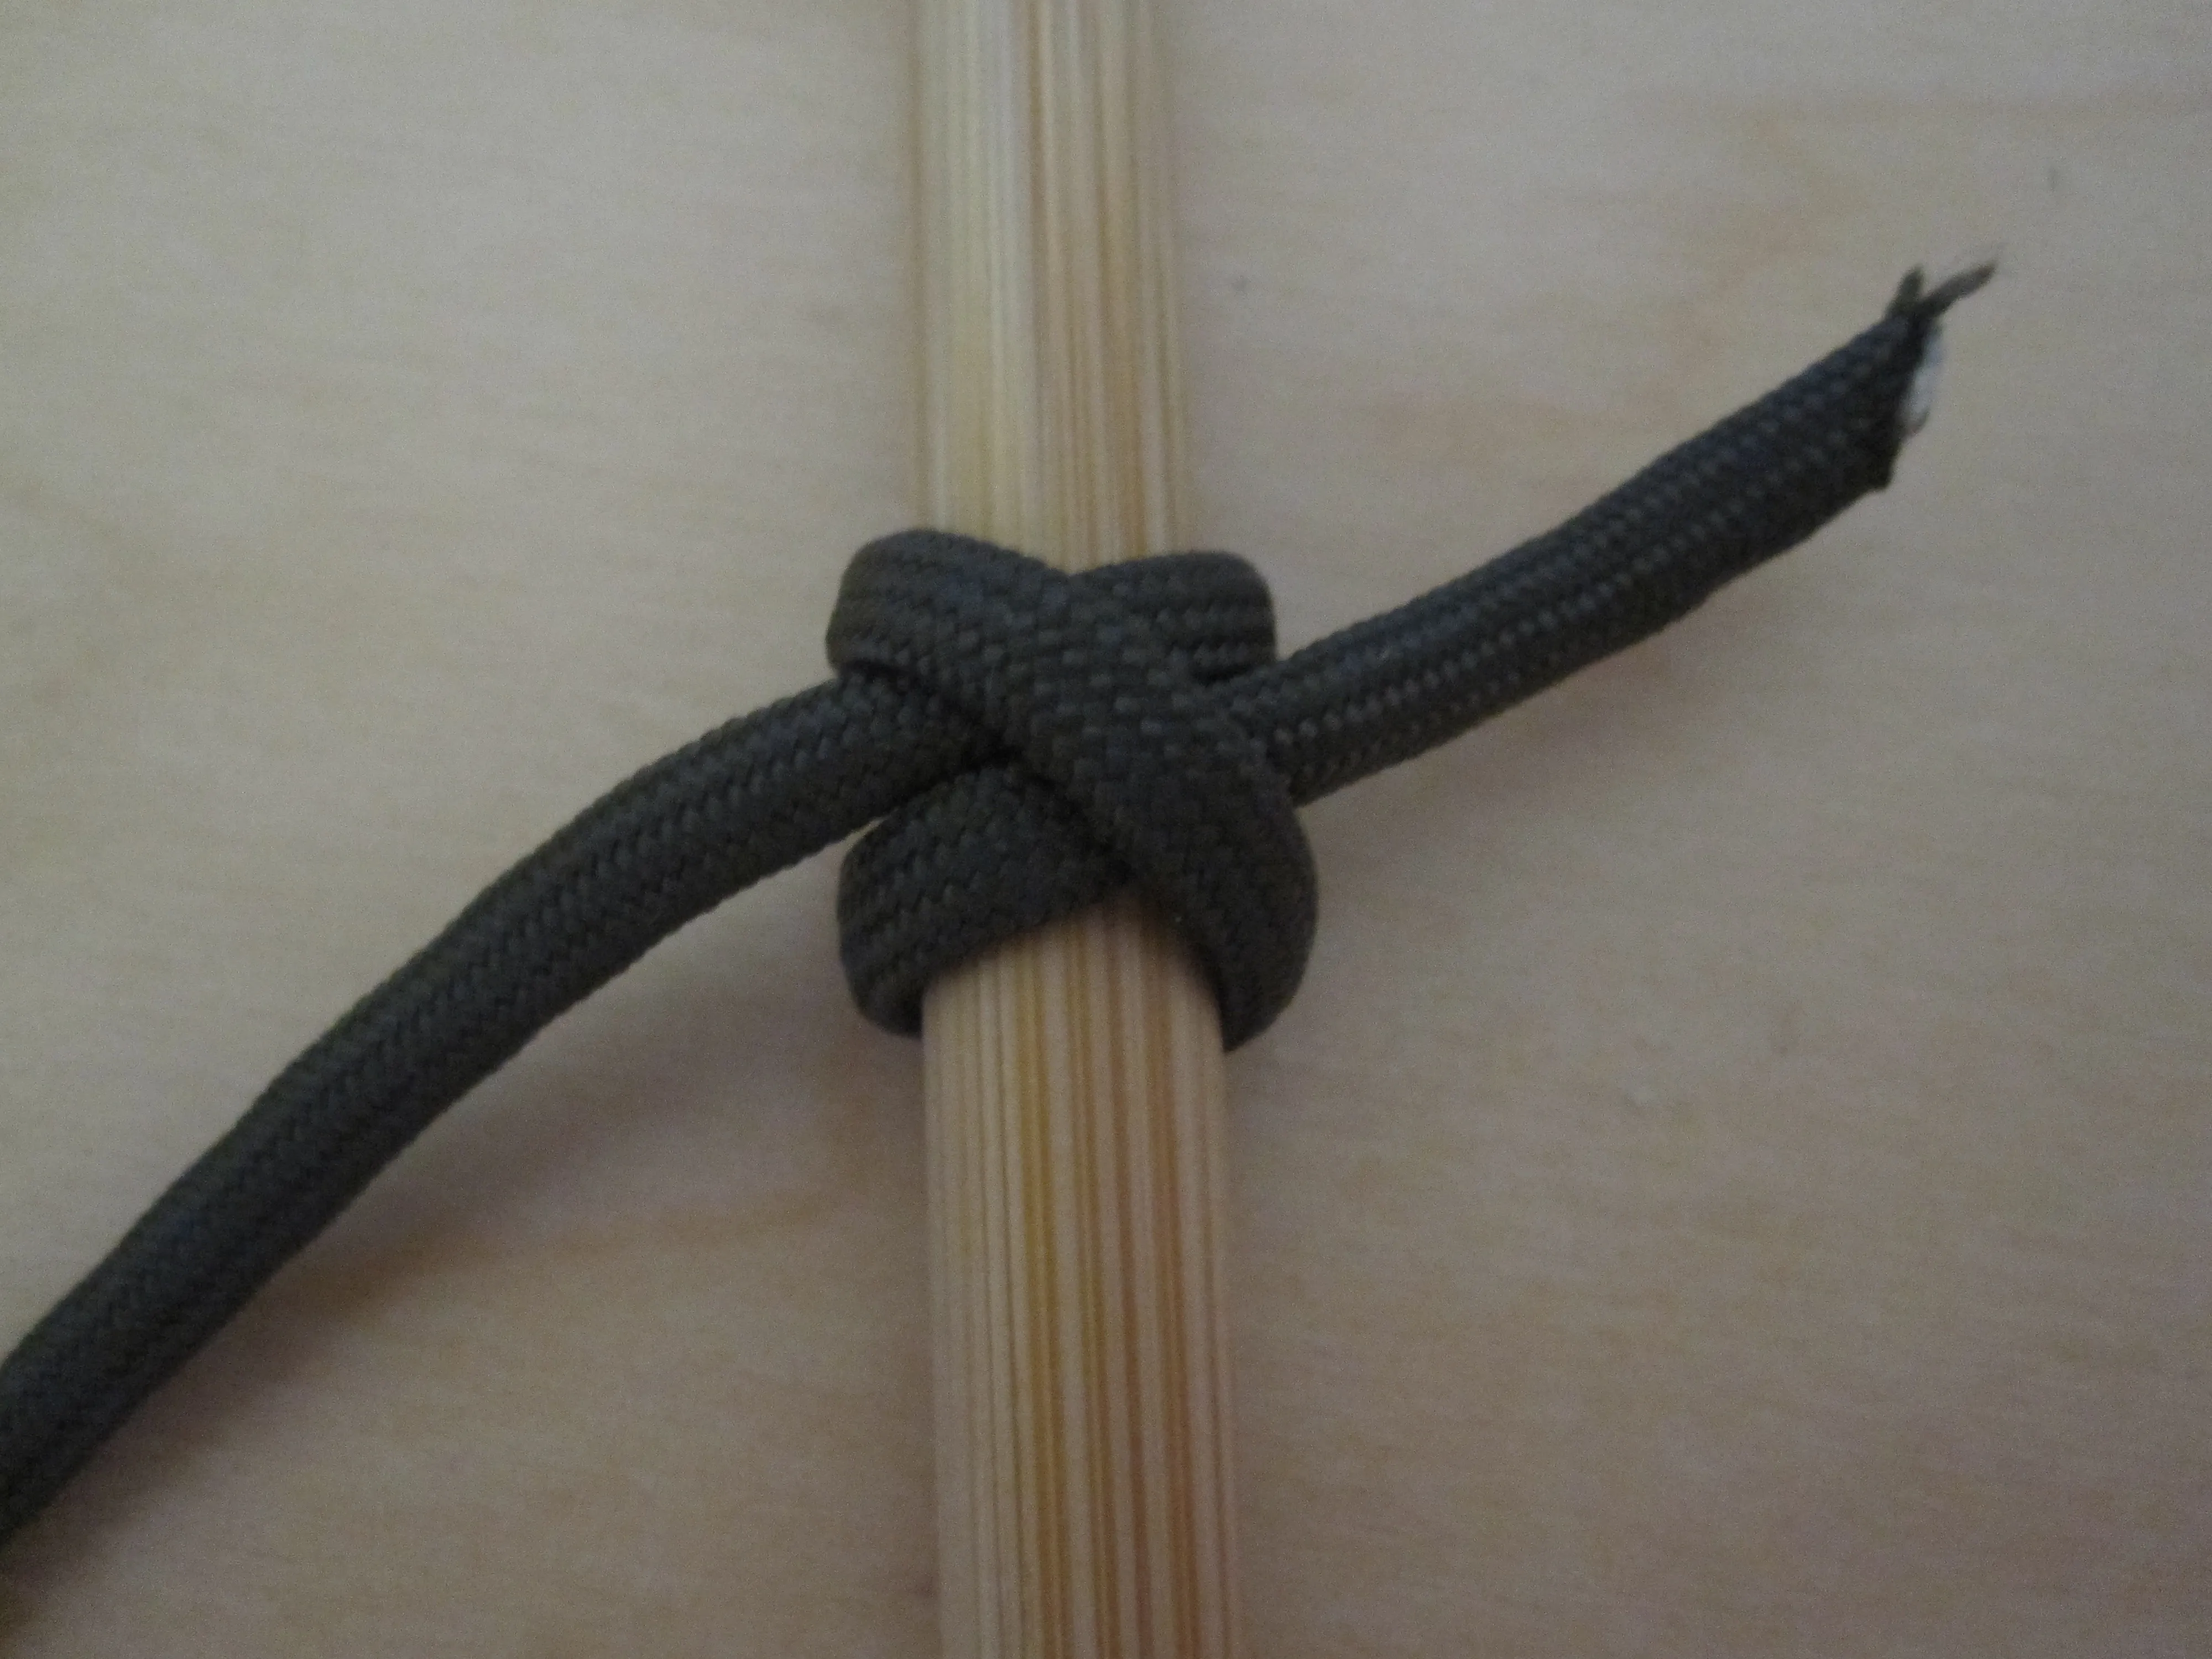
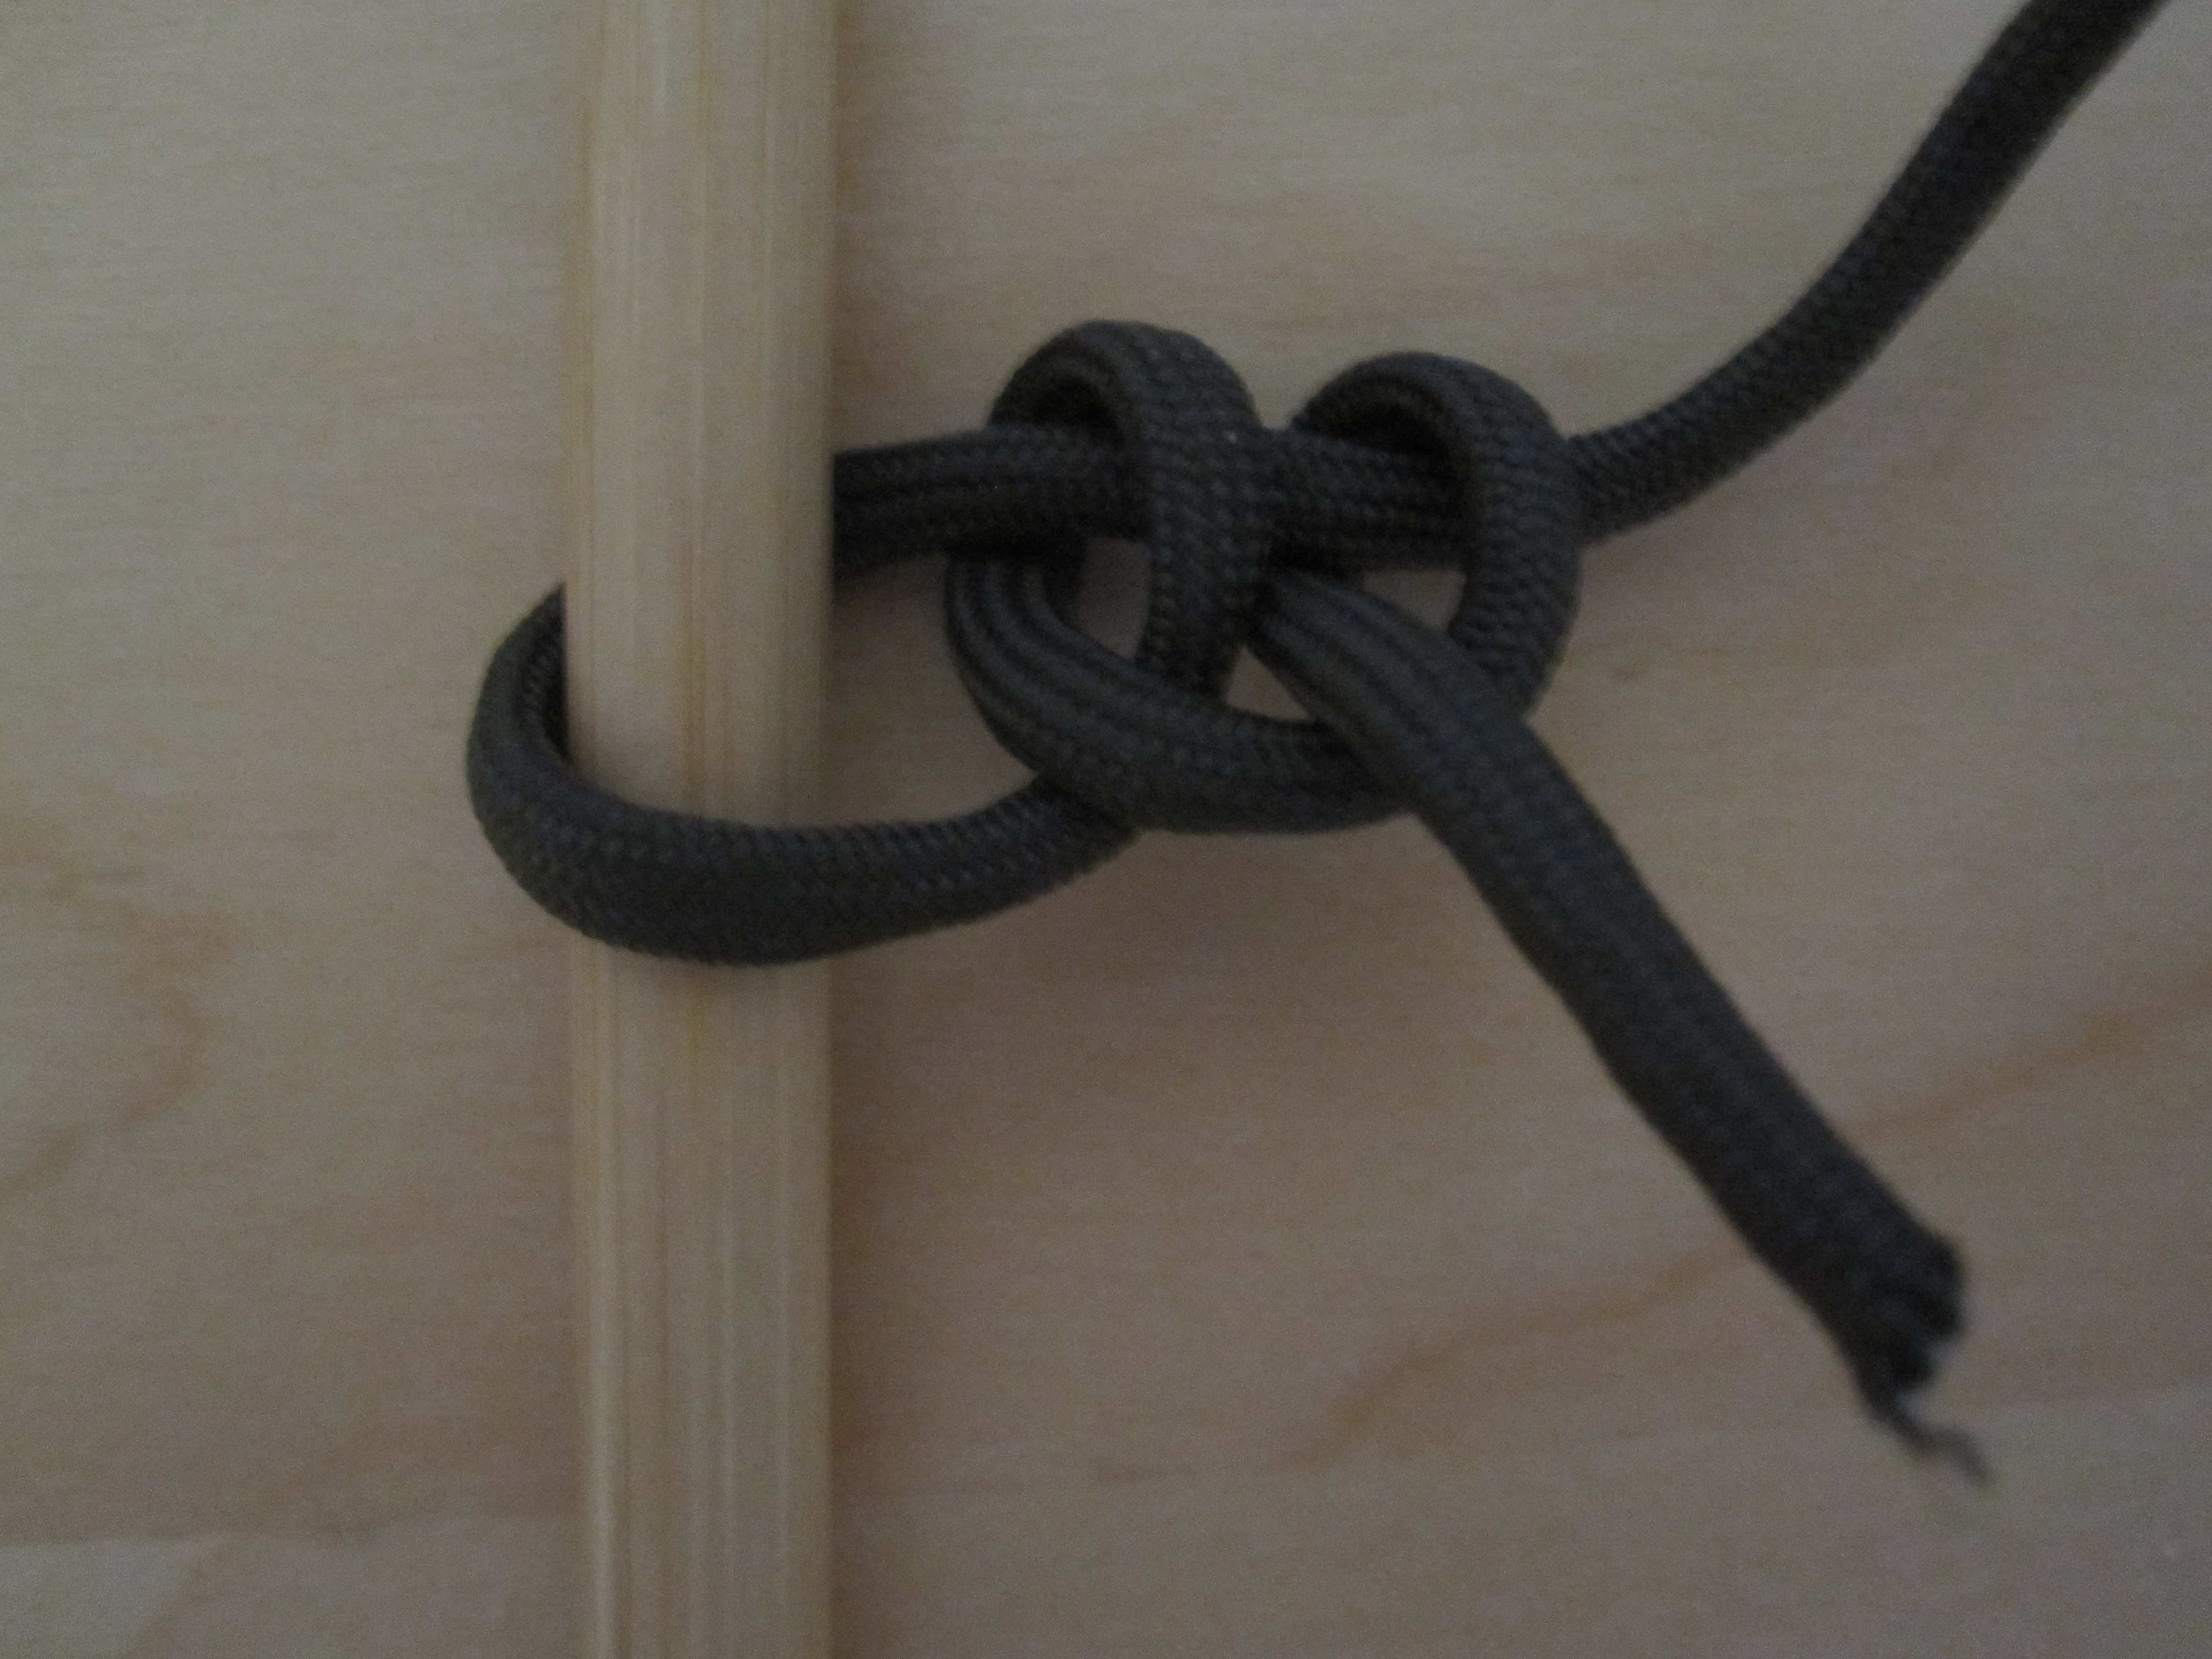
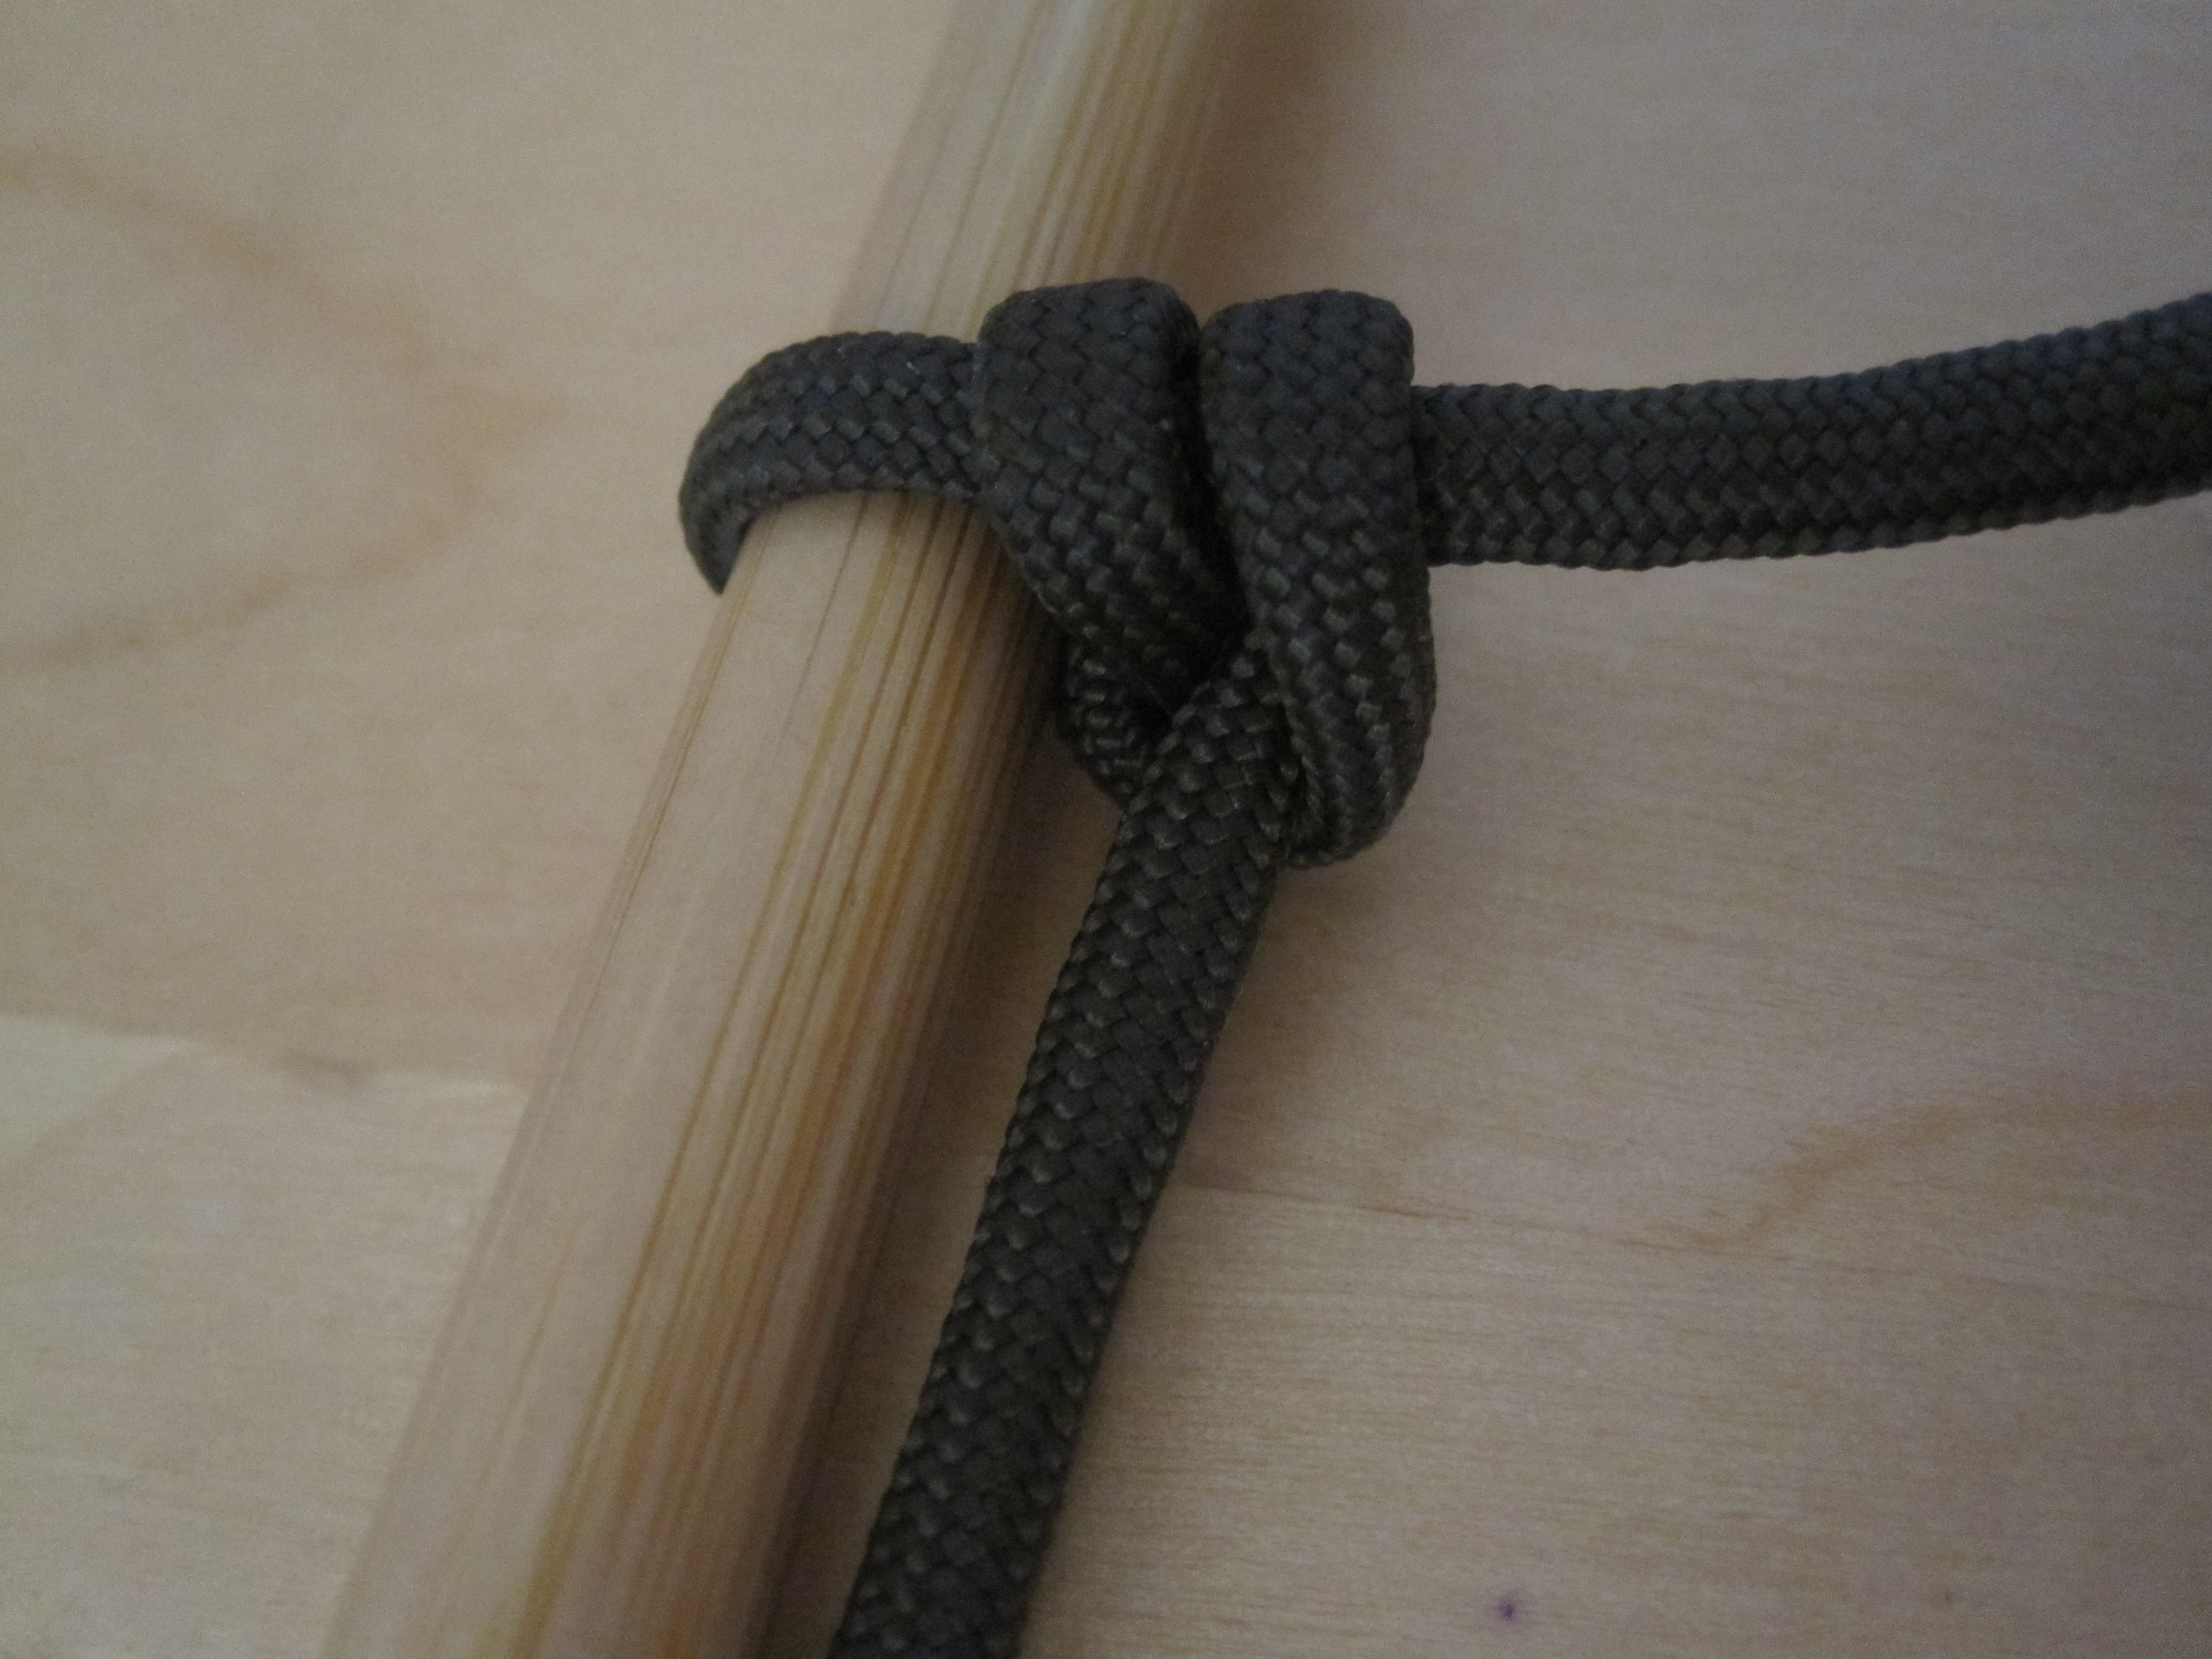
7. The Rolling Hitch
Why use this knot?
The rolling hitch is used to add a line to an arm onto a pre-existing rope.
How to tie it:
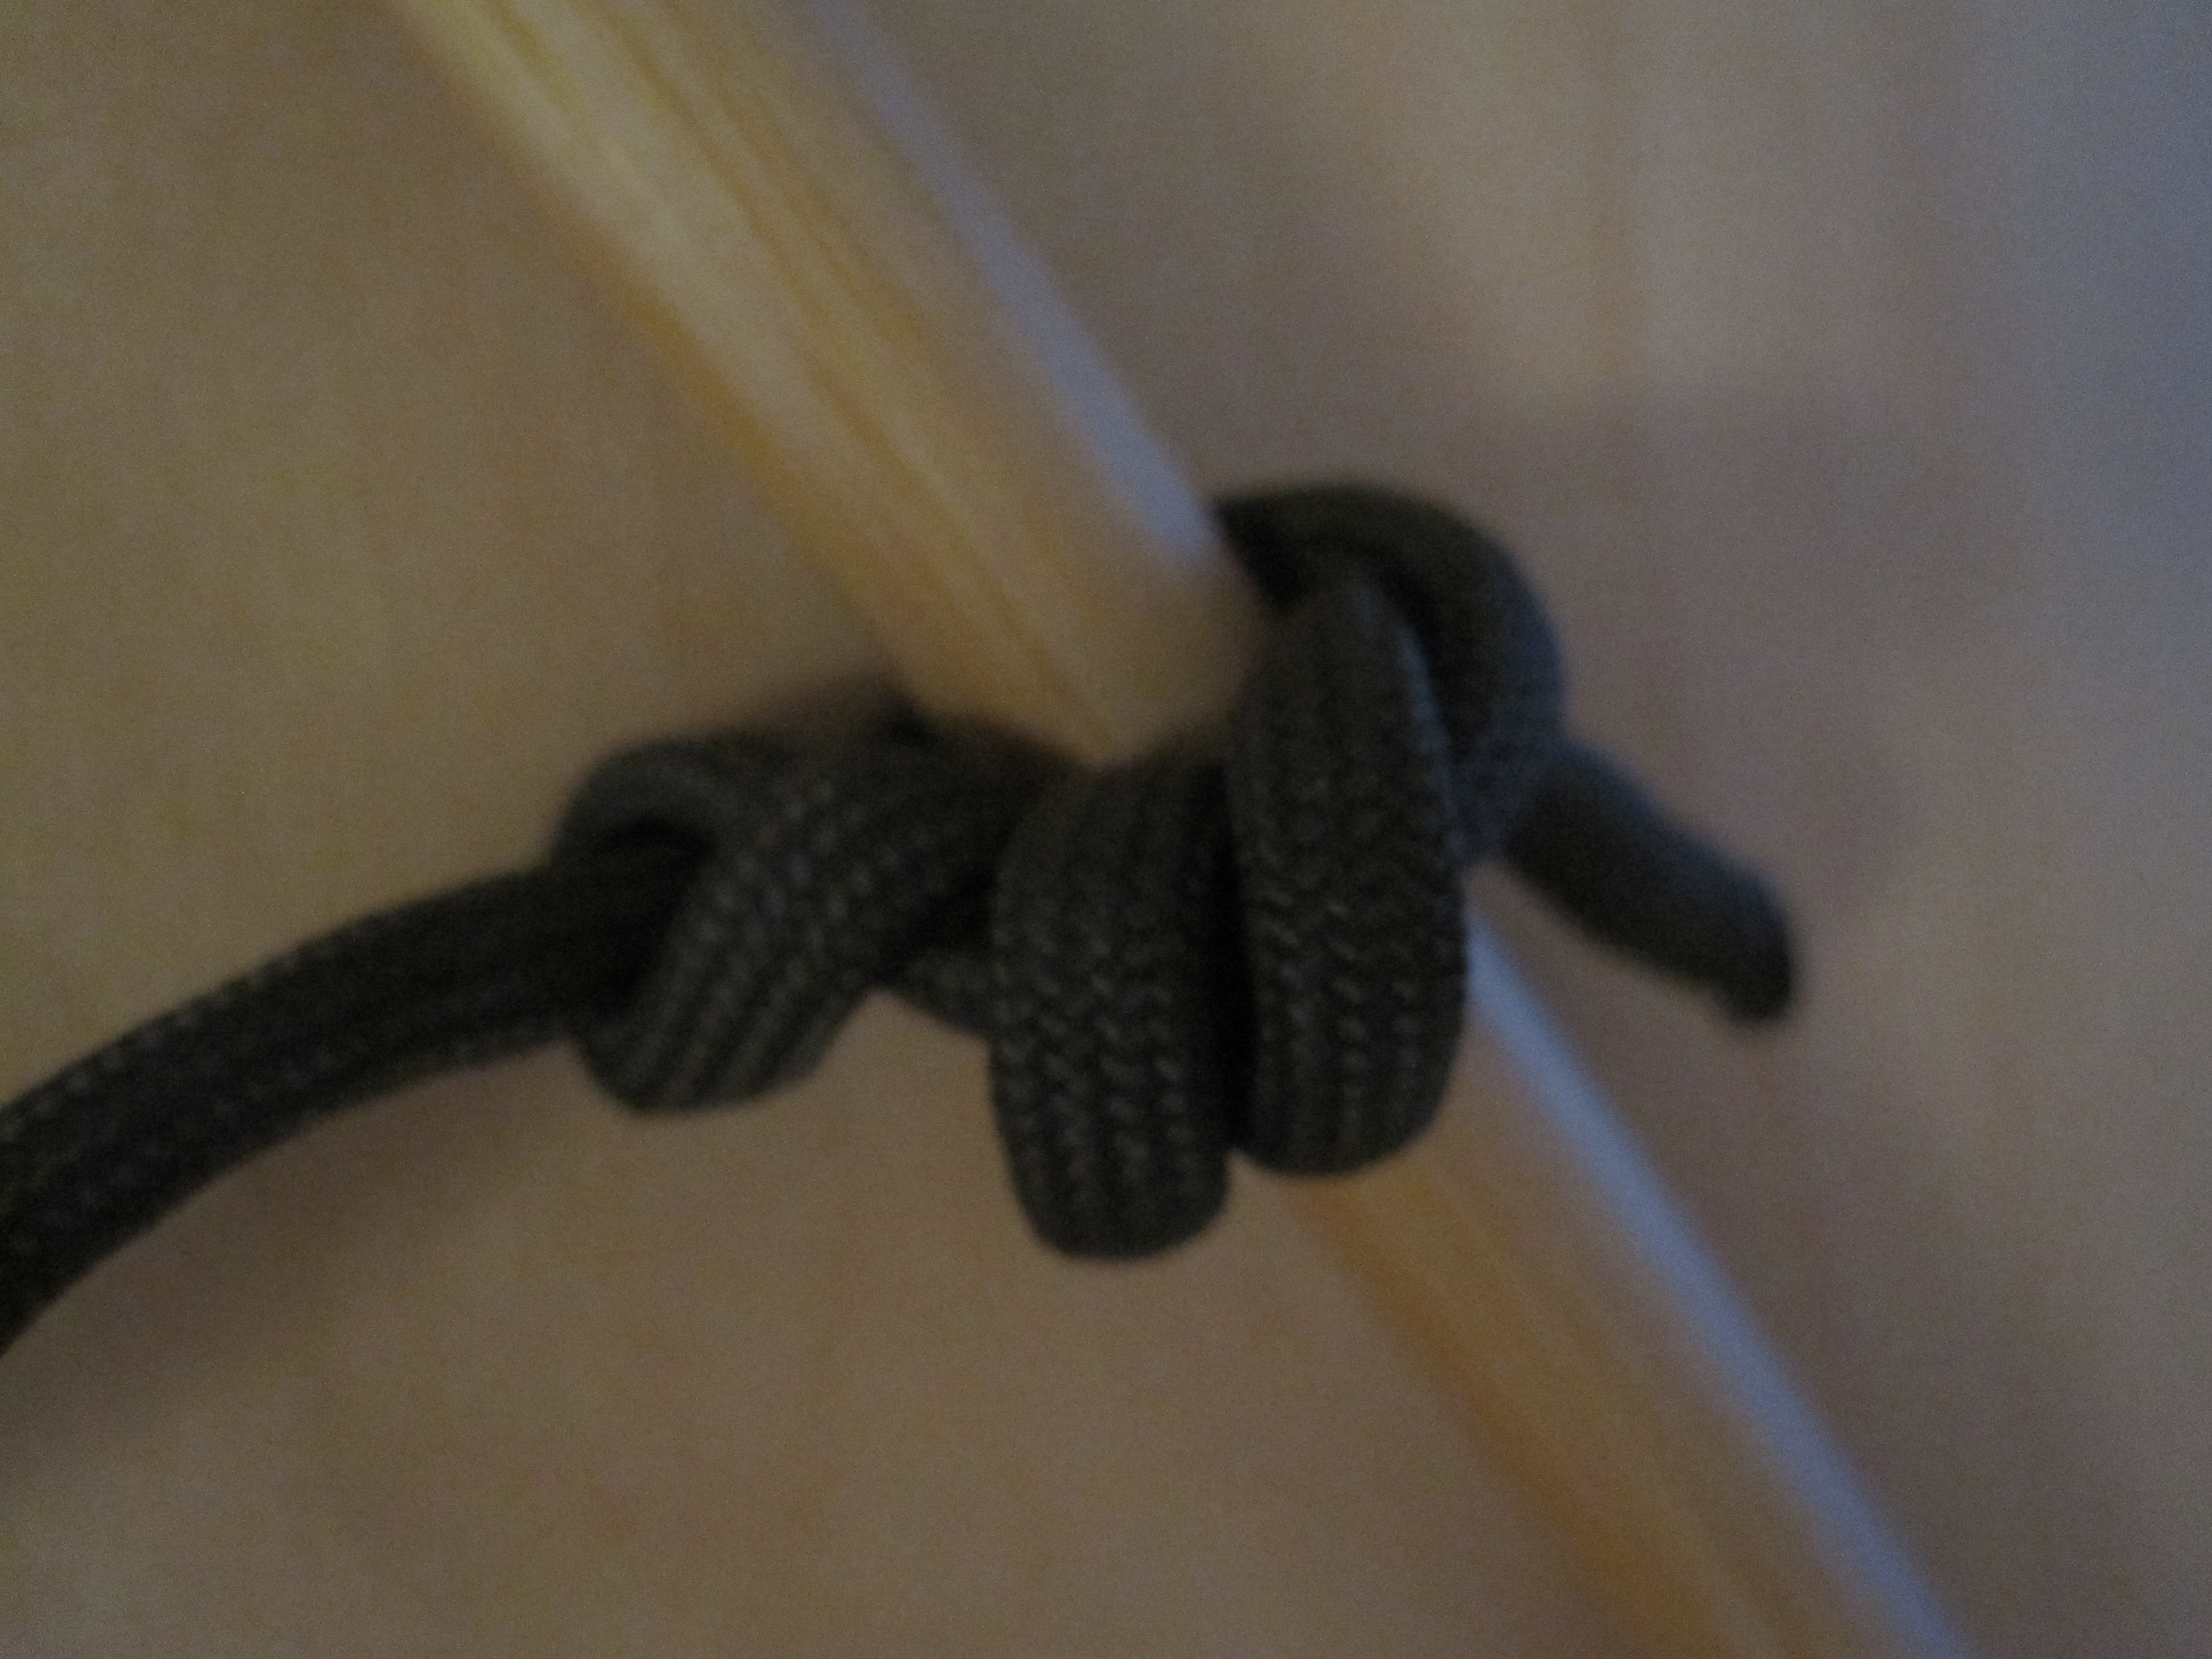
The rolling hitch is made up of three half hitches. Start with the end of the line you are adding. Wrap it around the pre-existing rope to create a half hitch. Make a second half hitch, and then go over the entire knot with the third half hitch ending on the opposite side from the starting place.
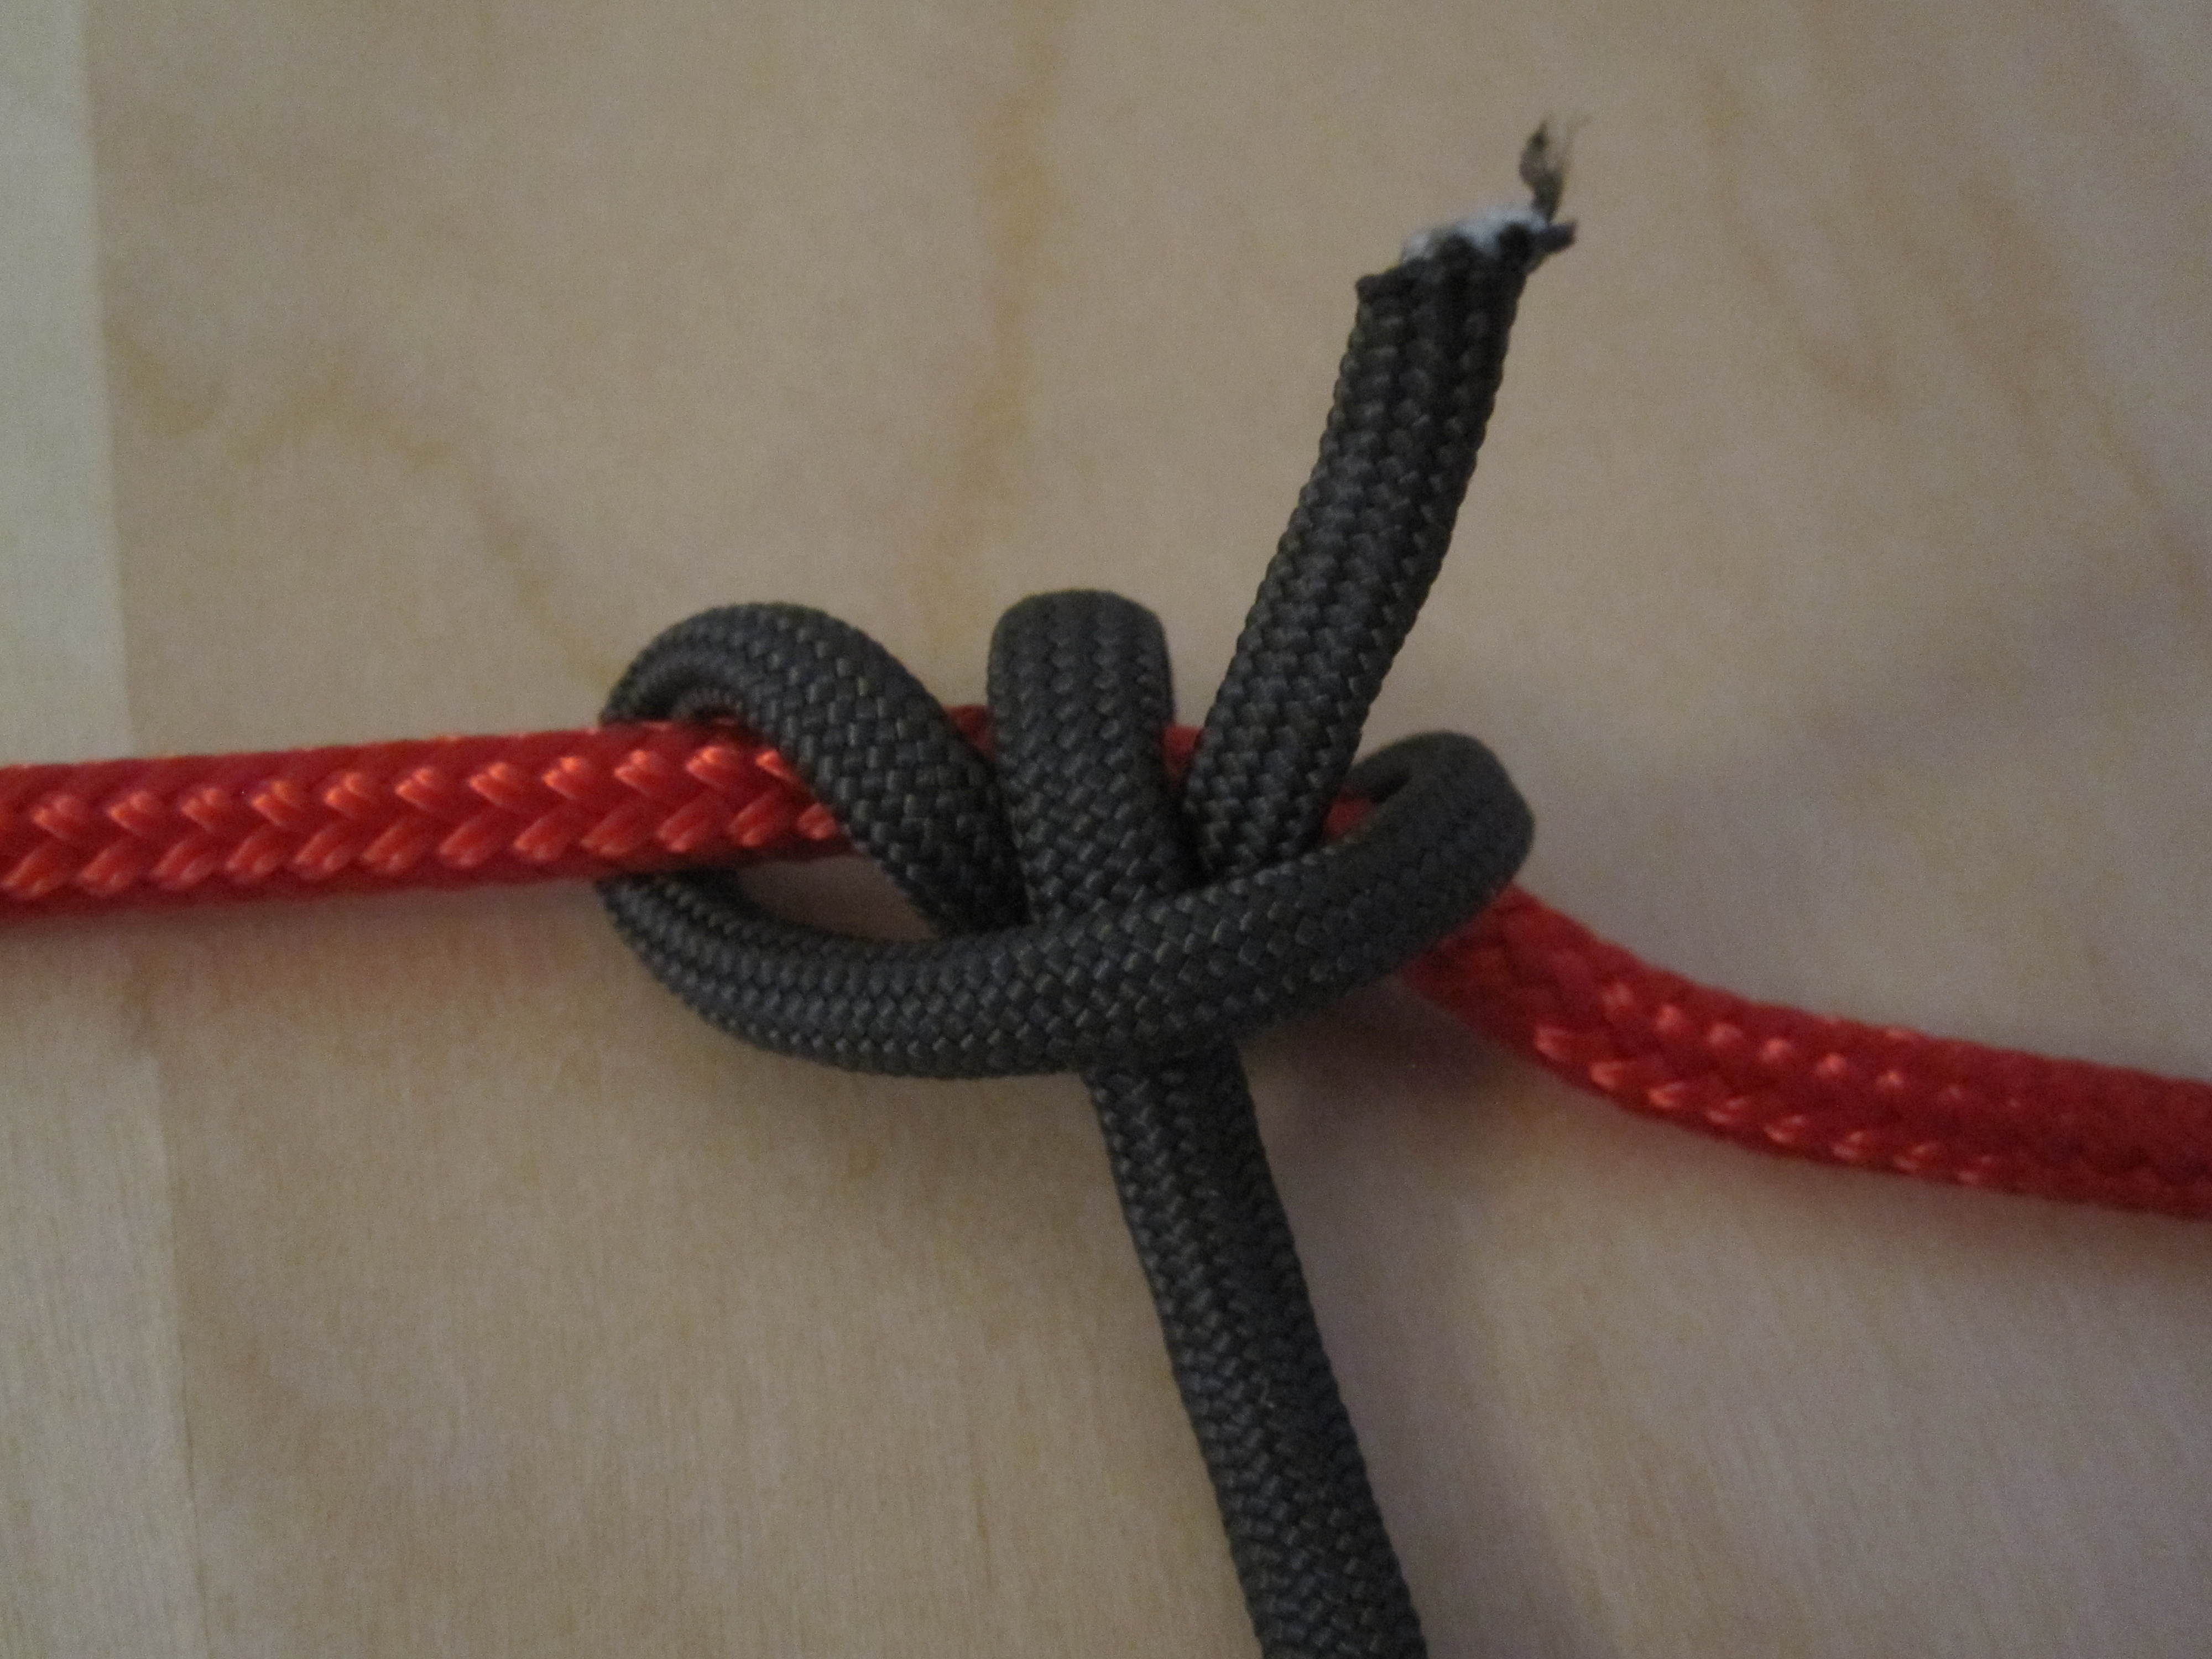
8. The Prusik Knot
Why use this knot?
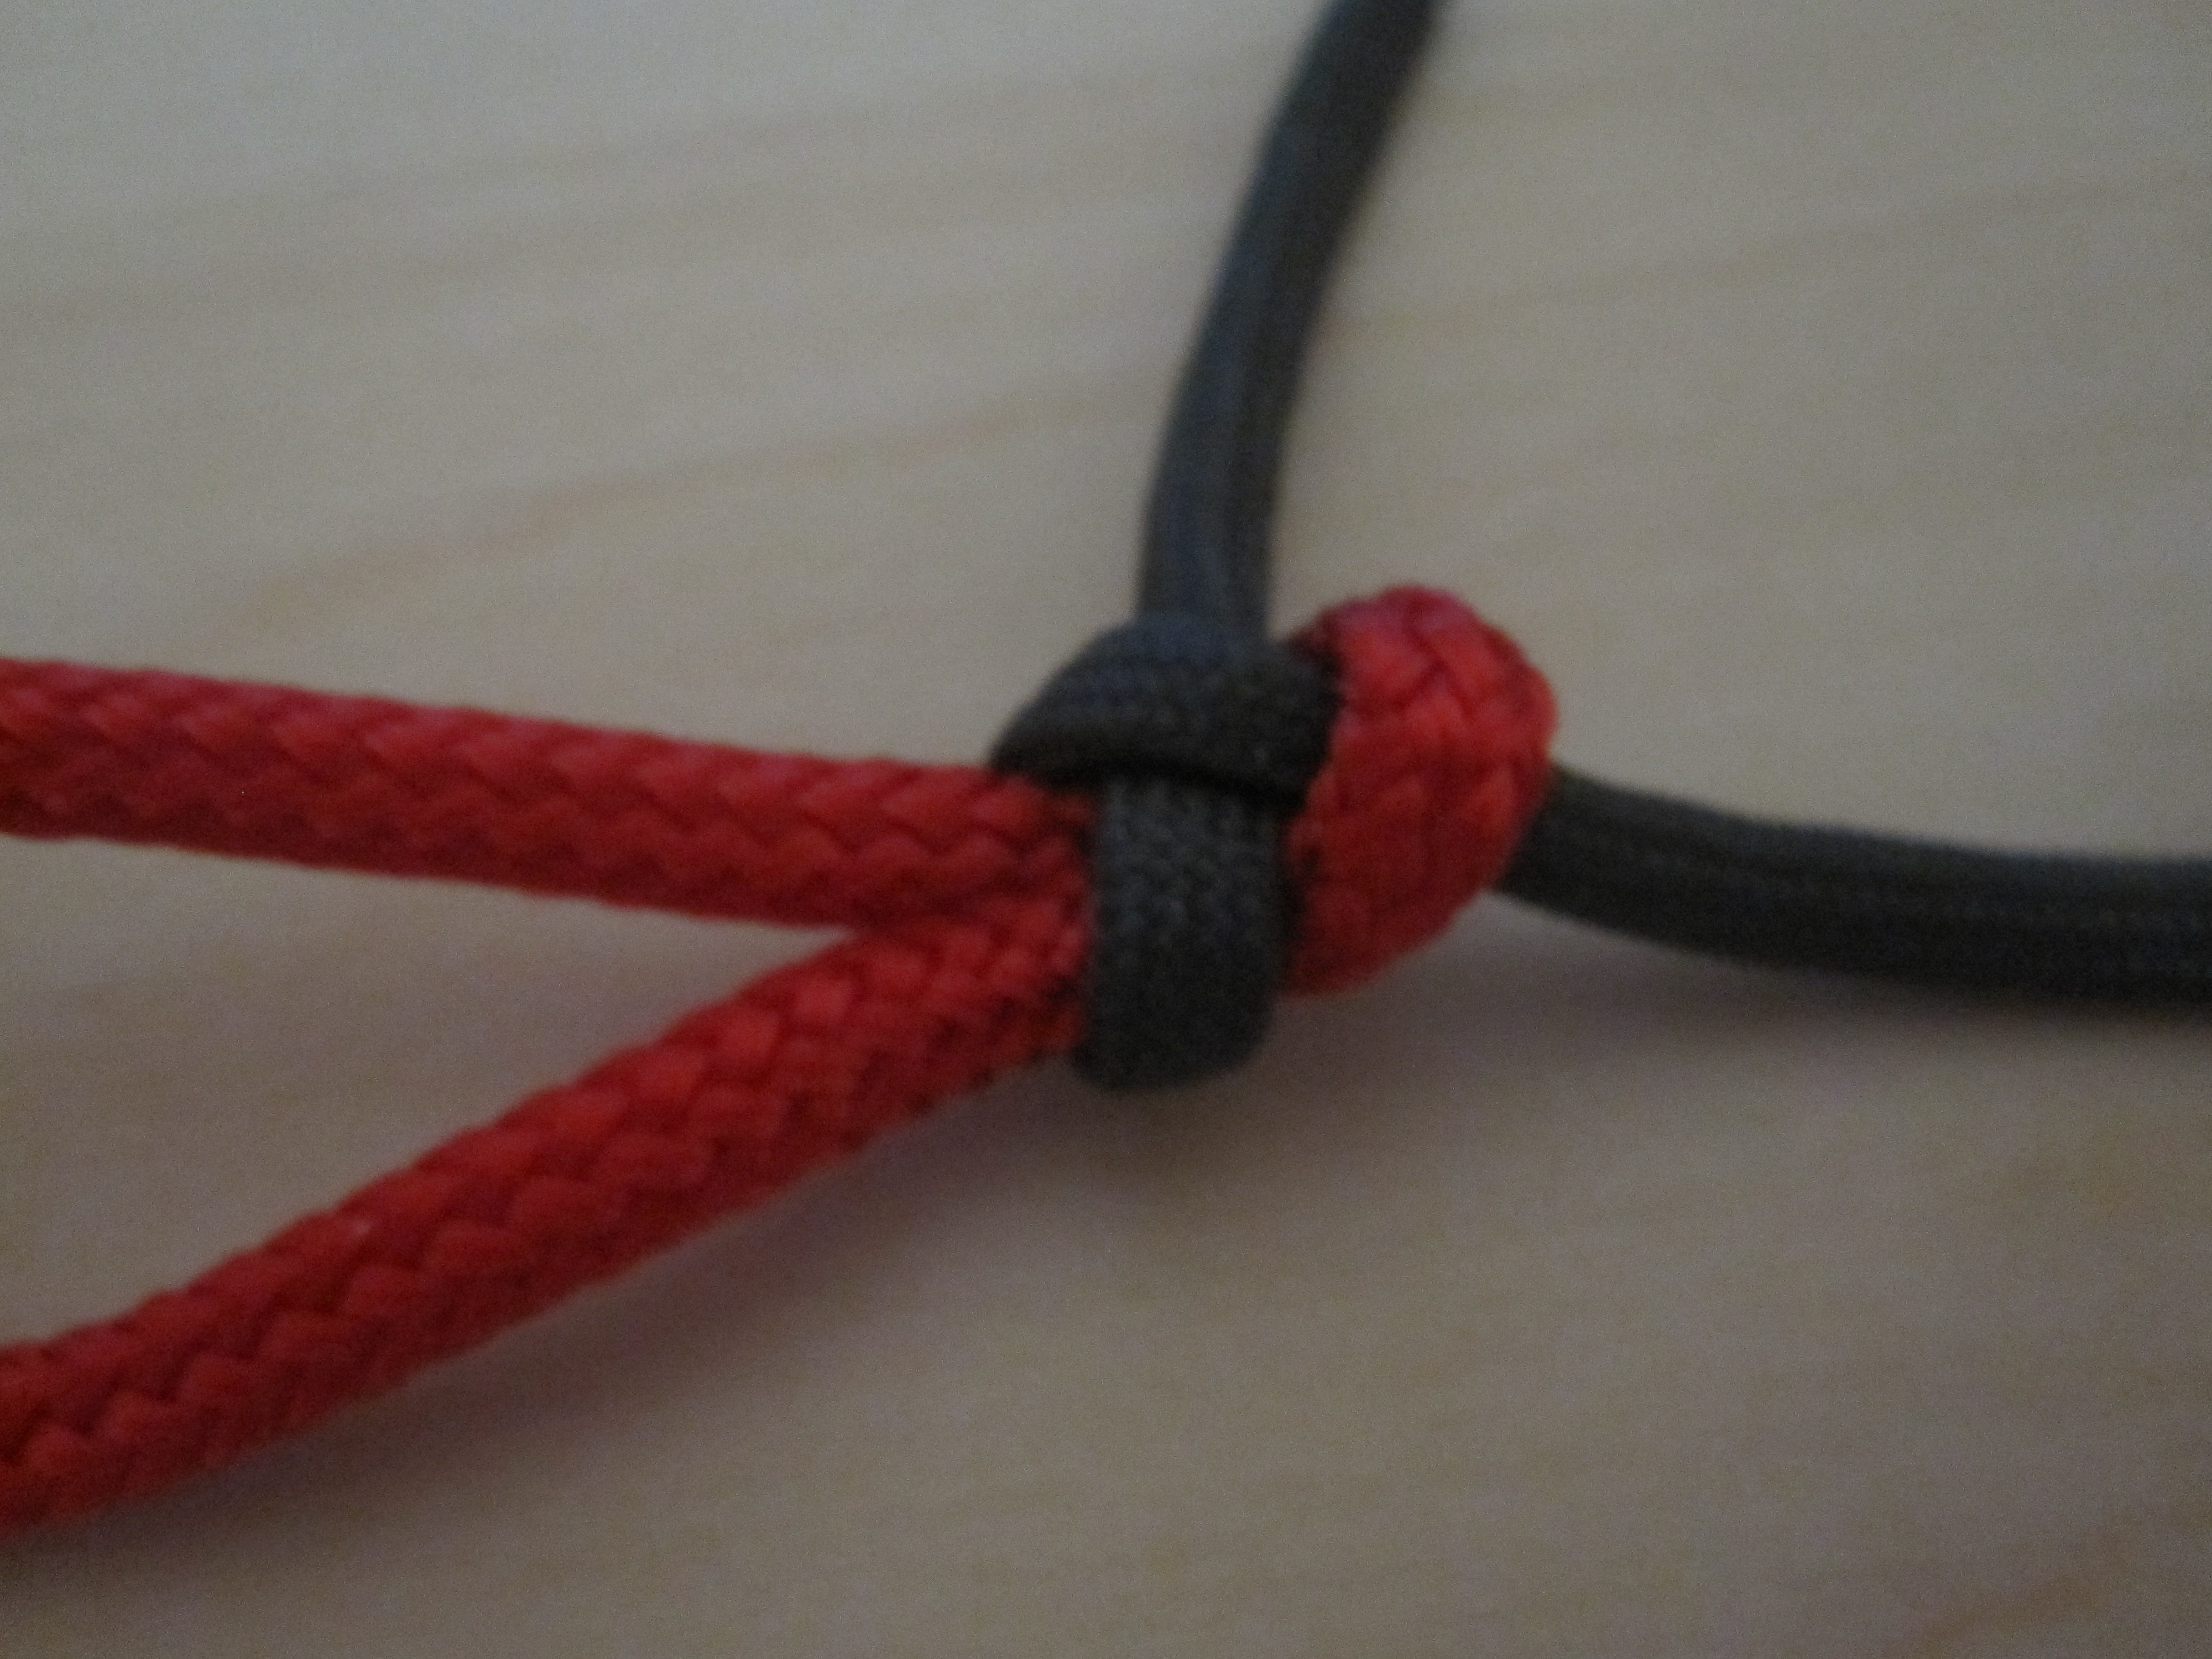
The Prusik knot creates a loop that attaches to another rope. This loop can be used as an attachment point when neither end of the rope is free. It can also be used to ascend and descend, as it slides when there is no weight or tension and then tightens when tension is added.
How to tie it:
The Prusik knot is used to attach to a pre-existing rope. You only need a short piece of line or rope to attach and make an attachment point. Start by tying a square knot on your attachment line. Then wrap the line around the pre-existing rope three times, making sure it lays flat against the larger rope. Then simply pass the knot through itself and pull tight.
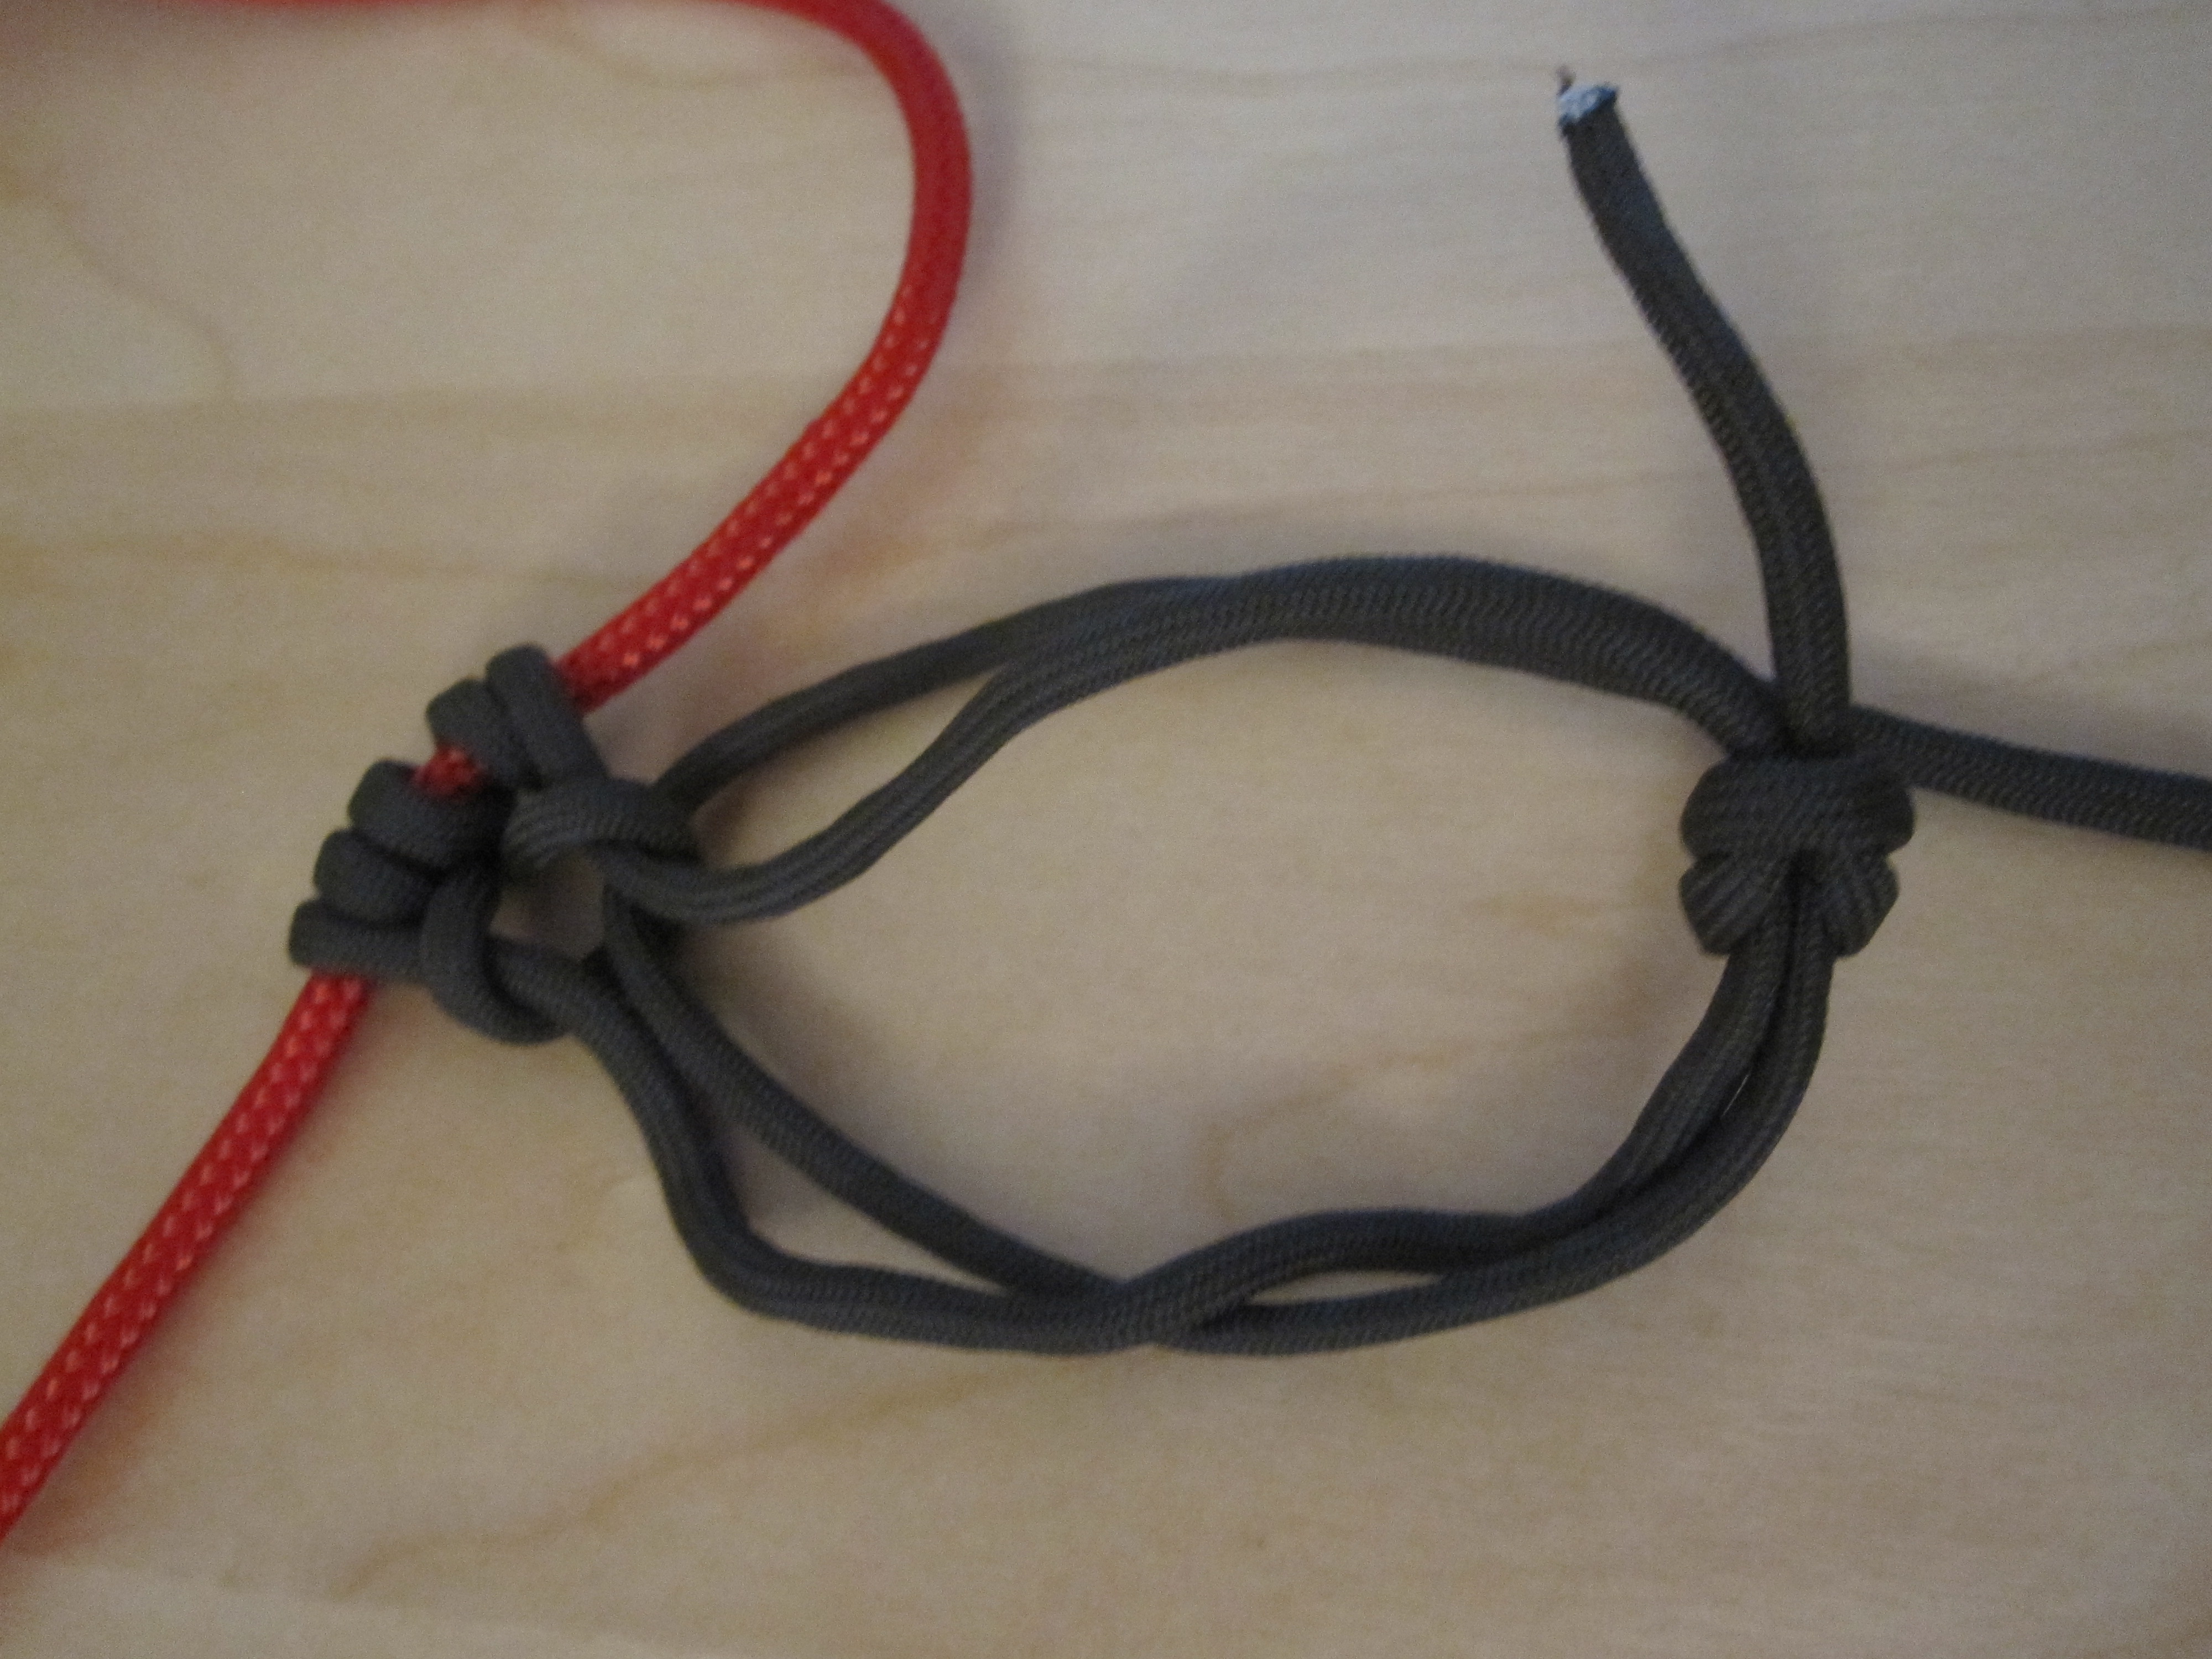
There is an extra line running through the loop in this picture (I didn't want to cut the rope).
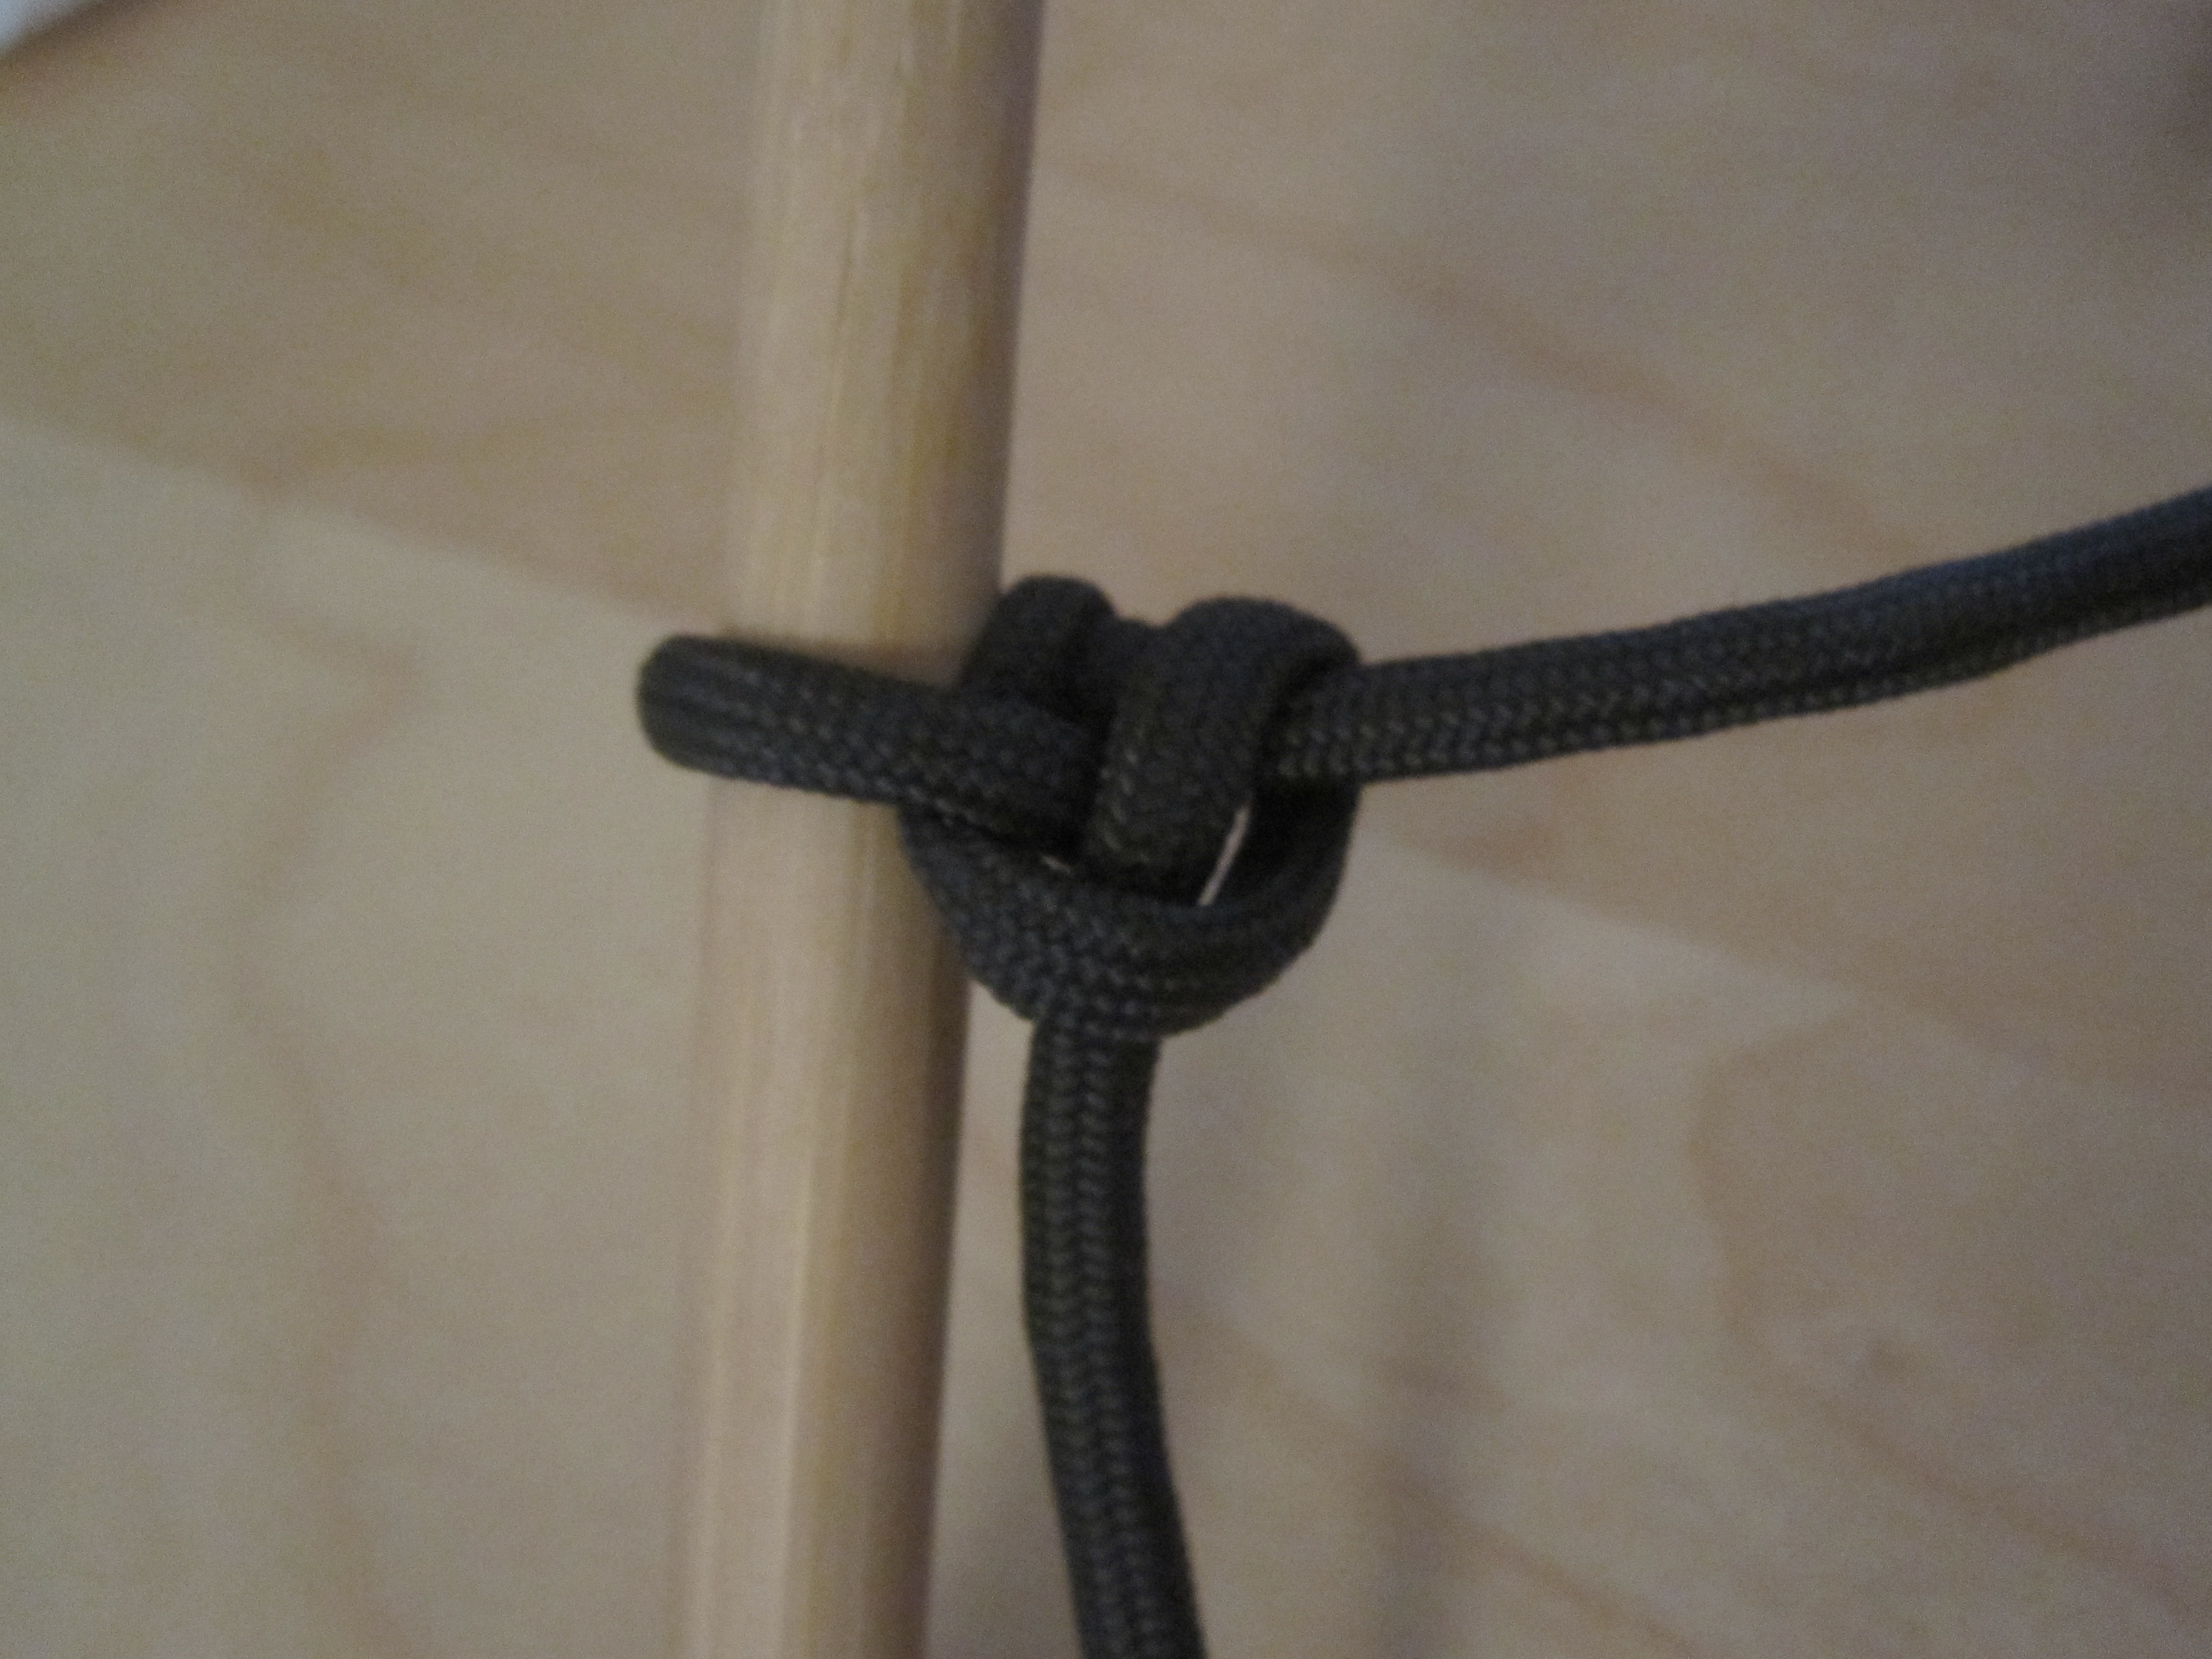
9. The Timber Hitch
Why use this Knot?
Moving timber can be a big part of clearing paths and building stands or blinds. The timber hitch is a quick, simple knot that will allow you to move timber safely through the woods.
How to tie it:
This hitch is similar to a fisherman's knot. Just run the end of the rope around the log or wood you want to pull, then wrap the end of the rope around the loop and pull tight.
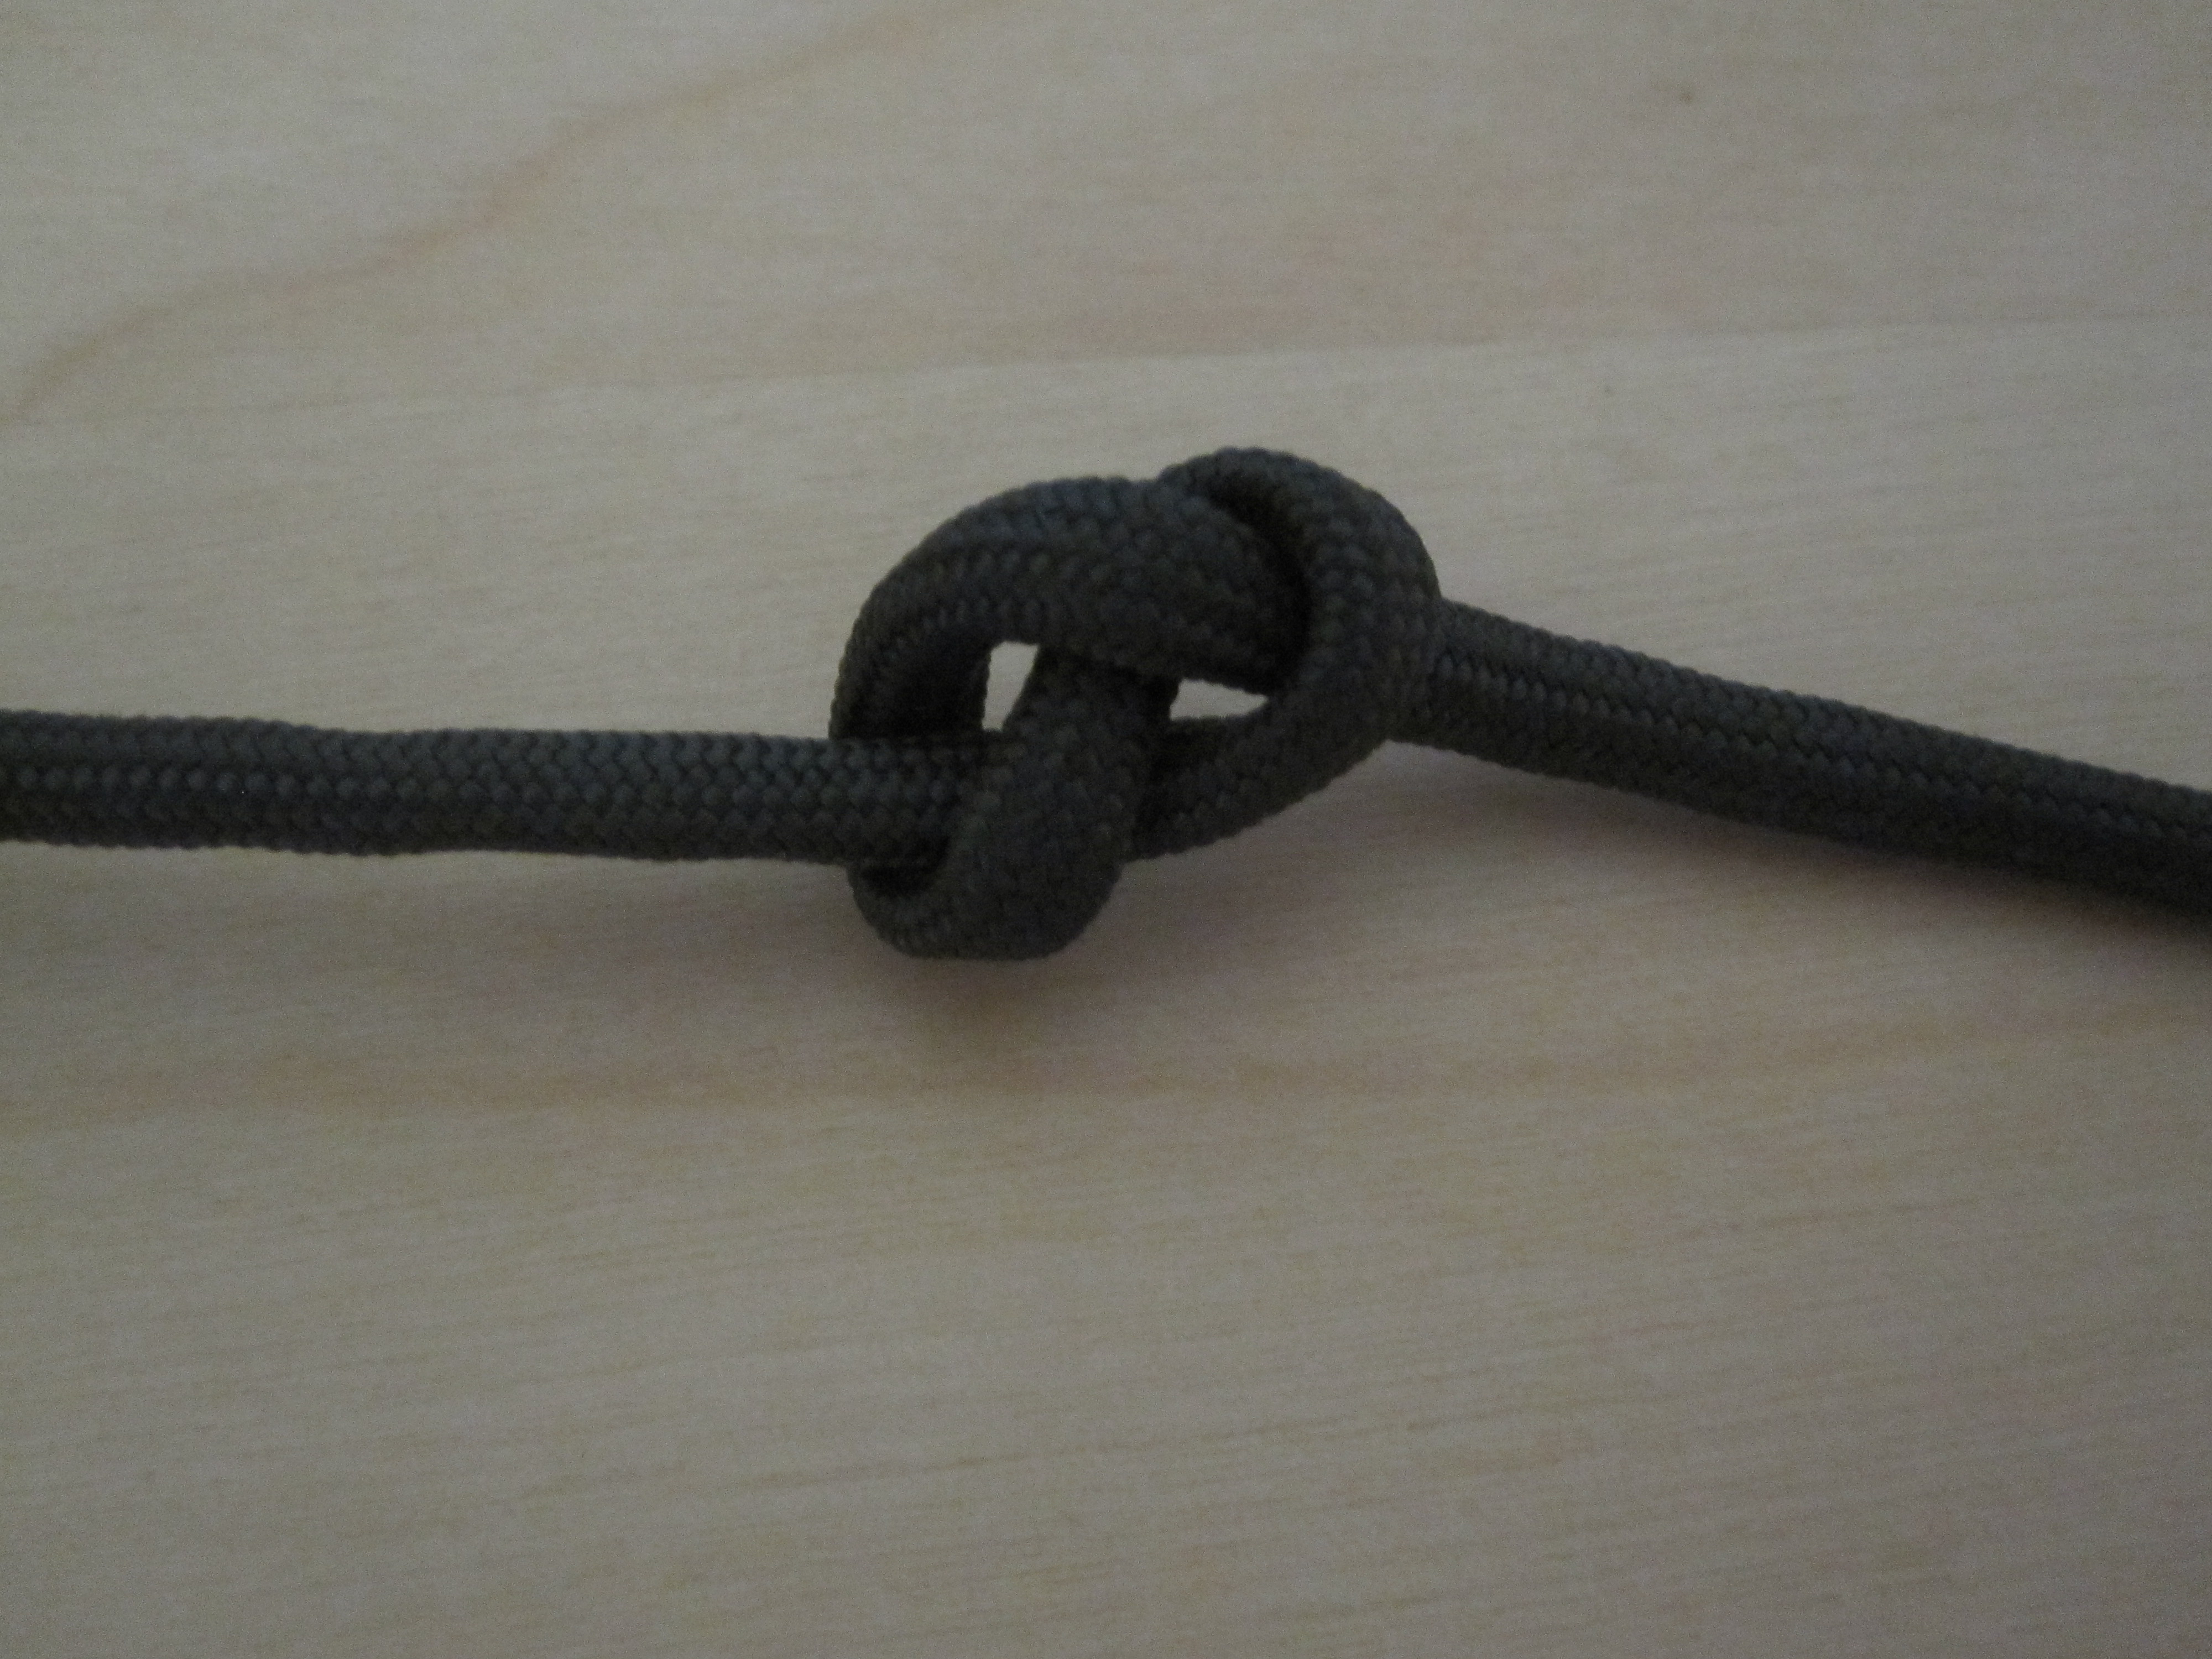
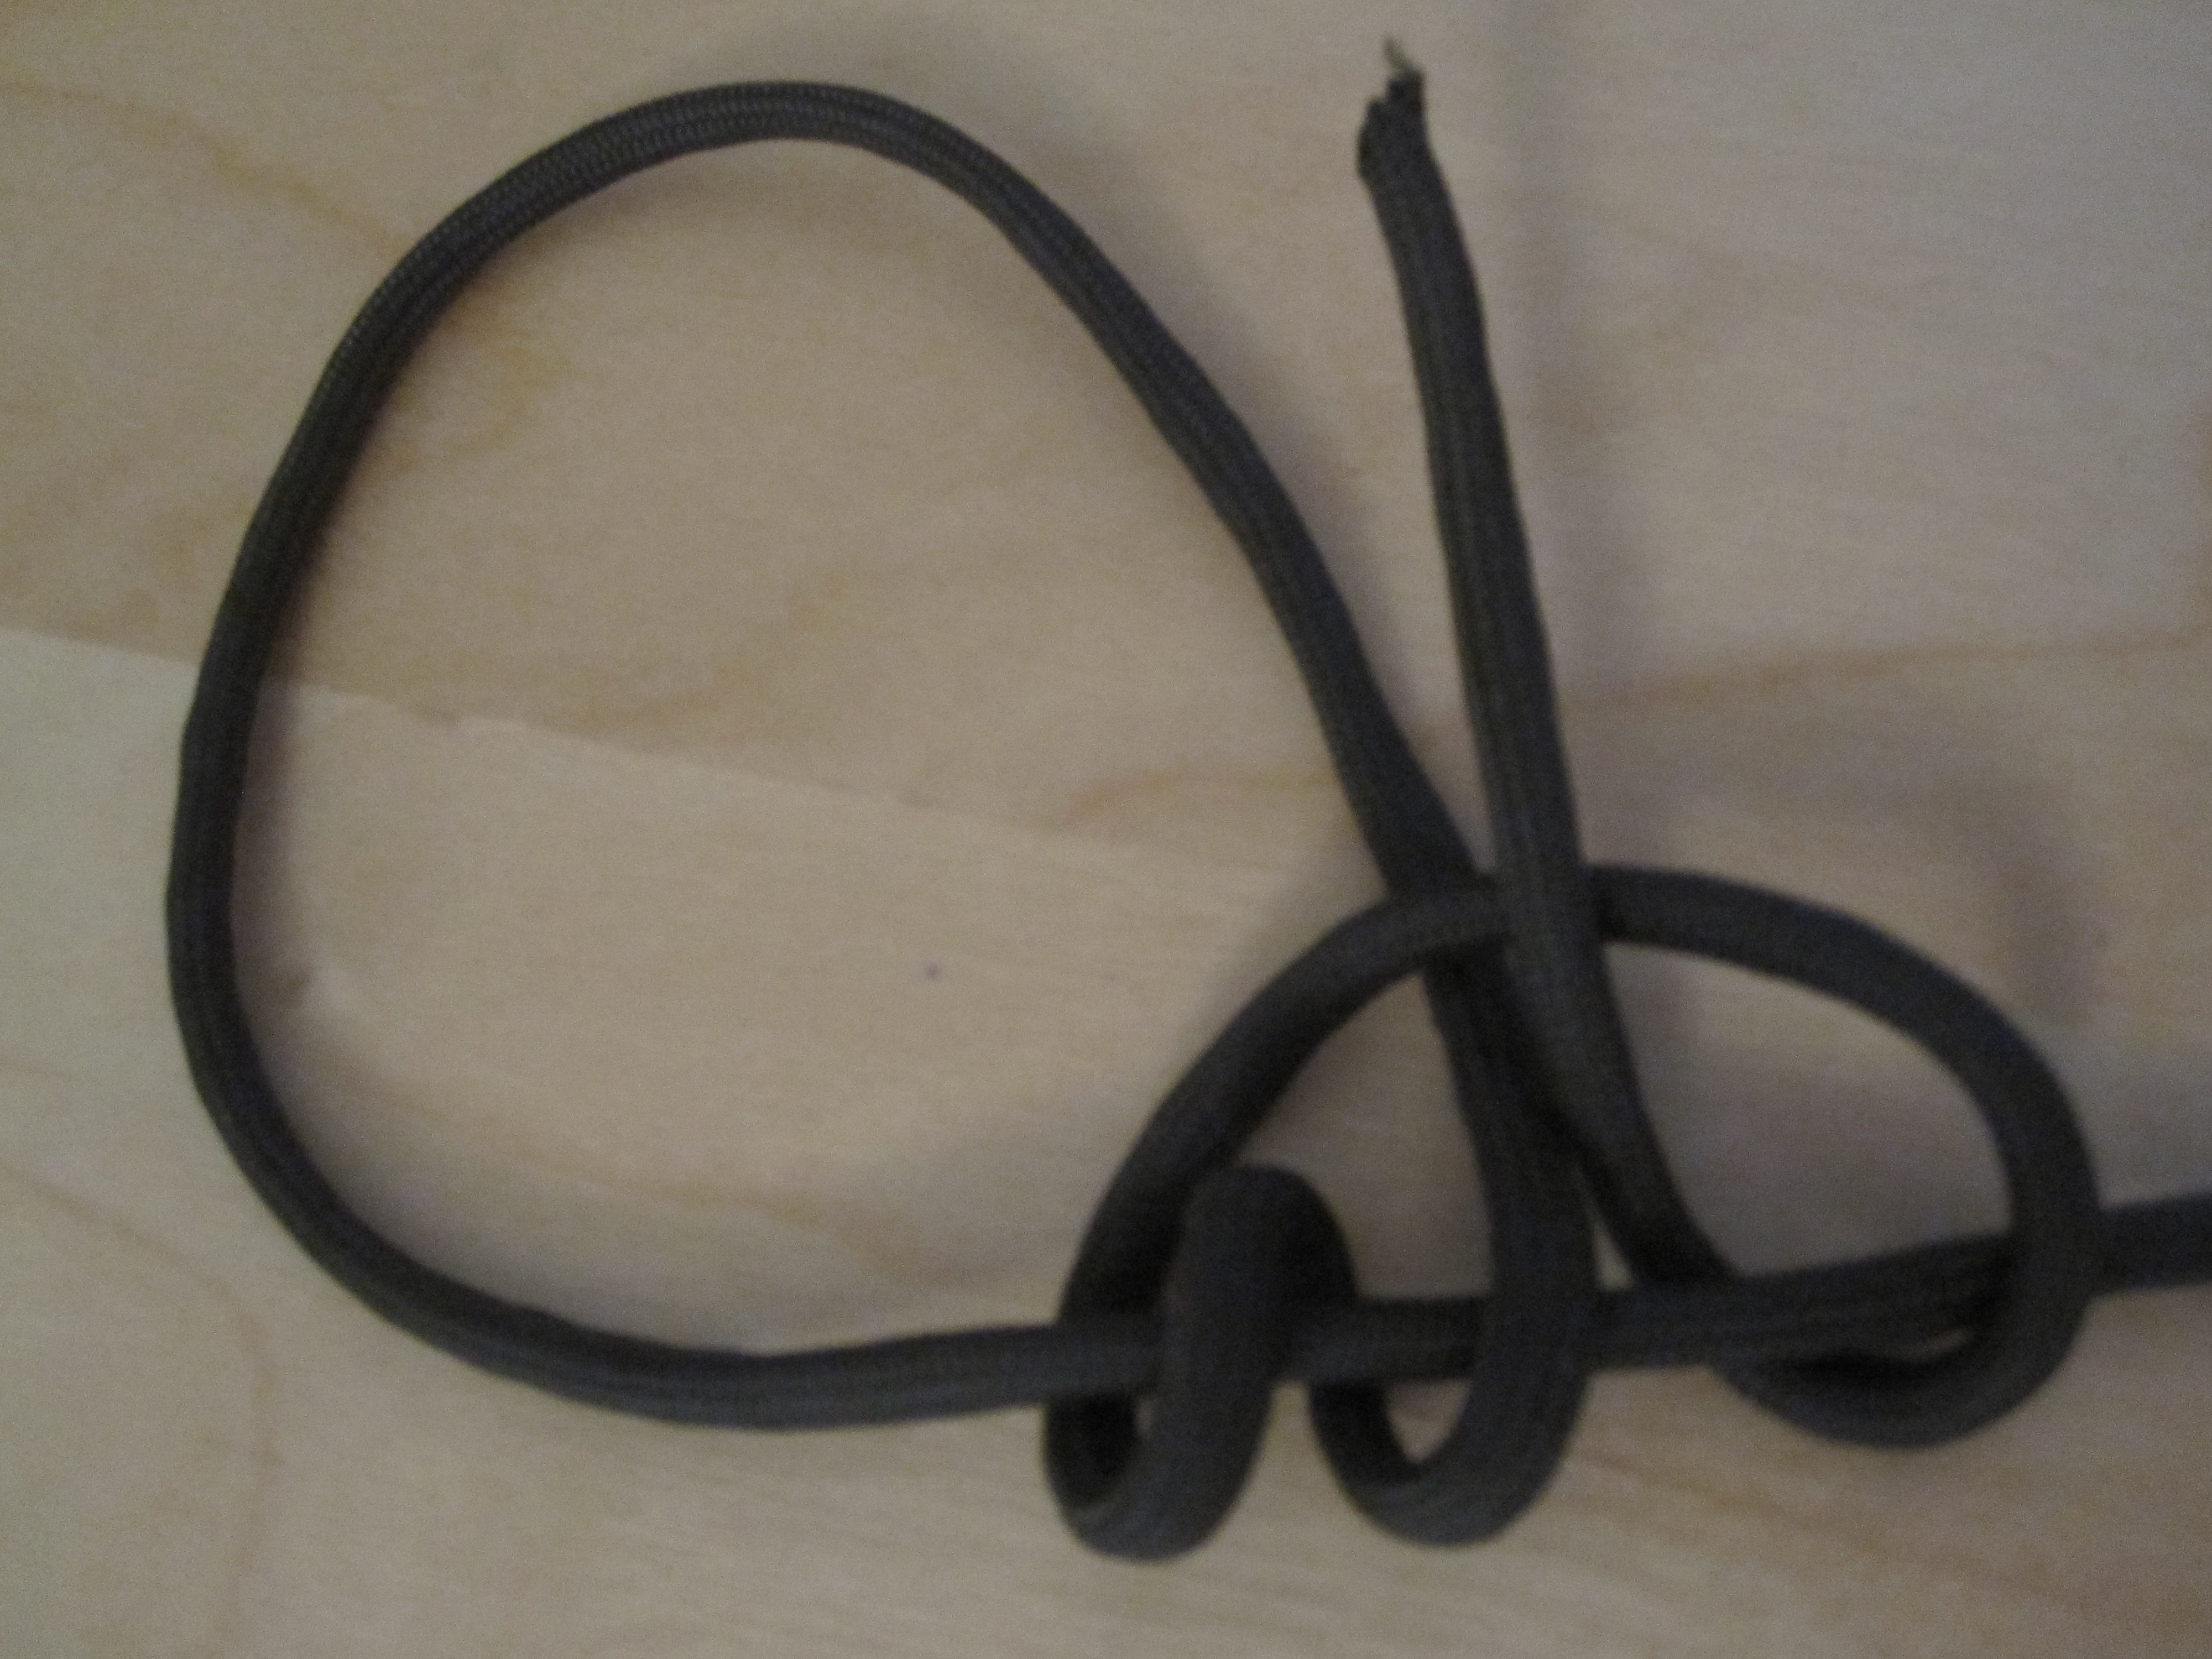
10. The Bowline
Why use this knot:
A bowline creates a loop on the end of your rope that stays the same size. The bowline knot will not tighten or loosen with use.
How to tie it:
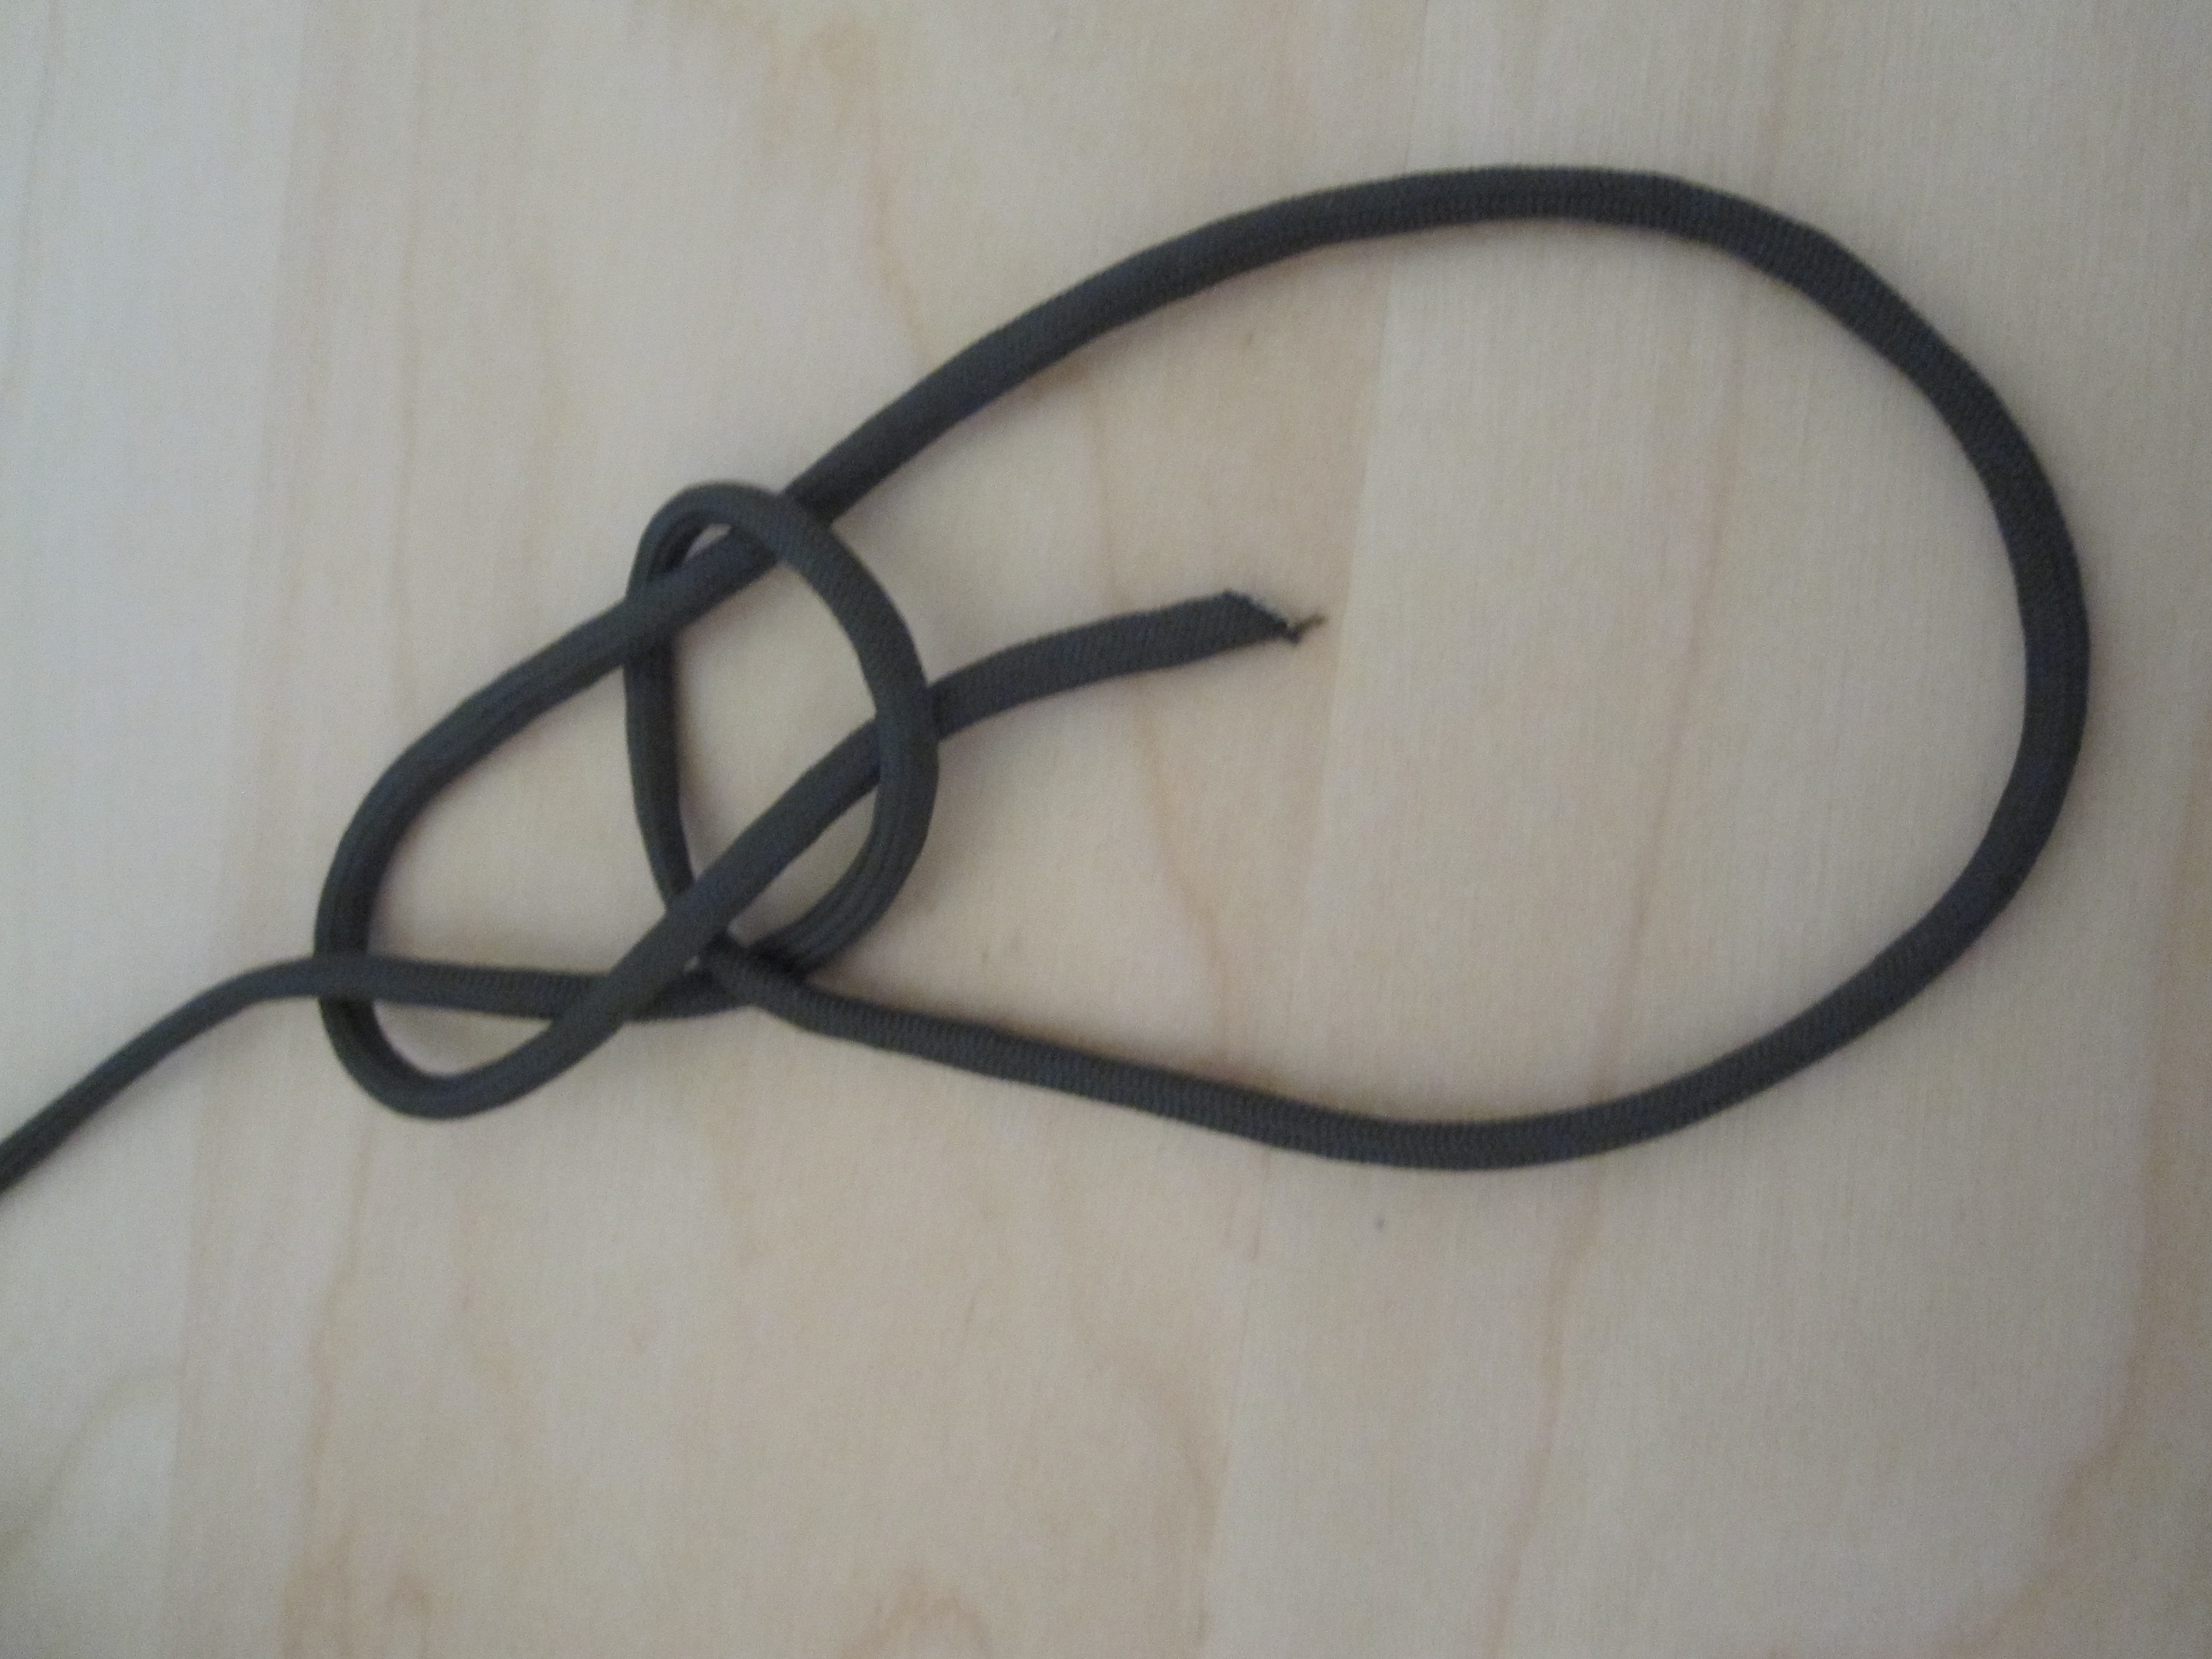
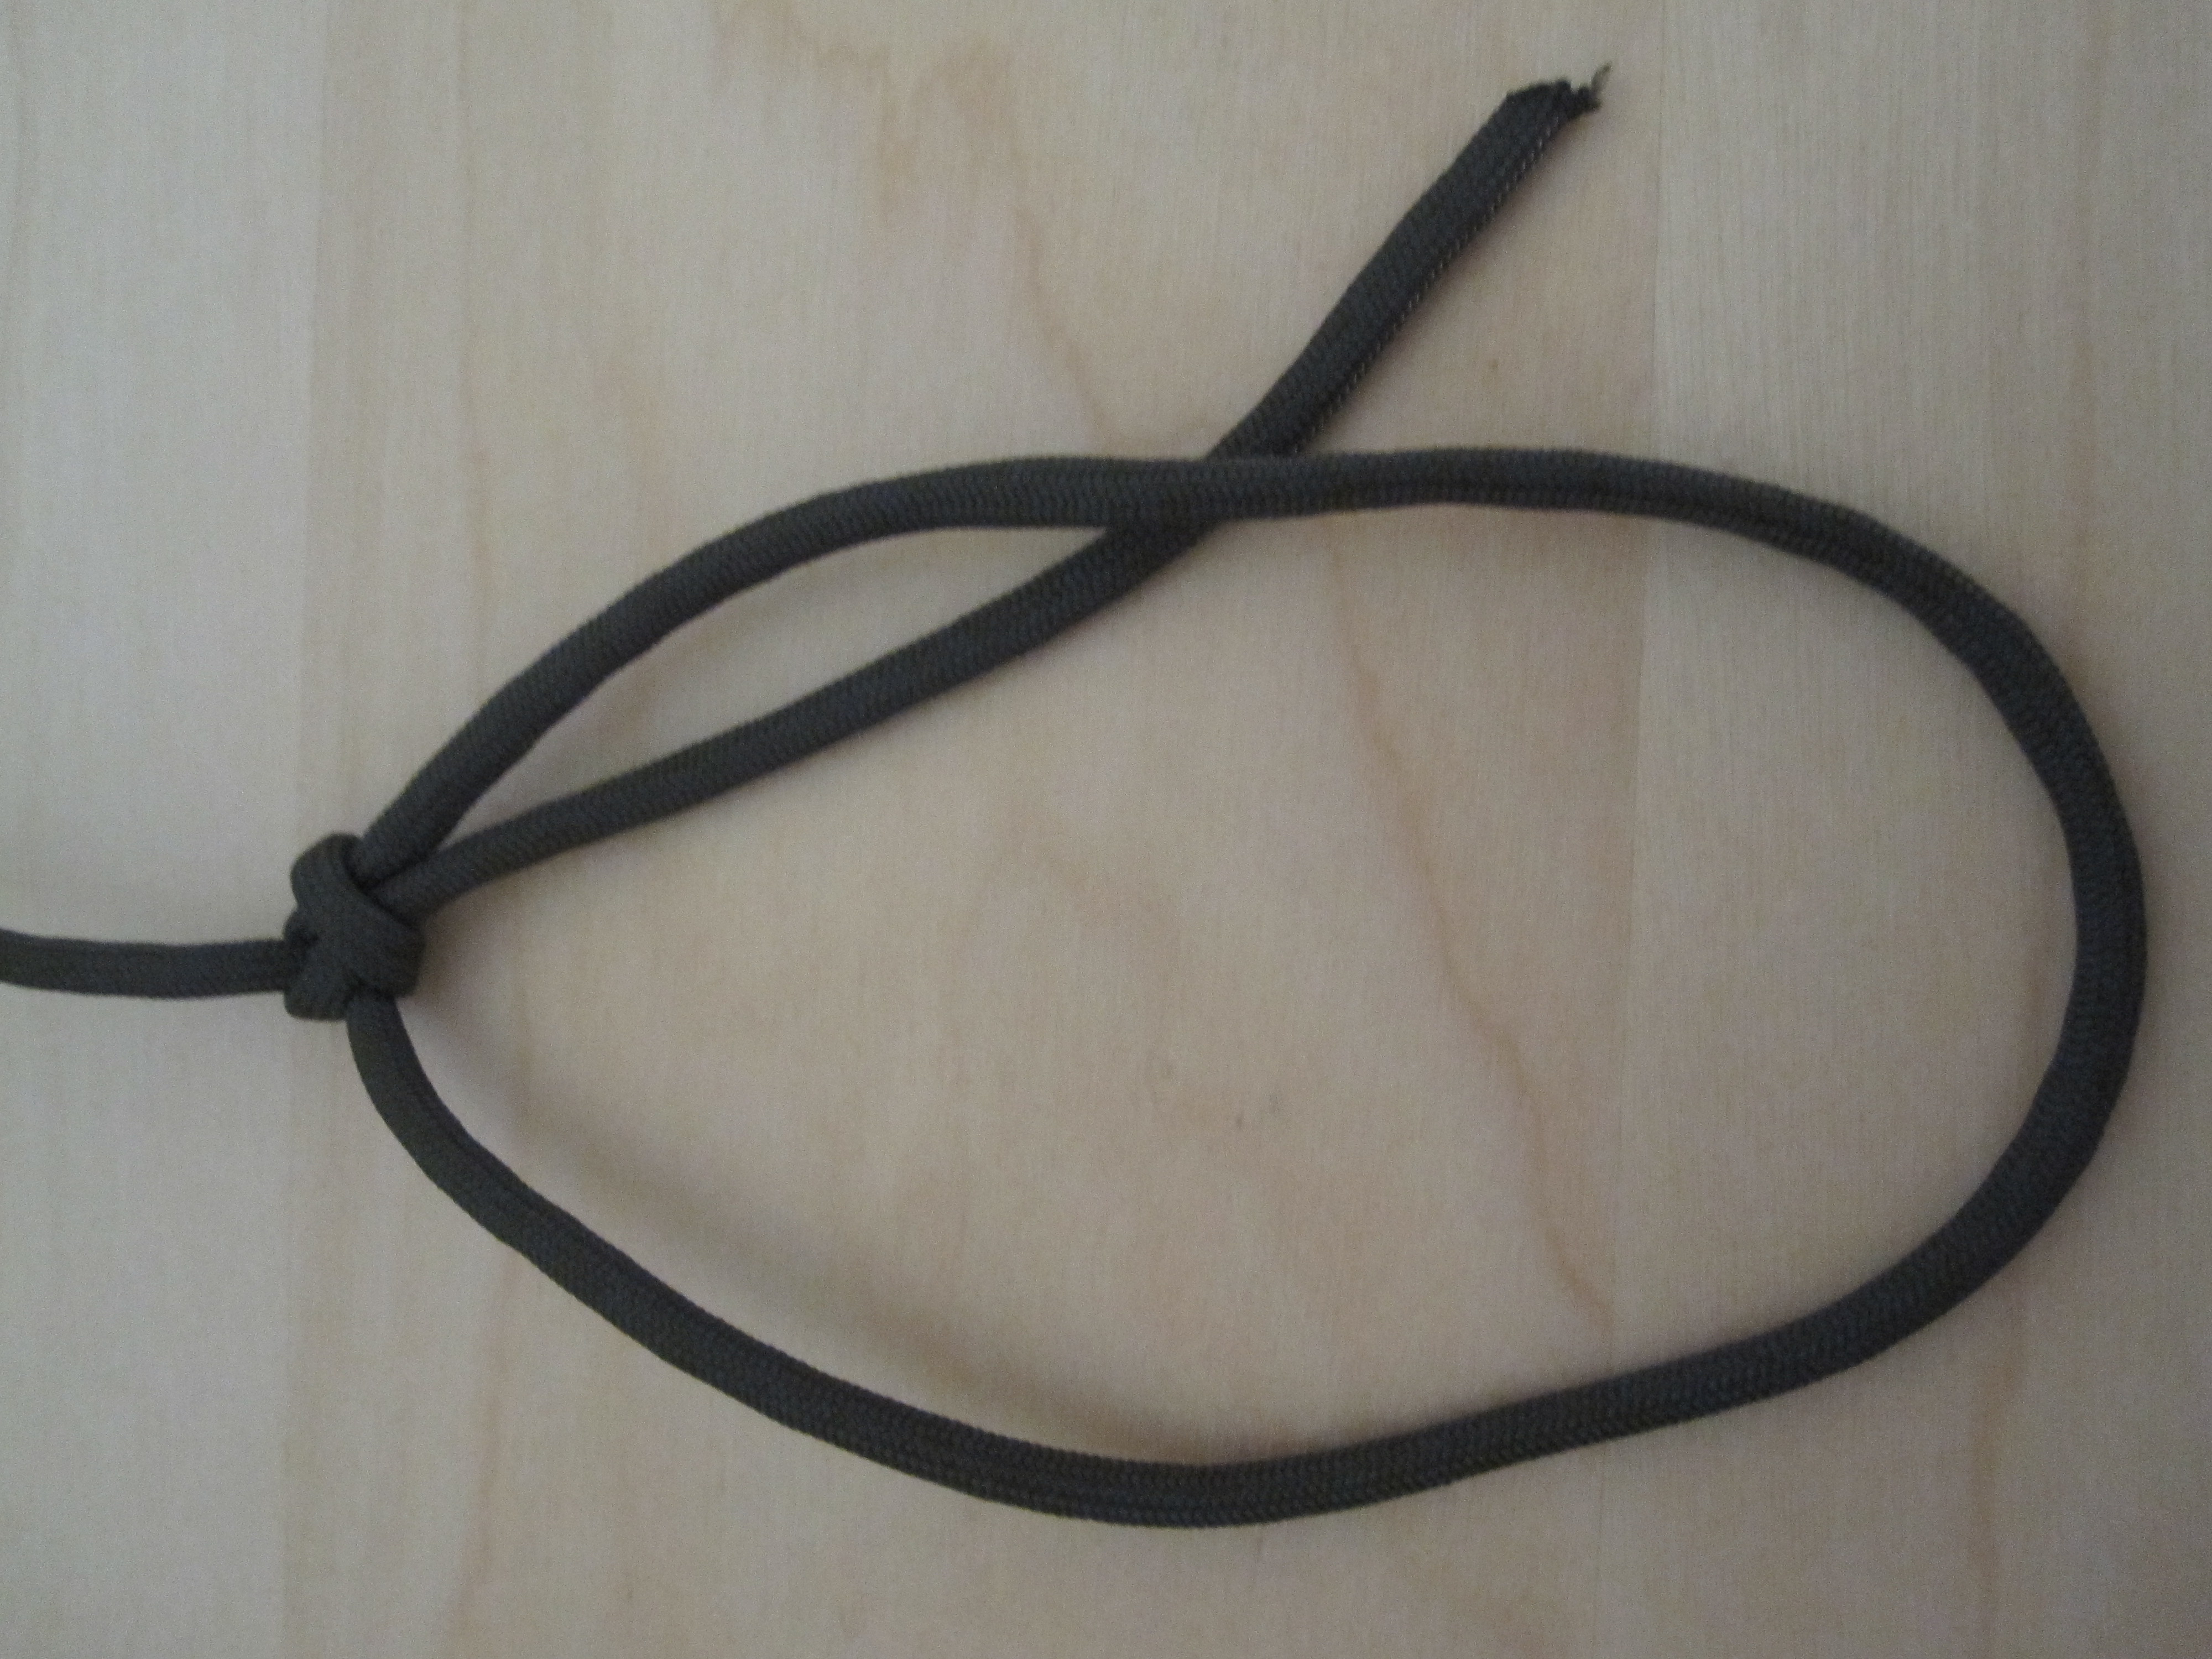
This knot is best explained with the story of the "rabbit hole." Make a loop near the end of the rope. For the story, the loop will be the rabbit hole, and the line is the tree. The rabbit comes up out of its hole, runs around the back of the tree, and then goes back down into the hole.
Knot images via Chris Buckner
NEXT: SIBERIAN BROWN BEAR GETS REVENGE ON HUNTER WHO SHOT HIM
WATCH

