Want to become a little more self-sufficient?
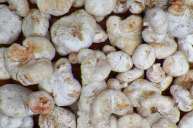
Acorns and acorn flour were at one time a staple food item for both settlers and Native Americans. We've gotten away from using acorns as a food source, but that doesn't mean that you can't make use of the plentiful nuts to supplement your own food stores.
Acorns have always fascinated me, ever since I was a little kid. I loved the Looney Tunes cartoons with Mac and Tosh, the Goofy Gophers and the two rodents' obsessive desire to collect truckloads of acorns while outwitting loggers or Elmer Fudd. When hunting or hiking through the woods, I'll invariably come home with a pocket full of the smooth-shelled little nuts, just for the pleasure of examining and admiring their symmetrical beauty.
I tried eating acorns several times as a youngster, figuring that if the squirrels loved them they must be good. But whenever I cracked them open and chewed the hard nuts inside I found that their flavor ranged from extremely bitter to barely palatable. I ultimately determined that while they must be edible on some level, they were probably a food only squirrels could truly appreciate.

The key to acorn edibility
As a teenager, I read Euell Gibbons' "Stalking the Wild Asparagus." Gibbons' brief chapter on acorns, and their use as a reliable food source both historically and presently, opened my eyes. He even compared them favorably with candied chestnuts prepared in a similar manner. All I needed to do, according to Gibbons, was learn the process of leaching with water the bitter tannins from the acorn nutmeats.
There are a variety of different acorn producing oak species in America, but the two broad categories are red oak and white oak. I'm not going to get into the differences between them and the different qualities of acorns they produce. As far as I know, all acorns produced by oak trees are edible. You can make acorn flour from any species, so use what you have available to you.
I don't use acorns much as whole or pieced nut, but more often like to make flour from them. I've used both hot-water and cold-water leaching methods to process acorns. They both work, and they both yield different results as far as flavor, color and texture of the finished product.
The best and most thorough discussion I've seen on the leaching process may be found in Sam Thayer's excellent book, "Nature's Garden." Thayer explains several leaching techniques in detail, as well as the entire operation of processing acorns, from collection to shelling, grinding and leaching.
Thayer's discussion on identifying and delineating good, worthy acorns from bad, weevil-infested acorns is what I found most impressive. The man has collected, processed and eaten many hundreds of pounds of acorns in his life, and his knowledge on the subject is unsurpassed.
Here's how I processed a few pounds of acorns into flour.
Sorting and cleaning
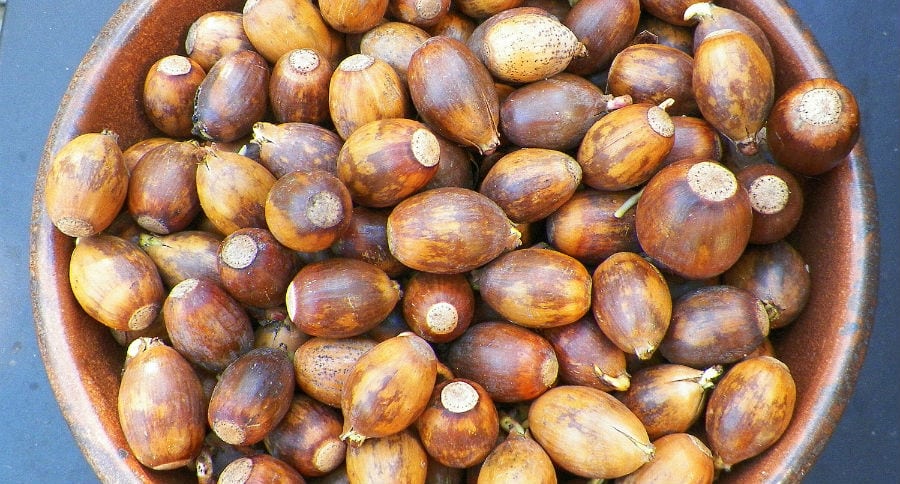
After collecting acorns, I place them in a sink full of cold water and swish them around. This serves to clean them and to further separate sound acorns from damaged ones. Acorns that are bad or weevil-damaged will float, and you can easily skim those from the water and dispose of them. The ones that sink aren't all damage-free necessarily, but the ones that float surely are. By skimming the floaters you've effectively eliminated the sure losers right away.
Don't wait to do this; do it while your acorns are freshly collected. If you let them sit around for a week before getting to them, the good ones will begin to dry a bit. As they dry, they become more buoyant, and some that are good may float along with the ones that are damaged, making the float test imprecise.
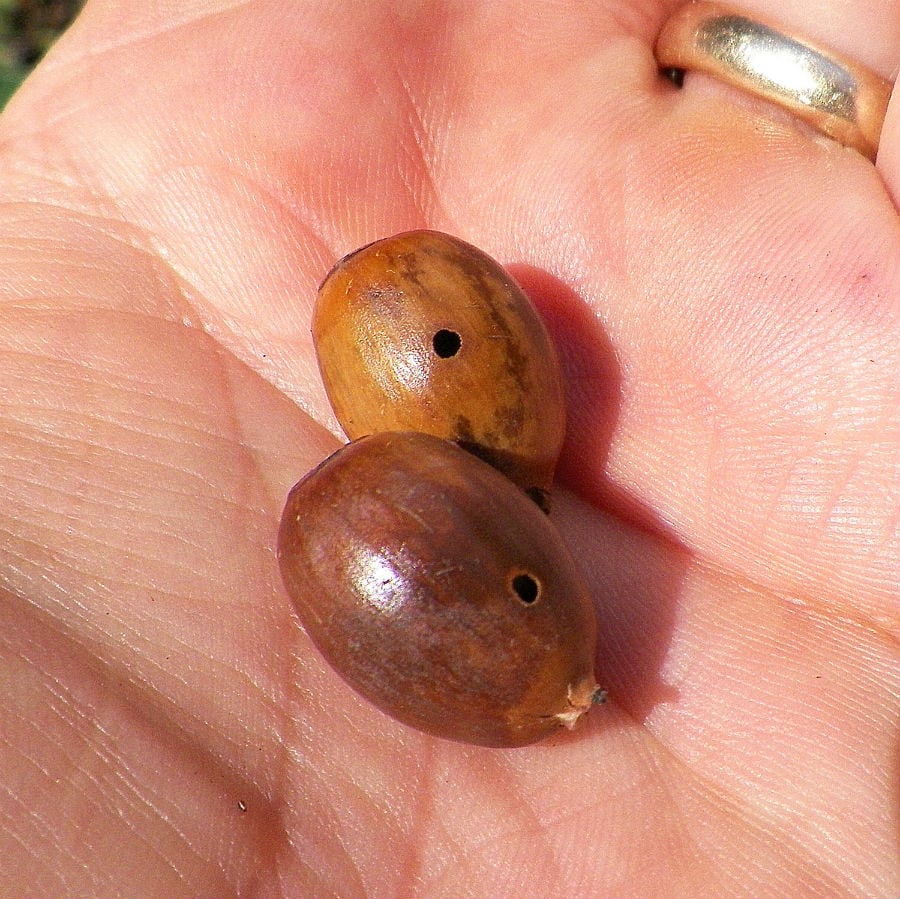
Weevil-infested acorns. Author
Shelling and drying
You can either shell the nuts and dry the nutmeats directly, or dry the nuts in the shell and then shell them later at your convenience. Once the nuts dry, they have a long shelf life as most nuts do.
There are several of ways to shell acorns. To crack the shells you can use a nutcracker, or place them in a cloth bag or under a towel and hit them with a hammer or club. You can also "peel" them with a knife if the shells haven't dried out and are still pliable.
I generally peel them, as I can do so while watching a football game on the television. This process uses a small, sharp knife. Make two or three quick, shallow vertical cuts into the acorn shell from top to bottom by rocking or arcing the knife edge with some pressure along the surface of the shell. You're trying to effectively create one or two elliptical or teardrop-shaped patterns in the shell.
Then, using the edge of the knife or a fingernail, pry or peel the little teardrop piece away from the shell. Try to bring the inner testa or lining of the shell with it. Once that first piece is removed, it's a simple matter to pop the rest of the shell off the nutmeat. This sounds more involved than it really is, and once you get into the rhythm of it, it takes just a few seconds to shell each nut.
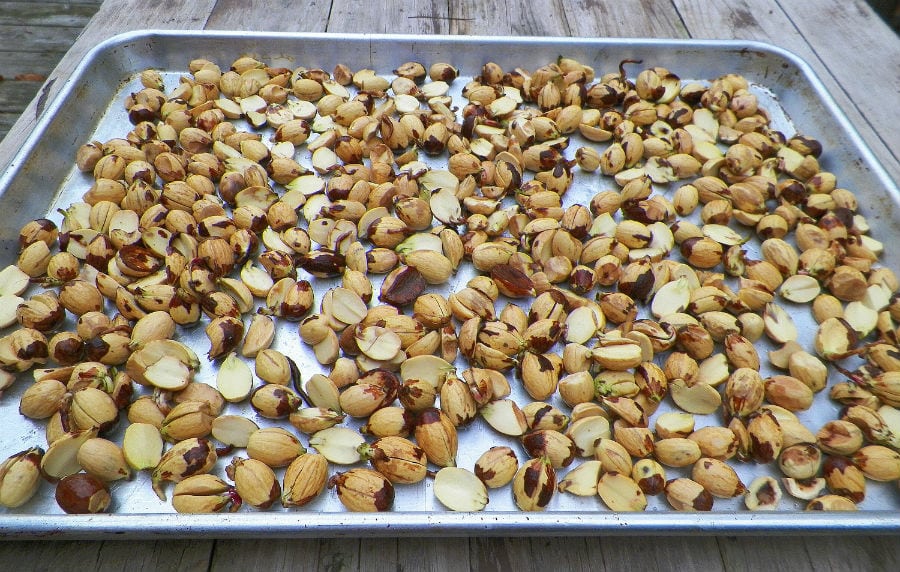
During the shelling process, you'll also inevitably find acorns that are black and damaged that you didn't discover earlier. Dispose of them. Once all of the acorns are shelled, you need to check them over again for any bits of shell or chaff that may be hanging around. It's not a bad idea to give them another wash in the sink. You can grab a handful of the nutmeats and rub them between your palms underwater. This will also help loosen and remove any remaining testa, the brown skin similar to that which covers peanuts.
Once have everything shelled and cleaned, the tough, manual labor part of the process is over. Drain the nuts in a colander and lay them out on towels or on baking sheets to dry. Dry them in the sun or in a food dehydrator.
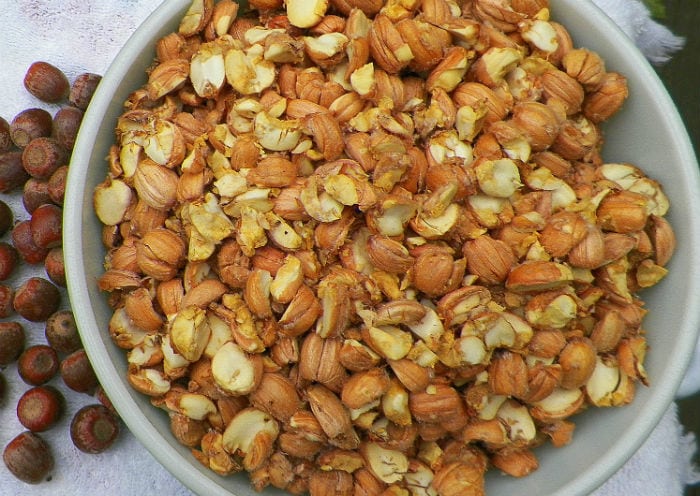
Chopping and grinding
Acorn nuts are hard, too hard to grind as larger pieces in a countertop coffee grinder. I know this because I burned one out trying to do just that. You can roughly chop the acorns with a chef's knife as you might chop walnuts. Once you get more or less uniformly small pieces, use a food processor to pulverize them further. Adding a little water to the nuts makes processing them a bit easier.
You probably won't be able to grind the nuts finely enough with a food processor for them to qualify as flour, but you can get them pretty small, like grits or coarse cornmeal in consistency. And, that's OK, because they're now small enough for a coffee grinder to handle them, and certainly small enough to make using a mortar and pestle less taxing.

Leaching
Leaching is the process by which you remove tannic acid, the substance that creates a bitter taste. This makes the nuts palatable.
You'll now have a sort of gritty acorn slurry. You can strain and dry it, and then grind it even more finely before leaching. Leaching smaller particles is more efficient for removing the bitter tannins. Larger particles require more leaching time. I usually begin the leaching process with the grittier product and then grind it into flour after finishing this step.
The method I generally use for cold leaching is an old one. Simply immerse the thing to be leached in numerous changes of water. When camping once, I filled a cloth bag with acorn nutmeats and tied it to a stick in the running water of a stream we were camping near. At home, I just use a large glass jar.
- Place the acorn flour or grits into the jar no more than a third of the way up.
- Fill the jar with cold water and give it a good stir.
- Let it sit in the fridge for several hours or even a day at a time.
- Drain or decant the water from the particulates that settle on the bottom.
- Repeat over and over and over until the nutmeat no longer tastes bitter.

This process could take several days or more than a week. The color of the water is not an indicator of when the process is complete (it won't become clear). You have to use taste as your guide. Be patient. This is simple and doesn't require much interference on your part. It's just very time-consuming.
Once the acorns lose their bitterness, you'll want to squeeze out as much water as you possibly can. Set a strainer or colander over a large bowl, and line it with cheesecloth or a tea towel. Scoop a softball-size blob of acorn mush into the cloth-lined strainer. Bring the corners of the cloth together and begin twisting it to tighten the ball more and more. Squeeze the ball with your hands as hard as you can to get as much moisture out as possible. When you remove the acorn mush from the cloth, it'll be like a ball of sandy clay if it's gritty to begin with. Repeat with all of the acorn mash.
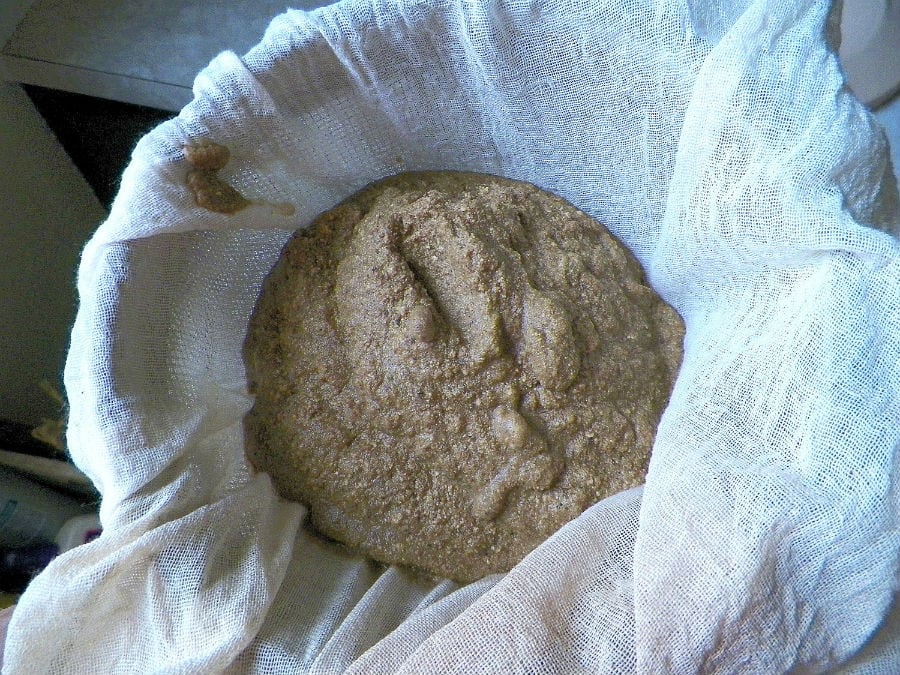
NOTE: You can use the moisture (or milk) you wring from the acorn mash if you wish. It's not quite the same as the leaching water drained from the jar each day. It's a little more milky, so to speak, and it has some flavor and nutrients.
Drying
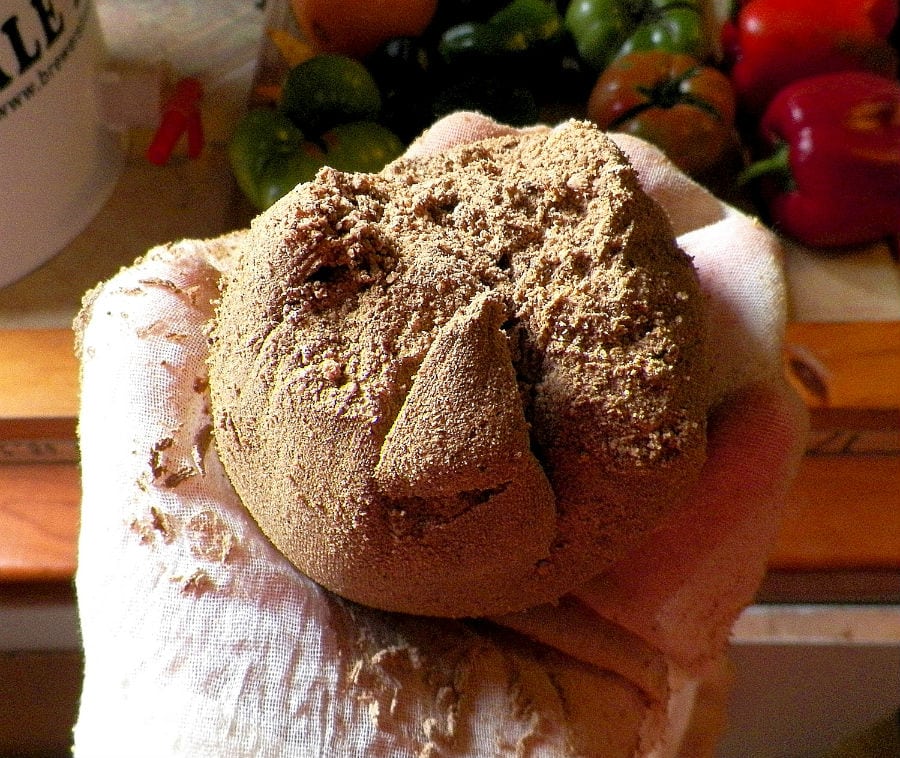
Spread the acorn grits onto a cookie sheet, breaking up the bigger clumps with a fork. Place in a food dehydrator or in an oven at its lowest setting. Keep the oven door ajar. Stir the mixture occasionally, until it's completely dry.
Grinding into flour
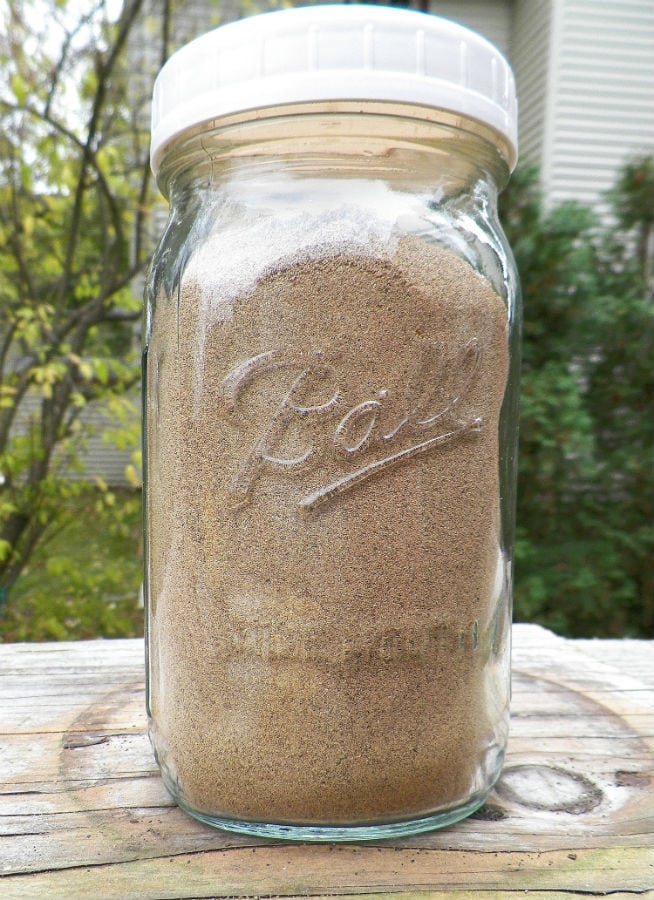
You now have a quantity of dry, tan-colored acorn meal, the consistency of sand. A coffee grinder should be able to handle these particles pretty easily, turning them into fine flour. Store the acorn flour in an airtight container such as a mason jar. You can use acorn flour as you might any non-wheat grain or nut flour. Add it to recipes using regular wheat flour for breads, pastas, gravies and so on. Here are a couple of recipes for acorn pancakes and acorn dumplings.
I'd wager that there are oak trees near where you live, maybe even in your own yard. Why let the squirrels have all of those tasty acorns? With the quantity of acorns that an oak tree are able to produce, chances are there are enough for both you and the squirrels to enjoy.
Like what you see here? Experience more articles and photographs about the great outdoors at the Facebook page, Stumpjack Outdoors.
NEXT: 10 TIPS FOR FORAGING FOR DELICIOUS, SMELLY RAMPS
WATCH