More people than ever are taking to the open road in custom camper vans of their own design. It's a far more cost-efficient way of owning your own RV, and it allows the opportunity to customize the interior details to your liking. Building your own van conversion is also just part of the fun. If you've never built anything like it before, you'll learn a lot of useful life and building skills prepping an adventure-ready van.
But before you start planning that ultimate road trip, you need to figure out the first steps you'll take on your conversion. That's what we're here to address today, the first five steps you'll need to take before starting your build. Some of these steps may seem a little redundant, but trust us—you'll want to consider all of the factors here before you make that offer on a new van or start cutting a hole in the roof for a fan.
Pick the Right Van
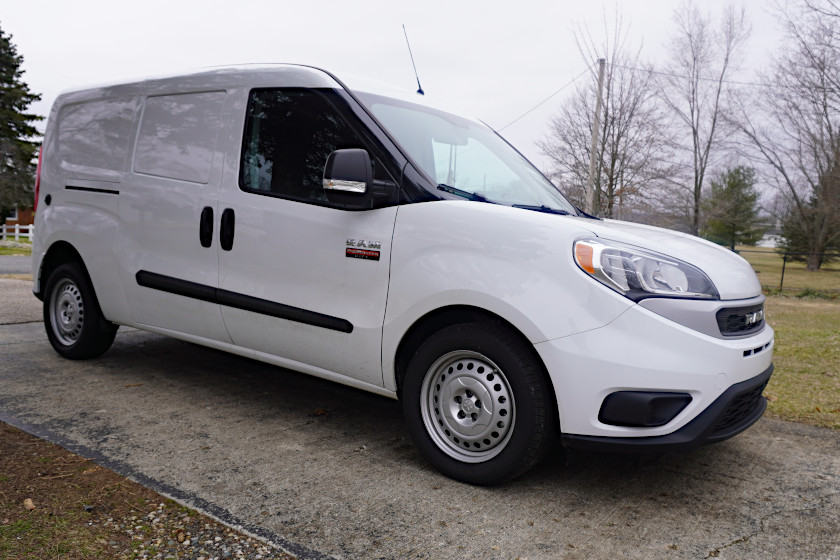
The author's Ram ProMaster City van build. Note the shore power port near the taillight. Photo by Travis Smola
I just want to underscore how vital it is to pick the correct van for the type of traveling you plan to do. When I first decided I wanted a van, my dad offered me a heck of a deal for his full-size Ford cargo van. It would have been way easier for me to just buy that and save the hassles that come with going to a dealership. I convinced him to let me borrow it for a quick weekend camping trip just to see how it would handle a typical jaunt.
I'm glad I did that, because while the van was more than adequate in terms of living and working space afforded in the back, it was lacking for my style of camping in several other areas—mainly the gas mileage. I fueled up three times in a simple, two-day getaway. The van was a guzzler, and I realized it simply wasn't going to work for the 3,000-mile road trips I have planned for the next few years.
In the end, I decided to purchase a small Ram ProMaster City cargo van for my build. It ended up costing me a little bit more since it was brand new. However, I'll get a longer life out of it, and it gets over 400 miles of range per tank. Also, this vehicle was replacing my old Jeep Liberty, and because both vehicles are made by Chrysler, it was a much easier transition. The Ram drives almost exactly like my old SUV. I work remotely from home, so it's not really a daily driver for me. However, as my primary mode of transportation, the ProMaster was also simply a better fit for a run to the grocery store than the full-size van.
The larger point here is to take into consideration all uses of your new adventure van. Is this going to be a daily driver or just something for weekends? If it's the latter, it makes more sense to go with a larger ProMaster, Ford Transit, or Mercedes Sprinter than if you'll also be using it to commute to work every day. It's not a bad idea to consider a rental of the vehicle you're thinking about purchasing, too. Throw a simple air mattress in the back and see how it handles a weekend trip. If you come away wanting more, odds are you've found the vehicle for your build.
Make a Floor Plan

picture alliance via: Getty Images
This is one of those seemingly redundant steps we mentioned, but we felt it deserves more of an explanation. Once you have your van picked, it's time to start thinking long and hard about what you want to do with the interior. Some people are better than others at visualizing what they want. The thing that helped me the most during the design phase was getting some cardboard boxes and using them to figure out how large I wanted the cabinets and storage areas. This helped me determine how much room I had for a bed and cooler, too. Doing this just helps you think in three dimensions with the design.
At the very least, you should draw out a rough floor plan. Figure out how long your bed will be, where the seats will go, and where your bathroom will be if space allows. In many ways, it helps to take the bare-bones van on a weekend trip. Bring along a small folding table and chairs. This will help you determine the optimal layout for the space you have available.
Take the time to measure the walls, floor, and ceiling. This comes in handy when calculating the square footage of materials needed for covering these areas. In the case of my van build, I was able to get away with using just a single case of waterproof laminate flooring for my design. The more efficient you are with the materials, the less your build will cost.
Design the Electrical
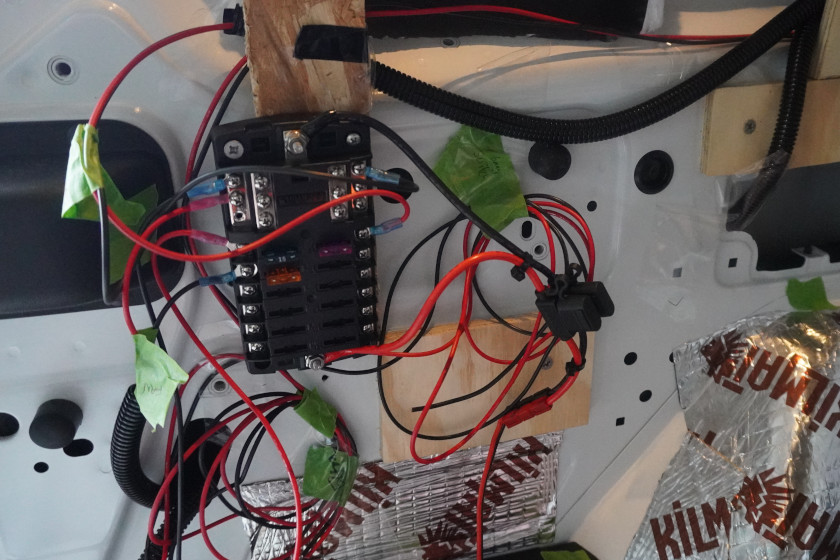
This electrical system is still in progress. It's simpler than it looks here. Photo by Travis Smola
The early design phase is when you'll also need to figure out the off-grid capabilities of your build. Especially if you're planning to do lots of stealth or dispersed camping, you'll need to set up your build with a full electrical system with batteries, lights, and solar to run when you can't access shore power at modern campgrounds. These systems can be as simple or as complex as you want to make them, and there's a build for nearly every budget.
I personally chose to wire my system to work off the 12-volt on a Goal Zero Yeti 500x power station because it was cheaper than purchasing batteries, an inverter, and other equipment for the electrical system. The simple 12-volt plug can also be used with a 2,000-watt power station I also purchased for this build. The nice thing about using 12-volt instead of a regular AC current is that it eats up less power in the battery.
The one mistake I made with that 2,000-watt station was not realizing I needed a solar panel with a 24-volt input to charge it. The 180-watt panel I bought wasn't powerful enough to charge it, and the same panel was also too powerful for the 500-watt Yeti, which had a 100-watt limit. Pay close attention to the inputs and outputs of the system you are designing.
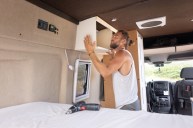
Determine Fan Placements and Framing
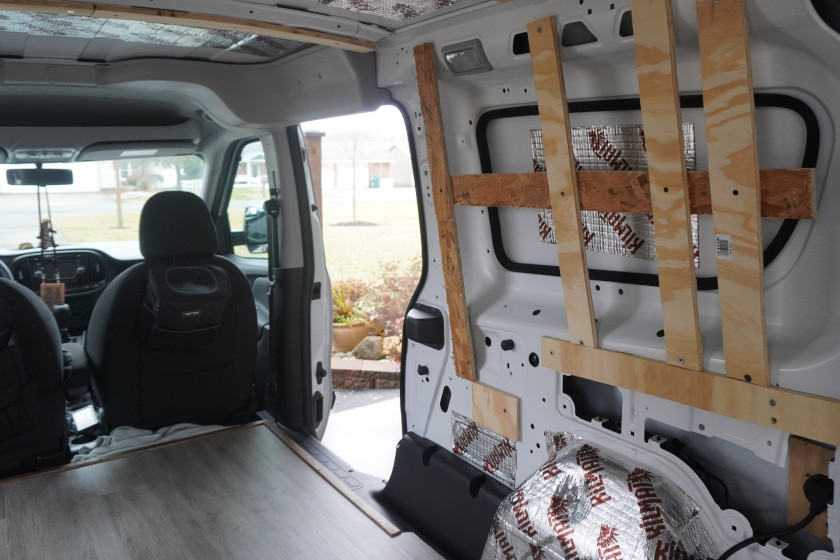
Photo by Travis Smola
Some parts of a van build require a lot of cutting and drilling into the frame, roof, or wall. Obviously, there's no going back if you make a major mistake with a cut or put a screw in the wrong place. The old saying "measure twice and cut once" applies here. It helps to have an extra person to help confirm your measurements and watch from the other side when you are cutting or drilling pilot holes to start your cuts.
Determining the placement of things such as roof fans can be tricky because the roof is often heavily contoured. I lucked out a bit with my Ram ProMaster in that there was a flat section of roof roughly 8 inches across. The small circular fan I chose for my build was about 6 inches. This allowed the fan to sit very flush with the roof, and I was able to make a solid, weatherproof seal that should last a long time.
When figuring out where an electrical fan will be placed, don't forget about the wiring. Preferably, you'll want to keep the distance between the fan and power source as short as you can to cut down on costs. Don't forget to consider things such as where your ceiling framing and walls will be when deciding where these wires will run.
When it comes to framing, some vans are more challenging than others. My ProMaster was a bit of a challenge because there are a lot of curved areas in the metal frame that are harder to drill through. You also want to be cognizant of things such as wires for the taillights or any other internal wiring. I ended up prying a plastic panel off in the back so I could shine a light in and see where everything was before I started drilling. Just take your time and don't rush anything, and you'll be fine.
Build the Floor First
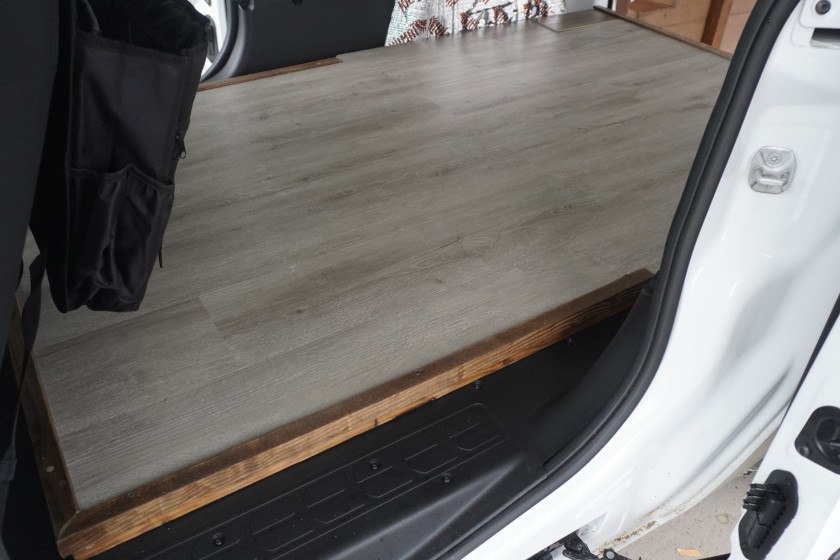
Photo by Travis Smola
It's usually best to start from the ground up with the floor. With my build, I ended up cutting a large piece of cardboard to fit the basic shape of the floor. I didn't cover the entire floor of the van because I wanted a little space on the sides for muddy boots, and there was some rugged plastic in those areas that works as a perfect place for footwear.
With the cardboard template, I was able to construct a sectioned frame out of 2-by-2 wood pieces. I put pieces of polystyrene insulation in the open spaces. I ended up using an extra piece left over from when my parents finished off their basement. This saved me a little bit of money, and the pieces are built to stand up to damp conditions, which makes them perfect for a van. I added pieces of foil tape to help keep the insulation in place.
I then put a piece of plywood on top of the frame and added a bamboo vapor barrier on top of that. The final part of the build was cutting and placing the waterproof laminate flooring on top. I used wooden trim pieces on the edges to give it a little flair and hold the whole thing together.
The floor is the ideal place to start because it's one of the simplest parts of the build. Almost anyone can put the floor together with minimal building experience. Getting the floor done helped develop confidence for other parts of the build later. It also just makes sense to start here because that's where the cabinets, bed, and other components will be sitting.
For more outdoor content from Travis Smola, be sure to follow him on Twitter and Instagram. For original videos, check out his Geocaching and Outdoors with Travis YouTube channels.