As more companies embrace remote work, more people are looking to live life out on the road. The only problem is that today's modern campers, especially the motorhomes, are getting tremendously expensive — more than what most people want to spend. The solution most people have embraced is to simply build their own DIY camper van conversion. These types of conversions can be done with brand new vans or used ones, small or large. The only real limit to a camper van build is your imagination and budget. The latter of those things is what we're here to talk about today.
More specifically, we're going to break down van conversion costs. Everyone's costs are going to vary a little bit based on the size of the van and the quality of the materials used in the build-out. However, this basic cost breakdown should give you a good baseline to work from as you begin your own van build.
How Much Does a Van Build Cost?
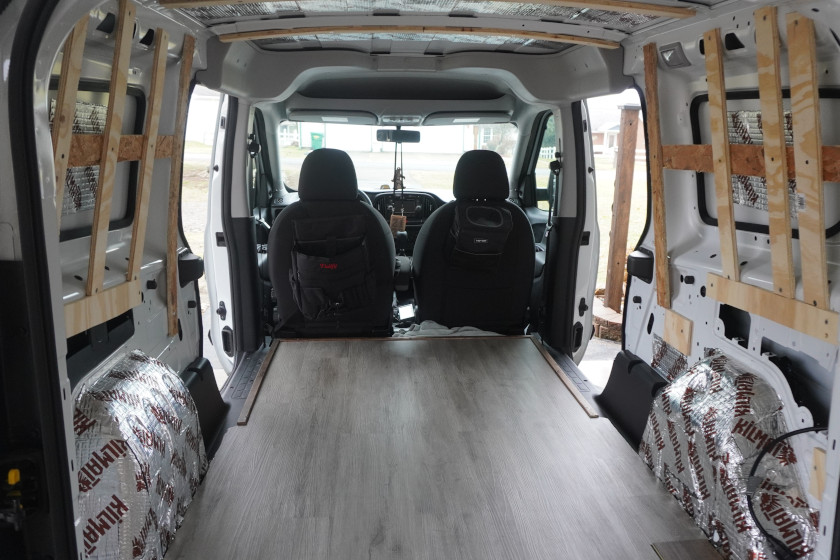
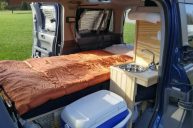
I only needed one case of waterproof laminate for my Ram ProMaster City van build. Photo by Travis Smola
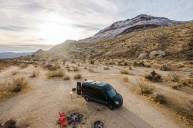
Before we begin, we just want to note that our cost breakdowns here don't include the cost of the van itself. That's simply because everyone's situation is going to be different. With my van, I ended up buying new. However, many people prefer to buy a used van. Camper van conversion costs also hinge greatly on the overall size of the van. A full-size sprinter van is going to be considerably more expensive than a smaller Ford Transit cargo van. My van is a small, Dodge Ram ProMaster City with a cargo area that's only about 7 feet, 3 inches long by 4 feet, 4 inches wide. It's a very small space, which saved me a lot of money in materials.
In most cases, the total cost — not including the van itself — is going to vary from $2,500 to $15,000 depending on how elaborate the van layout is. The costs go up considerably if you use any of the many van conversion companies for most of the labor.
Wood and Other Base Materials
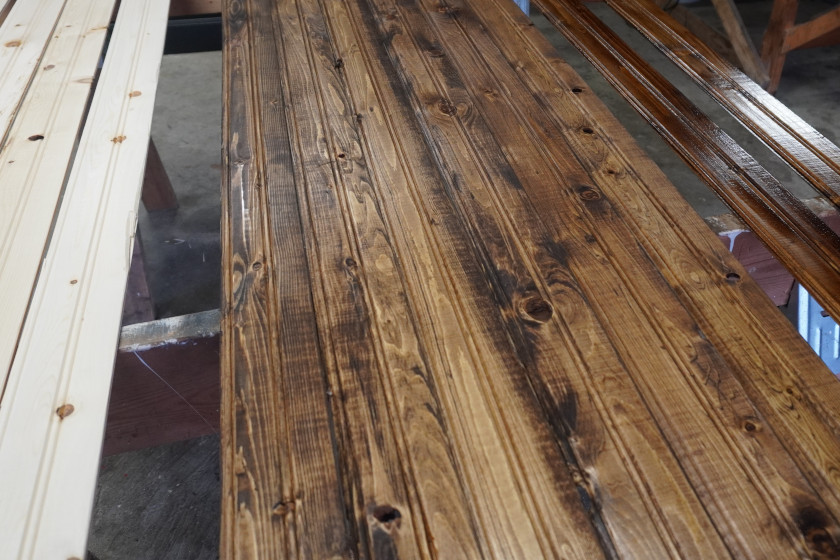
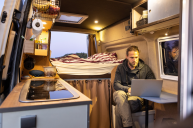
I went with a simple beadboard ceiling that looked very nice after staining. Photo by Travis Smola
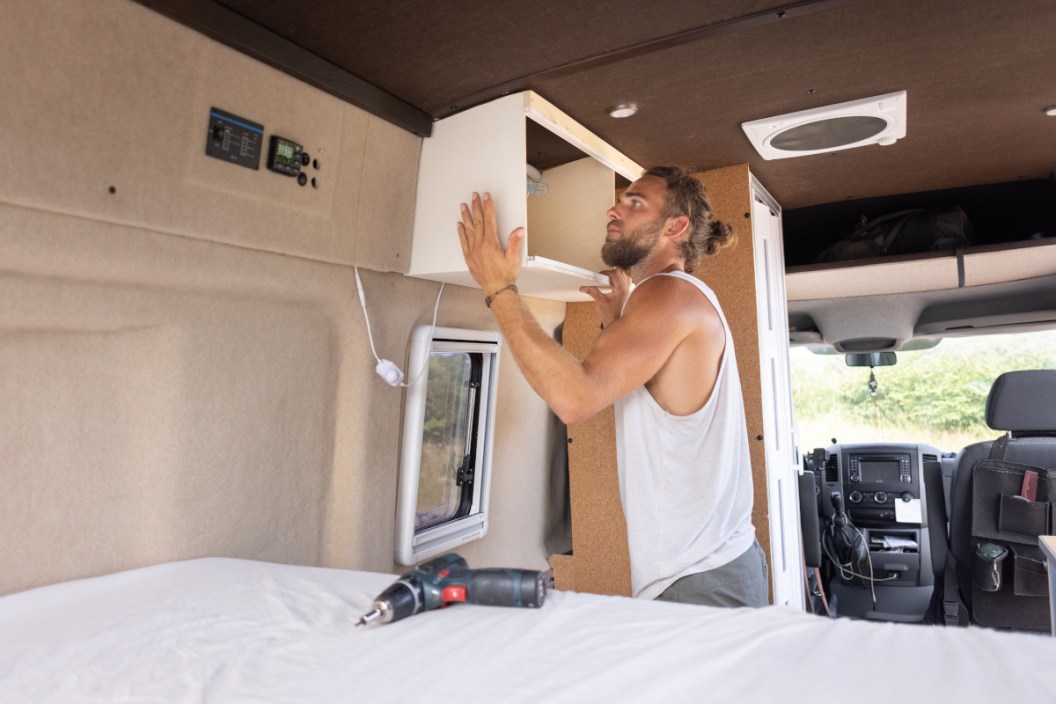
Speaking from experience, the build process is not easy unless you already have a lot of building know-how. Note that the breakdown here is for a smaller van such as my Ram ProMaster City. A full-size cargo or sprinter van conversion is going to require more raw materials. For sake of simplicity, this breakdown will cover what I spent or would spend for my smaller van. First, we'll cover the materials for the framing and building of the floors and walls. I rounded up the costs of many of these items just to give an approximate amount for everything.
- ½-inch 4x8 plywood: $19.99 each (2)
- 2x2 pine boards (for floor framing): $5 each (10)
- Beadboard (for ceiling or walls): $19.55 each (3)
- Wall paneling 4x8 piece (wall covering alternative): $35 each (1)
- Vapor barrier (100 square feet): $15 (1)
- Waterproof laminate flooring (20 square feet): $50 per package (1)
- Car sound-deadening material: $68 (1)
- Insulation: $100-$300 per roll (1)
- 1x3 boards: $3.66 each (15) (bed and cabinets)
- ¾-inch plywood: $20 each (2) (cabinets)
- Soft-close door slides: $14.99 each (6 sets)
- Cabinet hinges: $3 (for two) (8)
- Approximate total: Around $620
Note there are alternative floors that cost less. There are also wall and ceiling alternatives that cost more. I went with the waterproof laminate because I wanted something robust that would stand up to some additional moisture. For my tiny ProMaster build, I only needed one package of laminate for the floor and three packages of beadboard for the ceiling. Likewise, I was able to cover the walls cheaply using a single piece of wall paneling that is made to look like wood. I ended up going with that over single pieces of tongue and groove or shiplap simply because it was more cost-effective. I also used simple plywood for the framing that I later used to fasten the walls and ceiling. Larger builds with heavier walls and ceiling might require 2x2s or even heavier 2x4s for larger builds.
I also put insulation and sound-deadening materials in this part of the list since they are some of the first items you'll need to buy. I considered wool insulation but ultimately could not find it in stock. I went with a 3M Thinsulate type of insulation material, and it cost me about $100 for one roll. I also went with a Kilmat sound-deadening material that went for about $70 a box. You don't need to cover the entire interior of the van with sound-deadening material, though. I covered the wheel wells and select parts of the ceiling only.
Note that pre-built cabinet options are available out there. However, most are extremely expensive and not really cost-effective if you're looking to save some money. It's time-consuming, but building your own is going to save a lot more money. Most people use simple plywood, 1x3 boards, or even 2x2s or 2x4s for the framing of these cabinets. No matter what way you take it, the costs will add up quickly.
I should also mention that my cost breakdown doesn't include smaller things such as jig kits for putting together cabinets, screws, power tools, sealants, adhesives, and other construction materials. This is just to give you a rough idea of the costs incurred from some of the biggest expenses.
Electrical Systems
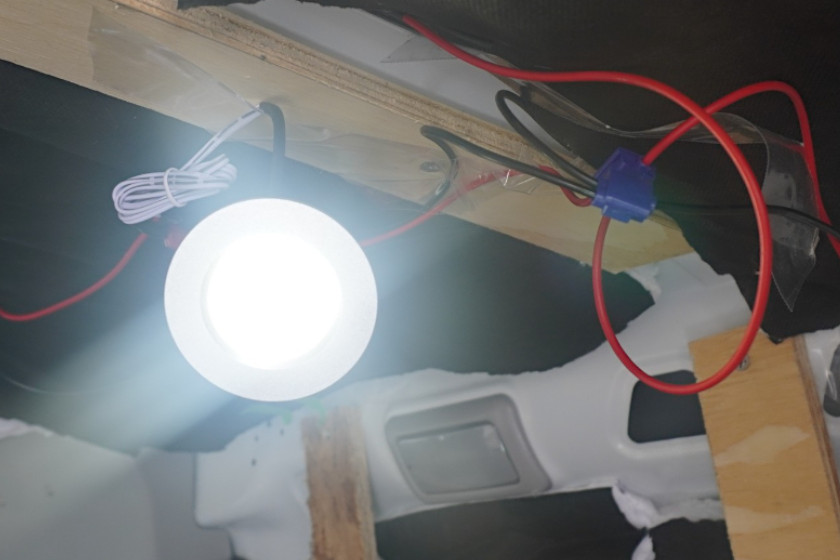
I went with simple 12-volt recessed lights for my build. Photo by Travis Smola
This is one of the more challenging parts of any van build. We don't have time to go into the building of the full system today, but we can quickly note the costs of some of the more expensive items you will need. For the purposes of my build, I kept things as simple as possible. I use portable power stations hooked into a fuse panel and 12-volt cables to power my lights and small Maxxair fan that circulates the air. These stations are also great for powering a small fridge or Dometic cooler through the 12-volt port. I have run my Dometic for as much as five days without fully draining the battery. It makes a power station such as the Goal Zero Yeti 500x an excellent off-grid power solution for the average camper when hooked into a solar panel. If you use a power station setup, here are a few station options plus the other gear you will need.
- Goal Zero Yeti 500x: $549.95 (1)
- Bluetti AC 200 Max: $1,999 (1)
- Fuse block: $49.99 (1)
- Ring terminals: $10 (box of assorted terminals) (1)
- 10-gauge wire: $18-$30 (1)
- 14-gauge wire: $20-$30 (1)
- Car fuses: $10 (1 box of assorted fuses)
- 100-watt solar panel: $140 (1)
- Solar MC-4 to DC cable with adapters: $13 (1)
- XT-90 plug male/female connector: $9.99 (1)
- 12-volt car charger cable for Goal Zero: $39.99 (1)
- 12-volt recessed lights: $43.99 (1)
- Split wire loom tubing (20 feet): $13.99 (1)
- Maxxair fan (6-inch circular): $95 (1)
- Shore power port: $20 (1)
- Approximate cost: $3,050
Now, I should note that I already owned the Goal Zero Yeti power station, and I ended up getting the Bluetti power station for approximately $1,200 during a Black Friday sale. If you're thrifty, and patient, you can save quite a bit of money. In the end, I decided to go with the power station over a more complicated setup with separate batteries. It simplified things since I didn't need to purchase an expensive solar charge controller or inverter. These things are built into most modern power stations. My one miscalculation was not realizing the Bluetti requires 24 volts of input to charge properly. Neither of my 100-watt solar panels will transfer enough juice to charge that. At some point down the line, I will need to purchase a folding panel that is at least 350 watts to charge that station in an off-grid situation. For now, the 500-watt Goal Zero will do the trick. For my van, I also added a simple shore power port for when I do use established campgrounds. They're simple and very easy to install. Just add a power strip inside or hook it to your power station, and you're set for all your energy needs.
Other Potential Costs
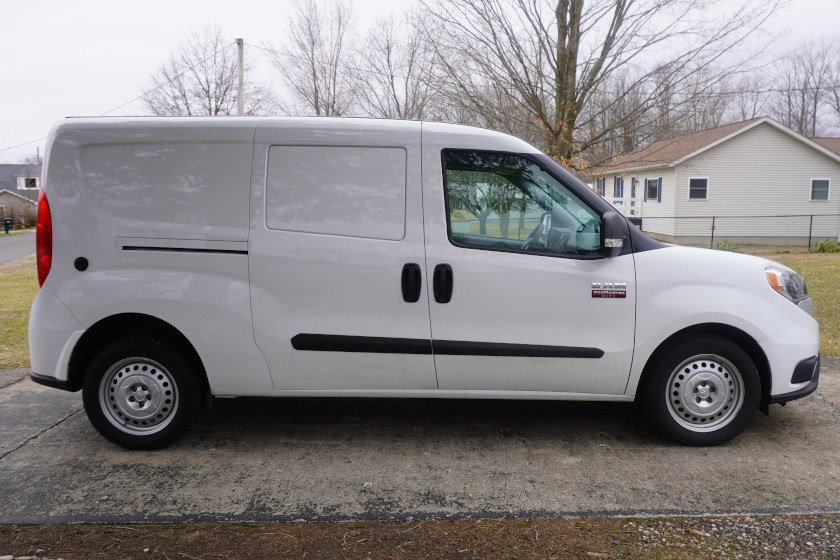
I went with a stealth van approach to my build. Note the shore power outlet. Photo by Travis Smola
Most of what I've outlined here is rather basic, and perfect for a first van build. For someone contemplating a full-time van life, you might need some more creature comforts — upgrades such as a composting toilet or a hot water heater that turn a small van into much more of a tiny home than a camper. Here are a few items to consider, and the price ranges.
- Tankless water heaters: $159-$300
- Portable toilet: $34-$200
- Electric or manual camp faucet: $20-$200
- Water containers: $20-$35
- Portable fridge or electric cooler: $199-$1,000
- Additional storage roof rack: $150-$300
As you can see, it's easy to add another couple thousand dollars to any van build just based on these other potential costs.
At this point, my van build has cost me just under $3,000. However, at least $1,600 of that is wrapped up in the two power stations, along with another $340 in two solar panels. Truthfully, I could probably get along with only one of each.
To spread the costs out a bit, I've also bought most of the items over a period of several months. I bought the van in October and started gathering materials immediately after. I took advantage of several holiday sales to defray the costs of some of the more expensive items. It takes time to put one of these builds together, so I was just fine not buying all the materials up front.
In short, no one breakdown is going to apply for every person's situation and vehicle. My best advice is to budget out everything you plan to have in your build, and then plan to spend $500 to $1,000 more than that. No van lifer goes through a build without some unexpected expenses along the way. The trick is to roll with the punches and figure out innovative solutions to issues that crop up.
For more outdoor content from Travis Smola, be sure to follow him on Twitter and Instagram. For original videos, check out his Geocaching and Outdoors with Travis YouTube channels.