If you want great pictures, first you need to actually know how to use a trail cam.
Some would argue that in today's trail cam market, these slick little scouting tools have thankfully become basically idiot proof.
That being said, everyone has misused a trail cam at some point, and learned a good lesson. There might have been a real shot at that 10-pointer, had they remembered a few little things...
Trial and error goes a long way, but with today's technology, trail cams have literally turned into a point and shoot device for the woods. You still have to know how to use them to the best of their abilities, so here's a step-by-step list that'll go a long way.
1. Batteries make or break a trail cam
Don't skimp on the batteries. If your camera doesn't have power, it can't take any pictures.
The lithium and alkaline version of the required batteries will simply last longer than knock-off, dollar store brands. Never use rechargeable batteries. Normally, most cameras will have a battery gauge showing where you are at with battery life. As a rule of thumb, replace those suckers if you check the cam and it's showing anything less than half life.
2. The SD card
If you use the wrong card, you just aren't going to get the quality pictures you are looking for.
For example, make sure your card has a high enough capacity for storage. Normally, eight GBs is a good starting point.
The super-fast cards are not usually a good fit for standard picture taking. Trail cams usually write information on a card much slower than what high speed cards are used too. If this is the case, you might start getting pictures that don't look right.
Usually, something in the low range speed from four to six MBs per second should work.
Even still, if you are doing HD recording with your camera, you will need a faster SD card to handle it. Usually those will start at the 10 MB per second mark up to UHS 1 to 3. For the most part, you can follow your trail cam's suggestions.
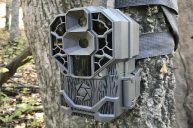
3. Setting up the camera
Once the batteries are installed and the SD card is in place, most any trail cam is going to be easy to use. The good ones make it naturally simple.
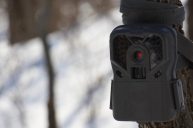
If you flip the switch to Quick Start, you will normally see a countdown clock giving you time to shut the case and get out of the way for the camera to start taking pictures. In some cases, you can even test the camera by walking in front of it while watching the IR light illuminate to show you the range.
If you want to get into the weeds, there are often other functions where you can select the megapixels the camera will snap pictures. Normally, anything around 5 MPs will take a quality shot with no digital extras added to the pictures.
4. Finding the right angle
The last thing you want is to pull your SD card to find you took a bunch of pictures of a tree or some deer's legs.
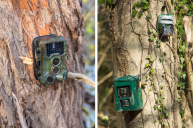
When you place your camera, most manuals recommend around three to four feet off the ground, hopefully secured on a tree or something sturdy.
Personally, I think a little higher is sometimes better, like closer to five feet. When you place your camera, put your back up against the tree, and look straight ahead in the direction the camera is facing. Pay attention to your peripherals. This will give you a good idea of what your camera will see.
Next, use a small piece of stick or bark to wedge between the camera and the tree to adjust the angle. Place it either below or above the strap between the camera and the tree, based on the size of the tree. If you place the camera higher, you'll want to put the stick above the strap to get a downward angle.
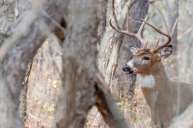
5. Location, location, location
If you want to really get the most out of your trail cam, it's got to be in a place where the deer are. Based on the time of the year, you have some options here.
During the summer, place your camera near bedding areas and water sources right off of known deer trails.
In the fall, salt blocks or bait piles are hit pretty hard and get deer to stand still in front of a camera.
During the pre-rut when bucks are starting to make scrapes, a camera near any of those areas will show you a lot. During rut, saddles and funnels can route a buck right past your camera. They are out seeking does and using the terrain to find them, so there's little reason your cameras should not be there to capture their images.
Finally, when the season is over, move your cameras to whatever food sources are in the area. This way, you can see who made it through the season.
NEXT: 3 WAYS MOULTRIE MOBILE WILL CHANGE THE WAY YOU USE TRAIL CAMS